
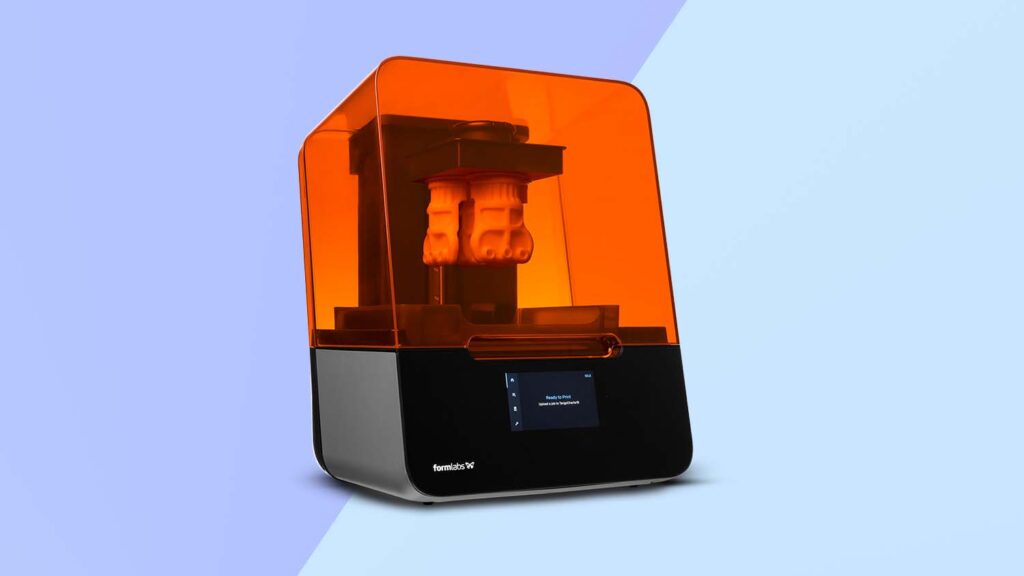
Formlabs continues to drive desktop SLA forwards, with the introduction of a new approach called Low Force Stereolithography in its new Form 3 machine. Al Dean reports on his findings

Back in 2012, Formlabs took the 3D printing world by storm with a crowdfunding campaign on Kickstarter that raised almost $3 million, making it the most highly funded project on that platform, at that time.
The start-up’s impressive reworking of stereolithography (SLA) brought this process to the desktop for the first time, making it more accessible, in terms of both device size and price.
The new Formlabs Form 3 drives desktop SLA forwards yet again, introducing a new approach that the company has trademarked as Low Force Stereolithography, or LFS.
To understand what this means, you need to understand what the Formlabs Form 3 replaces.
Basically, its predecessors – the Form 1/1+, and Form 2 machines – are inverted SLA machines, where the optics, lasers and so on are located below the build tank, rather than above it, as with more traditional SLA machines.
During a build, the build platform moves incrementally upwards as each layer is built below, in a tank of UV curable resin. For this arrangement to work, the base of the build tank is transparent and the light cures the resin held between the build platform and that transparent base, at the required layer thickness.
The issue here is that, once a layer is complete, you have a rigid build platform, liquid resin and a set of cured geometry, all within 0.2mm of a typically rigid glass or plastic window. To add the next layer height, the platform needs to move upwards, but this causes suction between the part on the build platform and the window below.
That force, although small, can impact build consistency, even snapping the part mid-build. It can also impact the resin tank’s integrity, as it repeats once every few seconds and potentially thousands of times per build. There are several ways to get around this issue.
The most common way is for the build tank to tilt away from the part, in order to break the suction. This is what the Form 1 did (the Form 2 adds a sliding action), in common with almost every other desktop SLA machine. But it’s also the reason why there are limits on what it’s possible to achieve with desktop, inverted SLA machines, in terms of geometry and size of parts and the speed of the systems themselves.
With the Form 3, the new LFS process looks to solve some of these challenges with two key pieces of technology. The first is a new optics arrangement; rather than a single fixed unit that emits light from a fixed position mirror, a new light processing unit slides back and forth beneath the build tank, delivering the UV light spot exactly where it’s needed.
This unit interacts with the second piece of technology – a new flexible, transparent window in the resin tank.
Essentially, the moving optics unit only applies pressure upwards to create the layer thickness when and where it is building, so the suction between the built material, the build platform and the resin are broken incrementally, rather than at the end of each layer.
So if Formlabs has overcome this problem, what are the benefits you might expect to see? For a start, you’ll be able to build parts with fewer supports needed to keep the part on the build platform – and that means better surface finish and less post-processing work. That’s huge news for those working with SLA, where a single build material means that time saved on the build itself is often offset by the time subsequently spent on post-processing tasks.
Conversely, if you’ve reduced the force, it also means when it comes to heavier, larger parts, you’re able to better support the part in the build process, perhaps using more supports, but supports that have less impact on surface finish.
Finally, if you’re moving the optics close to the point of build consistently, then you’re better managing the accuracy of each spot and hence the accuracy of the parts. The outer limits of the build chamber in particular, should be more consistent.
Formlabs Form 3 – Machine set-up
Set-up involves exactly what we’ve come to expect from Formlabs: well-packaged machines, clear instructions and a pretty trouble-free process. Once the machine is unpacked, set up with power, connected to your network and your build platform is in place, you’ll need to add in some key components.
The first is the build platform, which is dead simple. Then you’ll need to add the build tank and the stirring device that snaps into place. Once that’s done, you can add in the resin cartridge by slotting it into the back of the machine, making sure you keep the small cap that’s found over the dispensing valve, as this will come in handy later.
One point to note is that these parts all have their own ID chips in place, so if you get an error, remove and try again. This usually fixes things nicely.
Thanks to these chips, the machine ‘knows’ which tanks and resins you’ve inserted. So the first time that you combine a resin cartridge with a build tank, it links them in the software and records how much resin is dispensed and how much the resin tank is used. (We’ll get on to why that’s important in a little while.) Now that the machine is ready, you’ll need to prepare some parts for building.
 Enjoying this? Read our other Pro Desktop 3D Printer reviews here:
- Formlabs Form 3
- MakerBot Method X
- Raise3D E2
- 3D Systems FabPro 1000
- Ultimaker S5
- Stratasys F123 Series
- Rize Inc. Rize One
Formlabs Form 3 – Preform software
I want to discuss the software environment for Formlabs in more depth further on, but the initial step is to download and install PreForm, the company’s pre-processing software. Connect this to the machine you’ve just set up and you’re ready to get a part in and arrange it correctly.
Here, you have a wealth of tools available, from STL fixing to auto-orientation.
PreForm has always been impressive, and the latest version, in combination with this machine, is excellent. You’ll need to define the layer size you’re building with, as this can influence support generation.
While most 3D printers have fixed layer sizes that can be varied, Formlabs’ ecosystem means that the software knows the best range of settings for the resin you have loaded into the machine.
Depending on the resin, layers can vary from 0.05mm (which is pretty common) to 0.2mm if you’re using the new Draft resin. As ever, finer resolution means smoother surfaces, but longer build times.
Alongside these overall controls, Formlabs has also been introducing adaptive layer sizing to the material definitions in PreForm. This works by taking the geometry of your build and actively looking for areas where the machine can use larger layer thicknesses without impacting surface finish.
If you’re working with prismatic engineering parts, this can really save time.
For example, our block model benchmark part, built using 0.025mm layers, would take 27.5 hours to complete. Changing the settings to adaptive, by contrast, would reduce this to 11 hours, with comparable results in terms of surface finish.
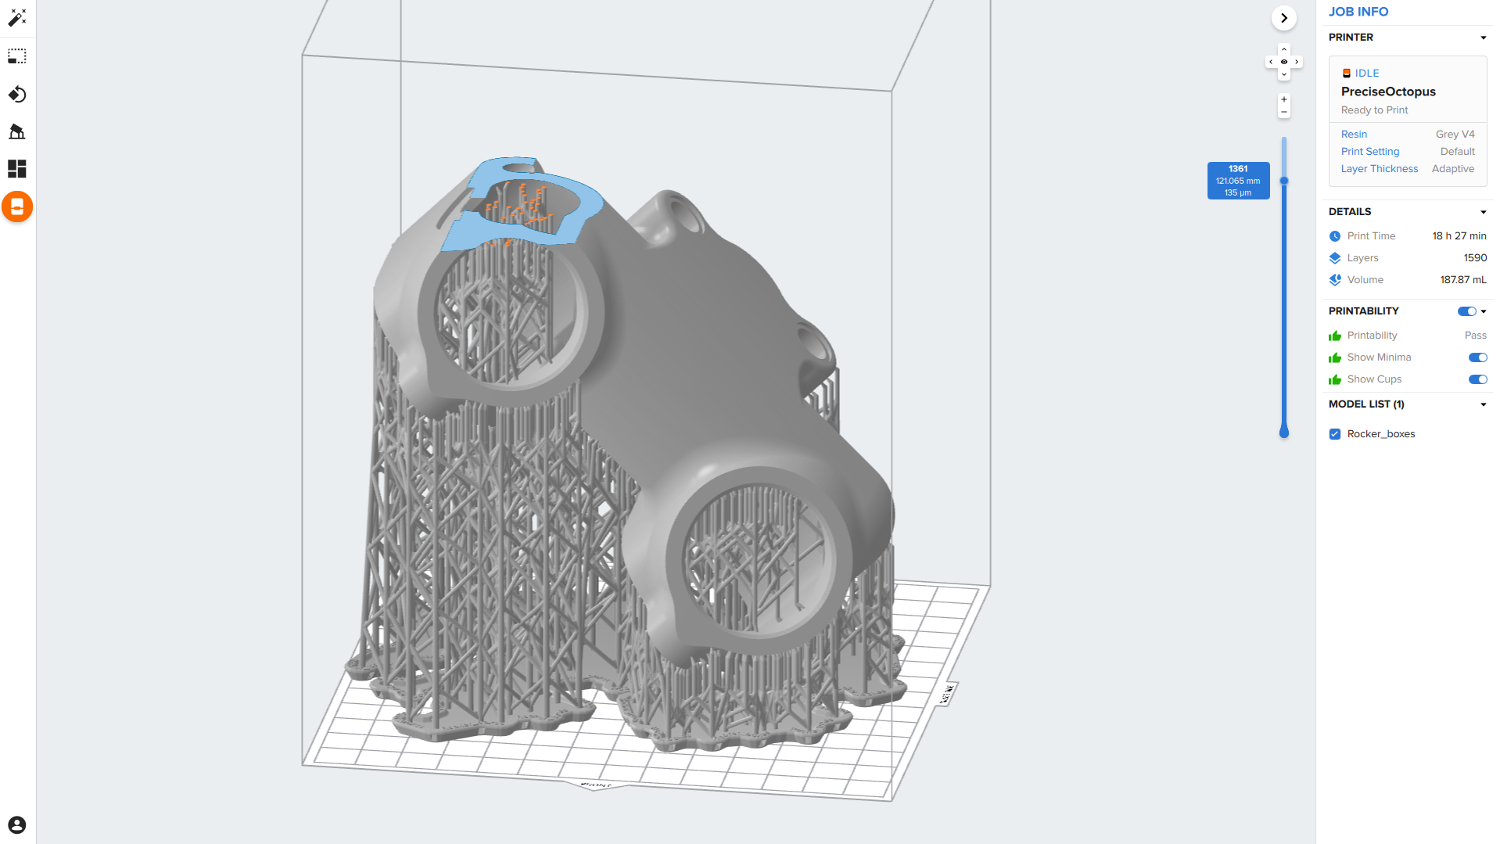
When it comes to support generation, PreForm does a decent job, particularly given the new approach made possible with the new build process.
The software gives you feedback about where you should add supports, allows you to remove them, indicates printability and identifies any areas that run the risk of suffering from ‘cupping’. (Cupping is what happens when specific geometry conditions during a build cause additional suction between the built part and the build tank.)
There are a ton of other options for things like labelling on the base of the part, optimising the position of parts and more. Time spent exploring PreForm’s options will pay real dividends in terms of results, and save you considerable time and materials.
Once you’ve got your build ready, you’ll need to send it to the machine. In most instances, this will mean transferring the build job over the network to the machine, loading it from the on-machine touchscreen and starting the build.
If your facility keeps 3D printer technologies away from the design office, then the new Prime option is worth exploring; this means that, when one job is finished, you can prepare the machine for the next job (by clearing the build platform and ensuring the material is loaded and ready to go).
You’ll then be able to save yourself a trip back to the machine, by enabling it to start automatically.
Software platform
While the machine is building, let’s now turn our attention to the software platform that comes with Formlabs machines these days.
The Formlabs Dashboard Platform is cloudbased and makes it possible to manage multiple Formlabs machines simultaneously, including their respective build jobs, resins and build tanks.
In the context of the Form 3, this is where you’re able to look into how your machines are being used, how much material you have remaining in each cartridge, the remaining lifespan of your build tanks and more.
If you’re also using Form 2 machines, you’re able to look into heat maps for each build tank, to find out where best to position your parts and when tanks need to be replaced.
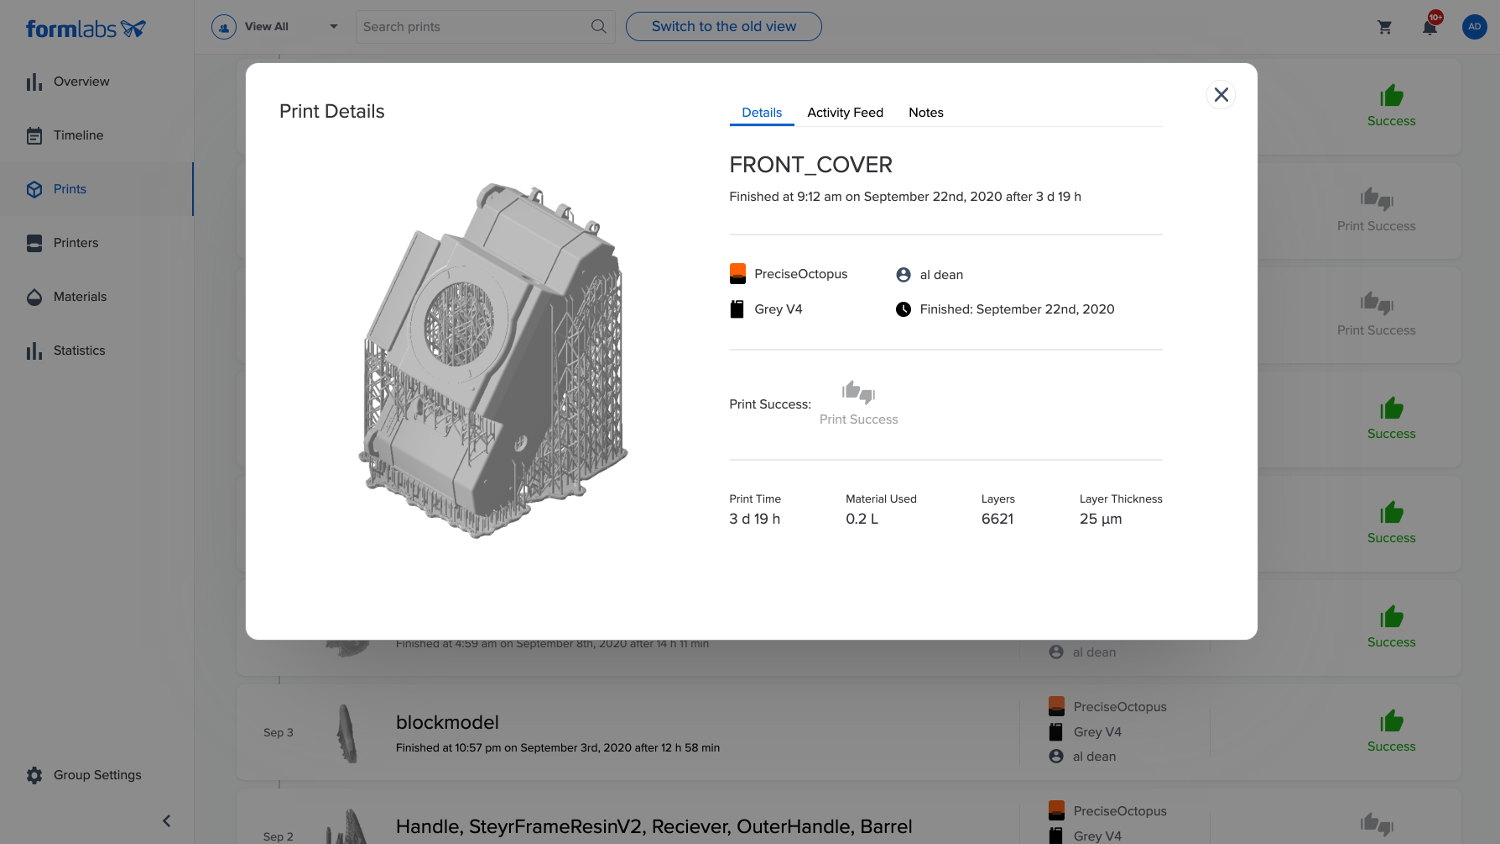
In terms of analytics, you’re also able to very quickly pull up a job history and export it as a spreadsheet – ideal for accounting and for auditing purposes.
Want to know how much prototypes for a particular project cost or how much your company spent on particular resins over a year? This information is readily available in a centralised location. You can inspect the data on a job-by-job basis, too, with quick thumbnail previews of each build. It’s worth noting, however, that actual geometry is not stored.
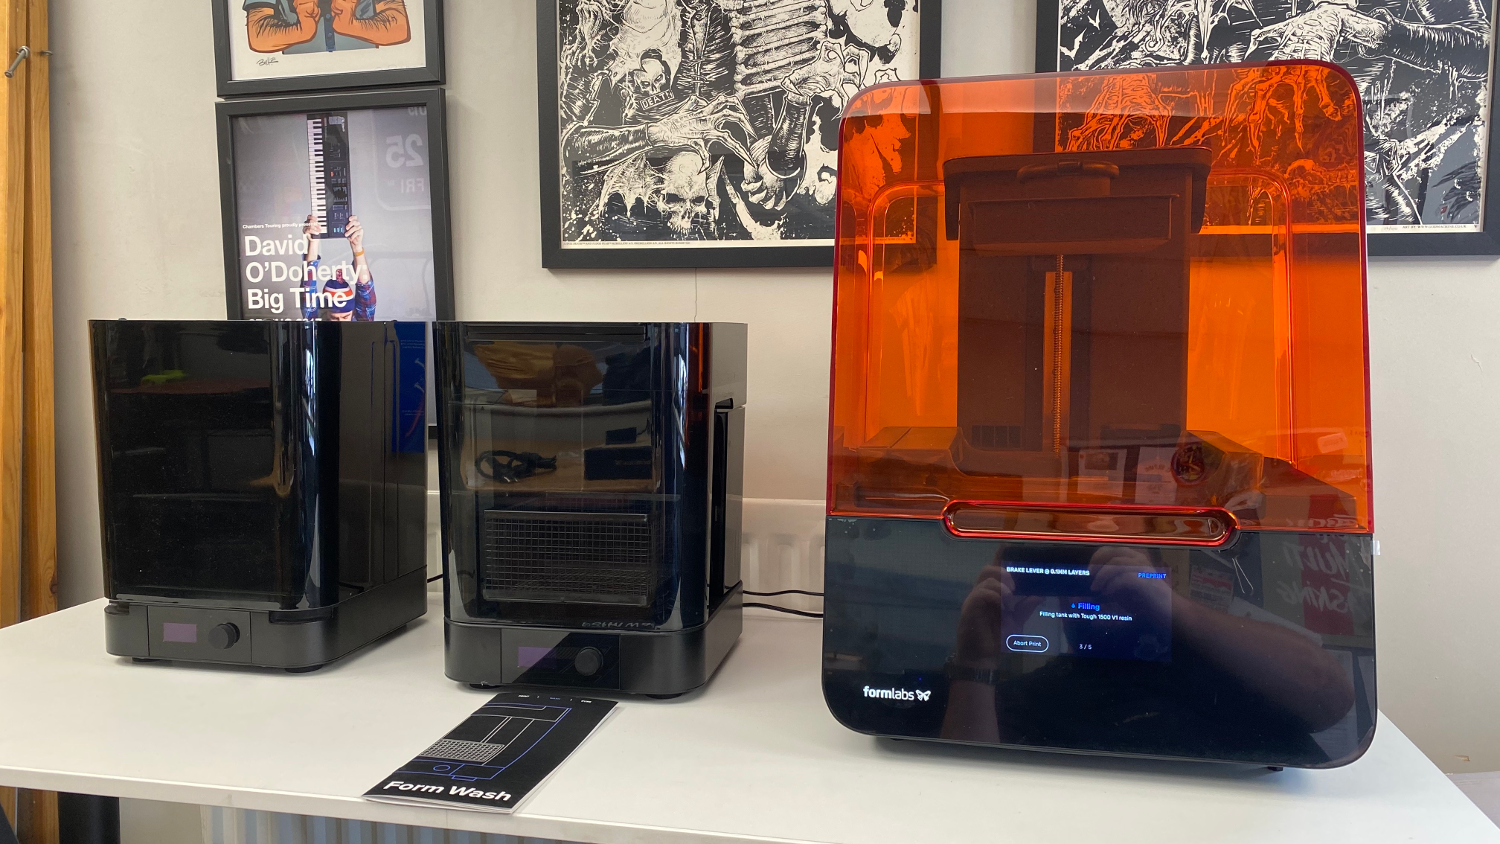
Form 3 – Post processing
This was the first time that I’ve had access to the Wash and Cure devices that accompany Formlabs’s machines. Whereas the standard offering is a set of post-processing tools that involve a lot of manual work, the Wash and Cure sets are designed to automate a lot of the work needed on your part once its build has completed.
The first step is to wash away any excess resin from the model. The Wash device is a part washer, into which you load either the complete build platform or just parts.
You set the time for a washing cycle and the machine takes the part into a bath of either isopropyl alcohol (IPA) or Tripropylene glycol monomethyl ether (TPM), which is not as effective, but has similar properties without the smell or flammability of IPA. It then spins it up to wash away any excess resin.
The amount of time needed to perform this task depends on both the resin being used (the Formlabs support site gives you a quick look-up table for recommendations) and the geometry of your part (more complex geometry typically needs more time to wash out, particularly parts with fine detail and/or more complex internal structures.)
Once that’s done, the part raises up again, drains back into the tank and you’re ready to dry it off before curing.
As we’ve discussed, the Form 3 uses UV-curable resins to build its parts, but the curing process is only sufficient to get you a part out of the machine. To achieve the best mechanical results, you’ll need to post-cure the parts, too.
This is where the Cure device comes in. The curing of Formlabs resins involves two factors: heating the part and further exposure to UV light. Again, a look-up table gives you rough estimates.
These are programmed into the device, the part is added, the door closed and the machine started. The Cure device will then heat up and light up your part, rotating it on the internal turntable and giving a chirpy little beep when it is done.
In conclusion
The Form 3 is an excellent evolution of what Formlabs has been delivering all along; that is to say, desktop SLA units that take the heavy lifting away from the user and let them carry on with the real work of design and engineering, rather than fannying around with 3D printer settings.
The desktop SLA market is one that’s very much saturated at the low end and while I’m sure you can get decent results out of some of these machines, I know from experience that this often means a lot of tinkering and maintenance. The big question, then, is whether this is a valuable use of your time.
Formlabs has built a solid ecosystem around its machines, one that brings together world-class hardware, an excellent software backbone for using and managing printers, and a growing range of materials. These include volume use engineering resins for a range of applications and use cases and more speciality resins for specific tasks: casting, dental, biocompatible and so on.
In use, the combination of the Form 3 alongside the Wash and Cure set is excellent and gets you a workable part in the shortest time possible.
It also takes a lot of the guesswork out of the process. If your organisation is looking at high cycles of parts, then I would suggest investing in an additional build platform as a minimum.
In terms of consumables, things get interesting with the new build tanks. Here, there isn’t as much degradation as you’d expect to see with each build on a Form 1 or a Form 2 machine, due to the different build process.
At the same time, with that flexible base, you really don’t want to run this up to the wire in terms of usability. Fortunately, the software monitors each tank and provides you with a health mark. My firm advice here would be not to ignore or dismiss what that health mark tells you.
In terms of materials, we worked with the Flexible, Tough 1500 and Grey Pro resins. The Grey Pro resin is incredible in terms of the quality of surface finish and the lightness of touch between the supports needed and your part. It excels at both and lightweight supports mean that even the B-sides of your part don’t need too much finishing.
The Tough Resin is an evolution of Formlabs’ original tough resin and the company offers a variety of these now for more demanding applications. Resulting parts are robust, but do seem to require a heavy support structure.
The Flexible resin arguably involved the steepest learning curve. If your parts are not too complex, it’ll be fine – but once you venture into the realms of parts that require internal support structures, things can get a little more hit-or-miss.
One thing we did struggle with was testing this in the height of British summer. Our workshops are not air-conditioned, and if you’re working with these devices in temperatures of 35C to 40C, you may find you’re exceeding the operating temperature of the resin. We experienced a few print failures until we figured out what was going on.
That said, other than those three days of sweltering heatwave, the machine performed robustly and consistently. The combination of the Wash and Cure units make the process even more efficient and everything we built was impressive from beginning to end.
If you’re looking for a desktop SLA machine for in-house prototyping, or indeed end-use part manufacture, then the Form 3 has to be at the top of your list.
Yes, there are more cost-effective options out there, on paper at least, but the robustness of these machines, the ecosystem in which they operate, the materials available and the development work done to make using them more efficient means that your additional investment gets paid back in no time at all. We can’t wait to see what Formlabs comes up with next.
Form 3 – Tech-specs
» Formlabs Form 3
» UV curable resins
» 145 x 145 x 185 mm build volume
» 405 x 375 x 530 mm machine dimensions
» 17.5 kg weight
» 0.025 to 0.2 mm layers with 0.085 mm spot size
» WiFi, LAN, USB port
» Assisted levelling, sensing for resin cartridges & build tanks » Remotely manageable build queue
» 1-year return to base warranty
» Optional Wash & Cure devices @ £1,070
» Price £3,349
» formlabs.com


