Prototyping is a curious process. It’s part experimentation, part black art and part luck. Al Dean has been pondering the tools we have available to us today and discovers that the pursuit of perfection isn’t the be all and end all
I’ve been lucky enough to be able to spend time with a whole range of different prototyping methods over the last few months, as you’ll have seen from the last few issues (and there’s more to come).
I’ve been in the workshop with not only a range of 3D printers, but also a small scale CNC machine from Roland. That’s meant a lot of experimentation and small scale projects to enable me to realistically complete them during the loan period.

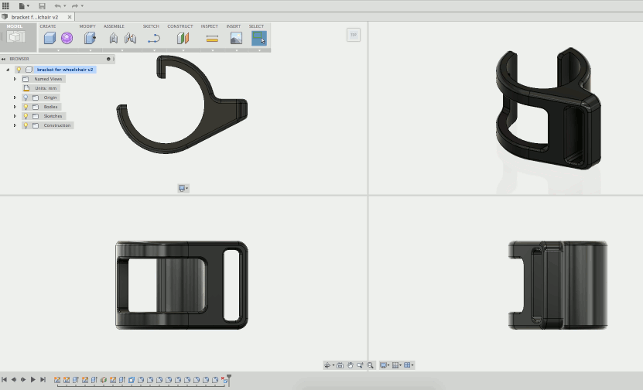
Part quickly knocked up in Fusion and exported as an STL
One such project is a mounting bracket for my daughter’s wheelchair in the back of the car. Anyone that’s cared for someone in a wheelchair (or indeed, has one themselves) will know that these things are massive and tend to take up a lot of space — and when running a smaller vehicle, you’re pretty much left with no usable space.
Handily, the current car has a set of luggage mounting bars that run down the sides of the luggage space. They’ve also got some nifty little clips for hanging items on.
One quick look at these and it’s evident that they’re ripe for a quick redesign to make something a little more suitable to hold the wheelchair out of the way and free up some of that boot space.
After pulling the existing clips out, a quick inspection showed that this was indeed the case, so I set about modelling something up.
Of course, unless you’re ultra precise with measurements, you’re never going to get an exact match for the production part, but it seemed close enough. So, the next step was knocking up a quick prototype.
As anyone that’s dealt with 3D printers will know, the words “prototype” and “quick” aren’t particularly well matched. Handily, I’ve just taken delivery of one of the early units from Autodesk’s Ember Explorer program.
This is essentially a beta test unit for those who got in early and will help Autodesk work through some issues and build up the Spark platform to assist with all the prep work involved in 3D printing.
At the moment, the workflow is a little fractured, but it works and works well once you’ve learned the ins and outs of the machine and the resin you’re running (pro tip: always check the operating temperature range if your office or workshop is a little on the chilly side).
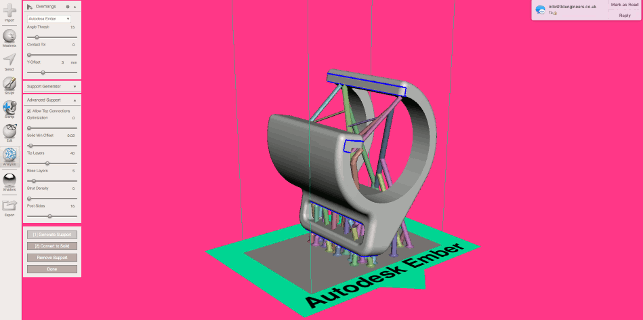
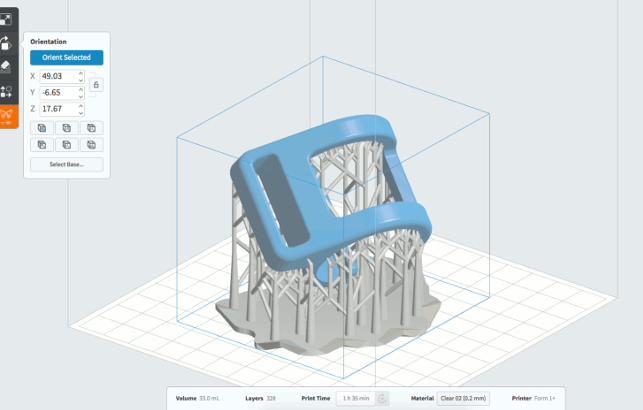
Using Meshmixer to generate the supports (see image below), I found that I was running things rather tight to the build envelope of the machine — but on I soldiered.

Pushing the limits of the Ember’s build tray
The machine was calibrated and set running. It’s here that I came up against the problem with working in a workshop in the British winter time. Light curable resins operate best at temperatures somewhere in the region on 18 degrees and above.
Of course, when trying to get a job done and the heater is taking its time, the temperature is often way below that.
What happens is the viscosity of the resin increases and this, in combination with localised heat build up in the parts (where they’re cured), results in failed parts.
All of this is well known. Except I forgot and cracked on anyway.
Failed builds are par for the course with any 3D printer, but it’s easy to forget even the most basic of these things when you’re in the middle of a project.
The end result was a half complete component. Luckily, the machine works quickly, but still it was an annoying occurrence, particularly when you know it’s a simple mistake that could have easily been avoided.
All is not lost
But what I noticed with these half built parts is that they gave me just enough to try out the geometry I’d put together, in terms of fit around those luggage racks as well as holding the webbing straps that would hold the wheelchair in place.
That struck me as an interesting thing and something that I’d experienced, but not really formalised before. Prototypes are meant to be rough and ready, particularly during those early stages of the design process, where you’re trying ideas and checking fit and function.

FormLabs now supports 200 micron lasers, reducing the build times for most parts, giving you a quicker cycle time
The 3D print industry’s obsession with resolution is all well and good, but perhaps we should be focussing on getting a model out of these machines more quickly, rather than slowly at a ridiculous resolution.
It would also seem some of the vendors agree. FormLabs recently announced an update to the software for its Form 1+ machine and a new variant of its resin that now allows it to print at 200 microns. As with all layer based processes, layer thickness is one of the key drivers to speed.
Autodesk is also working on a resin for its Ember printer that will allow similar build parameters and speed.
This is all incredibly exciting but sometimes I wonder if what we really need is the digital equivalent of a block of blue foam and ten minutes on a bandsaw, rather than something that will give us ultra fine detail.
With the tools available, the pursuit of perfection isn’t everything
Default


