Sigma D25 – IDEX 3D printers are becoming increasingly common, so how can you differentiate between them? Al Dean takes BCN3D’s entry-level offering for a spin, courtesy of 3DGBIRE, and finds a versatile machine that offers plenty to get excited about
BCN3D may not be a particularly well-known name, but the Barcelona-based company has focused on filament-based 3D printers since it was founded in 2011.
While its early products were based on RepRap, the company has more recently fixed its attention instead on IDEX based filament printers.
For those not familiar with the term, IDEX stands for ‘independent dual extrusion’. Whereas most filament-based dual extruder machines have two hot ends built into a singular unit, IDEX machines instead separate the two extruders along the X axis.
So while the movements of the two extruders match on the Y axis, it’s possible for the extruders to move independently on X. This opens up some interesting possibilities, especially around the use of two materials.
First, but not uniquely, you can either print with two build materials, or instead, a build material and a support material. The machine will swap between the two, pretty much as a single-extruder carriage machine does.
Where things get interesting is in driving the two extruders simultaneously. Whether in duplication mode or mirror mode, this effectively splits the build platform into two.
One side matches the other – either as a straight copy (so the two extruders move in the same direction in X and Y), or mirrored across a central plane (creating a mirrored copy of parts).
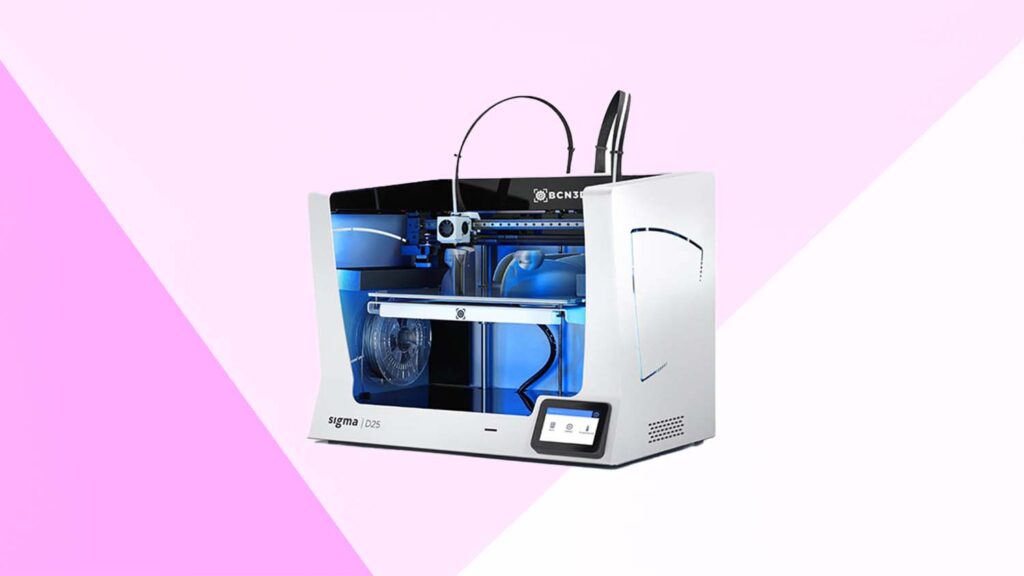
The subject of this review is BCN3D’s entry-level desktop machine – the Sigma D25. While it’s fair to say that many of the company’s products are larger and more capable, this model is representative of what the company is up to across its full product range.
So, let’s get the basics out of the way first; then we’ll move to look at how the machine performs; and finally, we’ll give you our impressions of working with it.
Sigma D25 – Install & set-up
The Sigma D25 is a desktop-class machine. To my mind, that means that it can fit on a workbench and can be lifted by one person, or two at the most.
With these criteria in mind, the Sigma D25 qualifies as a desktop machine – but only just. Put it this way: you’re not going to get much else on that workbench once it’s in place. It’s a big chunk of machine.
Once you’ve got it out of the box, you’ll need to work through the set-up and calibration process. There’s not much to setting it up. It’s simply a case of adding in Bowden tubes to help move filament from the two internal spool holders and feed mechanism to the two extruders.
With the glass build plate snapped into position, you’ll see that this machine has a decently sized build chamber, measuring in at 420 x 300mm platform with 200mm in the vertical Z axis.
Connectivity is via Ethernet at the rear of the unit; or via WiFi, with the addition of a USB WiFi dongle or use of the SD-Card slot on the front.
Boot up the machine, install your software (BCN uses a flavoured and branded version of Cura), and then load in your filament. You’ll find that unlike most FDM machines, the spools of material are stored within the unit and fed into the base.
During the load process, the machine grabs the filament and feeds it through to the extruders.
Once materials are loaded, calibration needs to be carried out using a wizard on the frontmounted, touch-enabled LCD screen, along with a combination of automatic measurements (using sensors on each extruder carriage) and manual adjustment of wheels on the build platform.
This process is pretty slick, as long as you follow the instructions closely. If you get something wrong, there are no options to step backwards in the process or cancel your current task. So you’ll need to switch the machine off and start all over again – something that really needs addressing. That said, once done, you’re ready to start building your first parts.
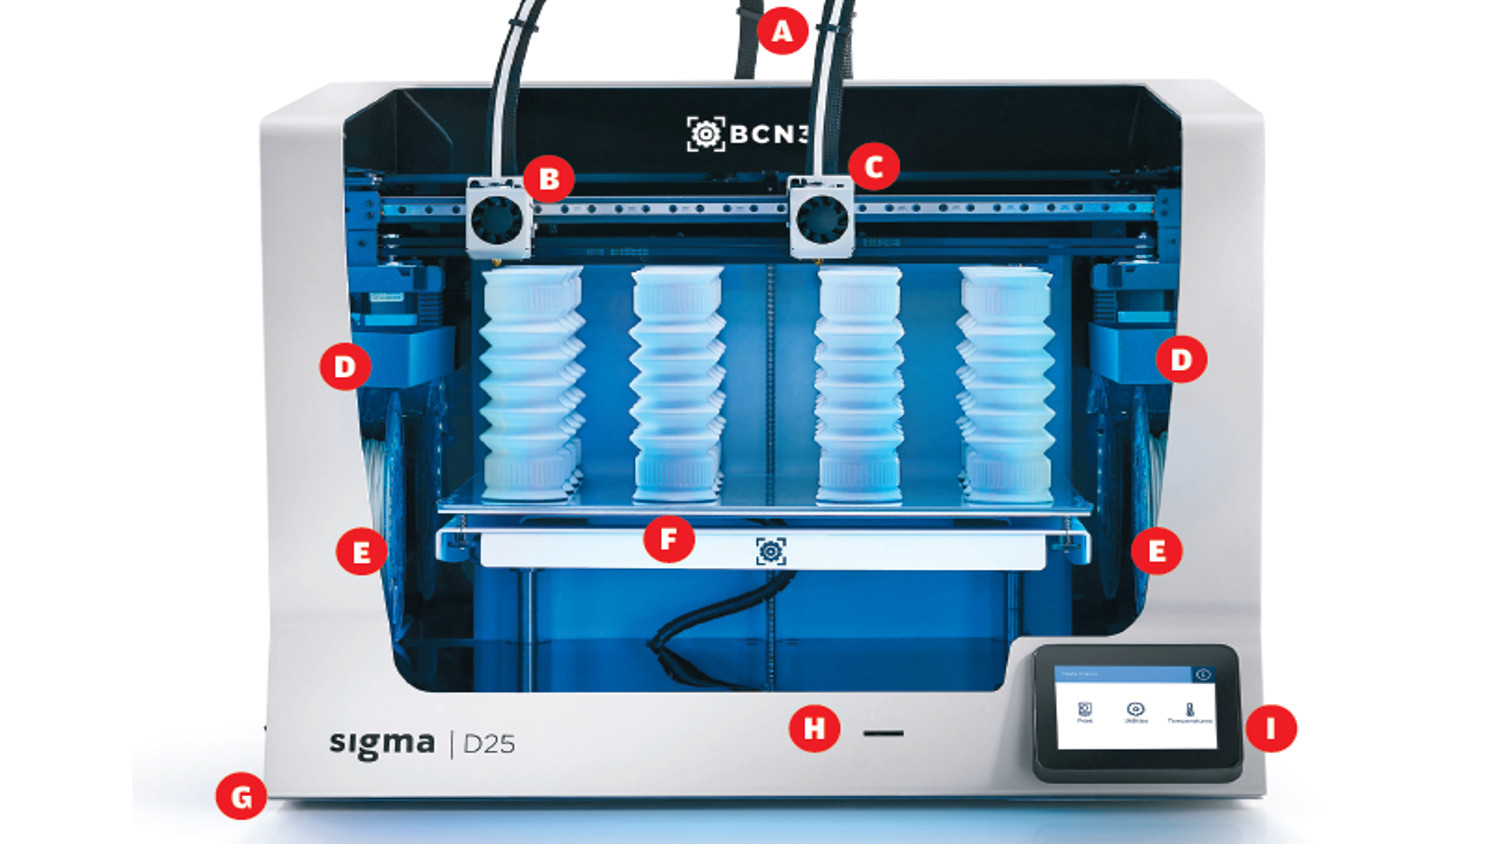
●A Bowden tubes feed filament from internal spool holders to extruders, travelling just over 1 metre in the process
●B Left extruder: your primary extruder, whether you’re running a single material or two materials
●C Right extruder: your secondary extruder, if you’re running two materials, or a build and a support material (such as PVA or BVOH). When you’re running in duplication or mirror mode, this copies the left extruder, move for move
●D Waste buckets and nozzle cleaner, which area handy for tackling those in-between layer-cleaning operations. Buckets catch the waste. Be careful not to let it build up
●E Spools are stored within the device, one each side. That might mean adaptations are needed for off-size, nonstandard spools
●F The Sigma D25’s generous build chamber is made possible with the large glass-heated build plate.
●G Power switch
●H SD-Card loading slot
●I Touchscreen interface for maintaining the machine and managing build jobs
Sigma D25 – In use
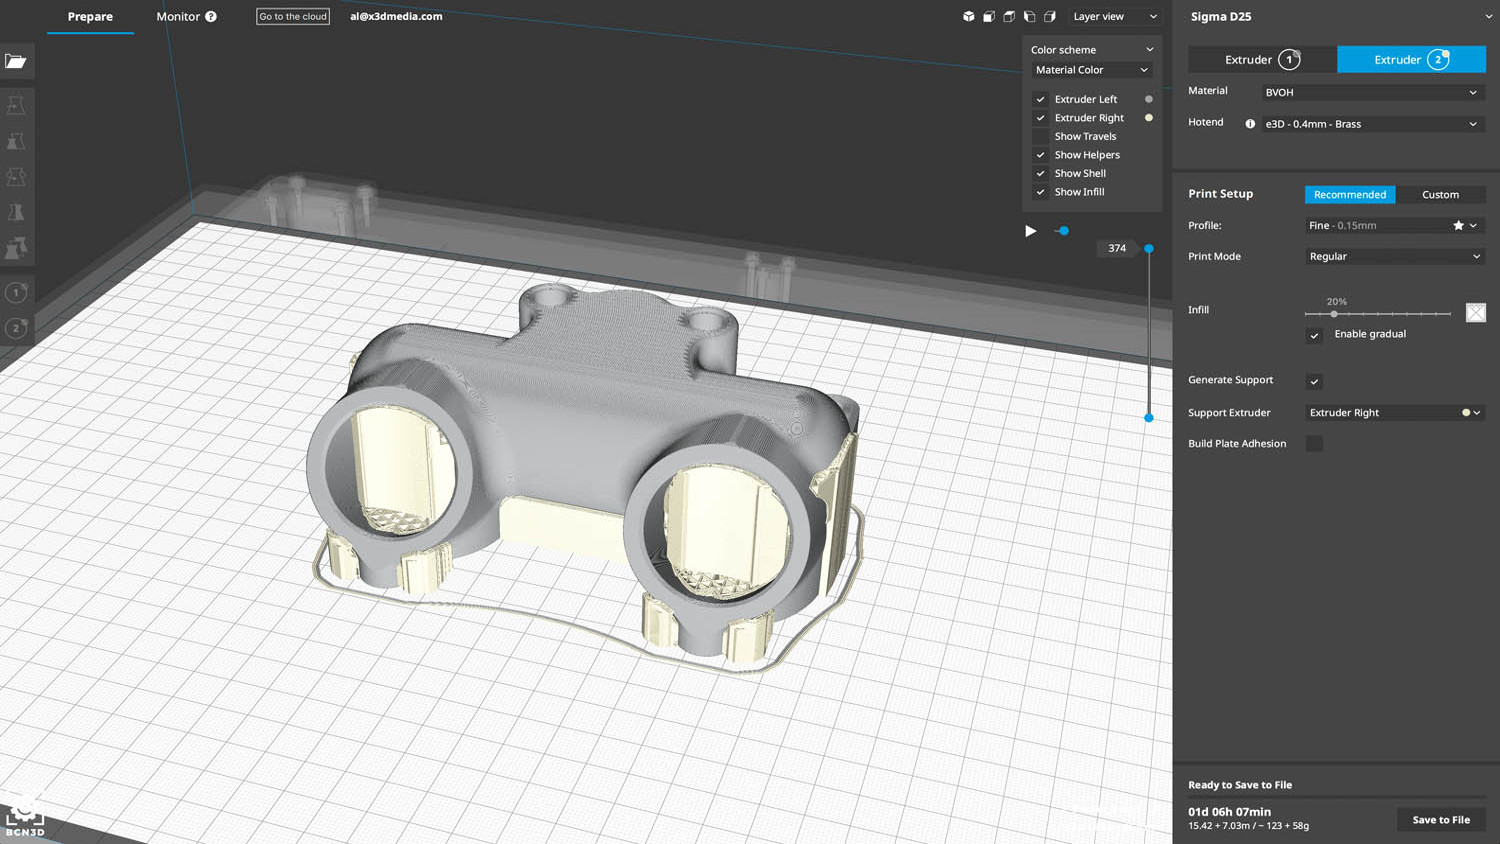
If you’ve ever used Cura as a pre-processor/slicer, then you’re going to be in very familiar territory with BCN3D’s preferred software.
If you’re not, then you’re going to follow the familiar process of loading an STL file, positioning it on the virtual build platform, and creating your toolpaths to build the part.
Here, it’s essential that your settings match those on the machine. Connecting directly to the machine transfers settings across, but if you’re doing job prep offline, you might need to doublecheck you have materials set properly.
If you’re running with a build and support material combo, the process is pretty simple: just remember to switch the Support Material extruder to your right extruder (it’s set as left by default). If you’re working with more complex material builds, then care needs to be taken to ensure materials are correctly assigned. Perhaps you’re running two materials as build in different portions of the job, to replicate over moulding, for example.
All of this is pretty standard fare for the dualextruder machine – but the independent nature of the Sigma D25 means you can also experiment with both duplication and mirror mode.
These, as we’ve discussed, allow you to run the two extruders at the same time – to either replicate parts or to build mirrored versions of parts.
Set-up for this is pretty straightforward. It’s a software toggle and the build platform on screen splits, allowing you to set up in one half and have it replicated in the other, as needed.
If you’re going to run like this (perhaps for a prototype batch run, for example, or for producing jigs), BCN3D suggests that the extruders are fitted with some shims (supplied with the machine) as required, so that results are more consistent.
The reason is that there’s an offset between the two nozzles that is automatically accounted for in normal printing modes. When you’re working in duplication or mirror mode, the nozzles need to operate at the same height. The workarounds are using a raft on the right-hand set of parts (useful for quick one-off use of these modes), or installing these shims to make the offset more robust, if you intend to use it in this configuration for a good while.
Sigma D25 – Results
I had a few teething problems getting the machine connected up to a workstation, attempting to do so with both a traditional cable and my WiFi connection. But once these issues had been ironed out, the machine proved itself very capable.
The build space is large in X and Y, and while the Z height is 200mm, it still gives you plenty of room to orient large components. In fact, our largest regular test part (a triple tree clamp) could have been built four times in a single shot with the Sigma D25. And when you factor in the dual extruder duplication, you could cut production time per part by another half. If you’re building larger components or handed sets, then this type of machine, particularly when combined with a generous build tray, makes massive sense.
Materials-wise, the Sigma D25 does not support the wealth of standard materials that larger machines, such as the W27 and W50, in the BCN3D portfolio do. Presumably, that’s down to the open frame and the hot end in use.
It’s perfect for the likes of PLA and TPU, but not for more aggressive filaments such as ABS, Nylon, Carbon-filled and so on. Those that it does support, however, work a treat and the BCN own-brand filaments perform very well indeed.
This was also my first time working with BVOH as a support material and I have to say it impressed hugely. The surface finish on that B surface, where support and build interact, was superior to a PVA support and pretty much matched the A surfaces.
If I had any reservations about the machine, it would be the open nature of it (also another reason the Sigma D25 is focused on PLA and the like – less warp and susceptibility to draughts and temperature variation).
In an office, this might be seen as a hazard. There’s also a pair of collection trays beneath each extruder and above the spool holders. If you’re running a single material, these aren’t an issue. If you’re running two materials, then the extruder needs to purge between each switchover, which on larger builds, can see a very quick build-up of filament strands. I’d be very careful about leaving a large build running over a weekend, unless you have some active monitoring in place.
Those concerns aside, the Sigma D25 hugely impressed: Easy to set-up and maintain, parts exactly as you’d expect from a desktop filament-based machine, and a platform large enough for some really interesting builds. Recommended for anyone’s shortlist.
Tech specs
» BCN3D Sigma D25
» 2.85mm filament
» 420x300x200 mm build volume
» 690x530x550mm machine dimensions
» 30 kg weight
» 0.05mm layers (Customisable)
» Independent extruders with silicon pad heated glass build plate
» Wi-Fi, LAN, USB port – no camera
» Open frame with internal and external (for large spools) material feed and management
» Levelling & filament sensing
» Bondtech Extruder with e3D brass hotend
» 1 year return to base warranty
» Price £3,285.00
BCN3D brand filaments: Options for the Sigma D25
Build materials:
PLA
Notes: PLA (Polylactic Acid) is a perennial favourite among regular users of 3D printers, for three main reasons: it’s a fairly robust material; it doesn’t tend to suffer too much from warp; and it’s known for building quickly and cleanly.
Price £32.99 per 750g spool
Tough PLA
Notes: Tough PLA is PLA remixed to provide it with similar properties to 3D-printed ABS; in other words, high impact resistance and strength, but with the same ease-of-use characteristics. If you’re building large parts, this is a solid bet.
Price £37.99 per 750g spool
PETG
Notes: We all know what PET is used for – flexible parts, ranging from structural packaging, automotive components or consumer products. PETG (the G meaning added gycol) in filament form lets you get close to replicating the material in prototypes.
Price £37.99 per 750g spool
TPU
Notes: Elastomeric parts aren’t the easiest to build, but TPU works well, particularly if you vary infill settings to achieve mimics for different shore hardnesses. TPU works well as a build or with PLA for simulating over moulded parts.
Price £56.99 per 750g spool
Support materials:
BVOH
Notes: BVOH (that’s Butenediol vinyl alcohol copolymer to you and me) is an excellent alternative to PVA. Highly soluble in water and offers crisp interaction layers within your model. It’s also interesting as a means of producing sacrificial patterns for moulding.
Price £60.99 per 500g
PVA
Notes: PVA (Poly vinyl alcohol) is one of the most commonly used soluble support materials out there. It’s readily available, but it does suffer a little with surface finish on contact surfaces and takes a fair old while to dissolve. Works best with PLA, TPU and PETG.
Price £56.99 per 500g
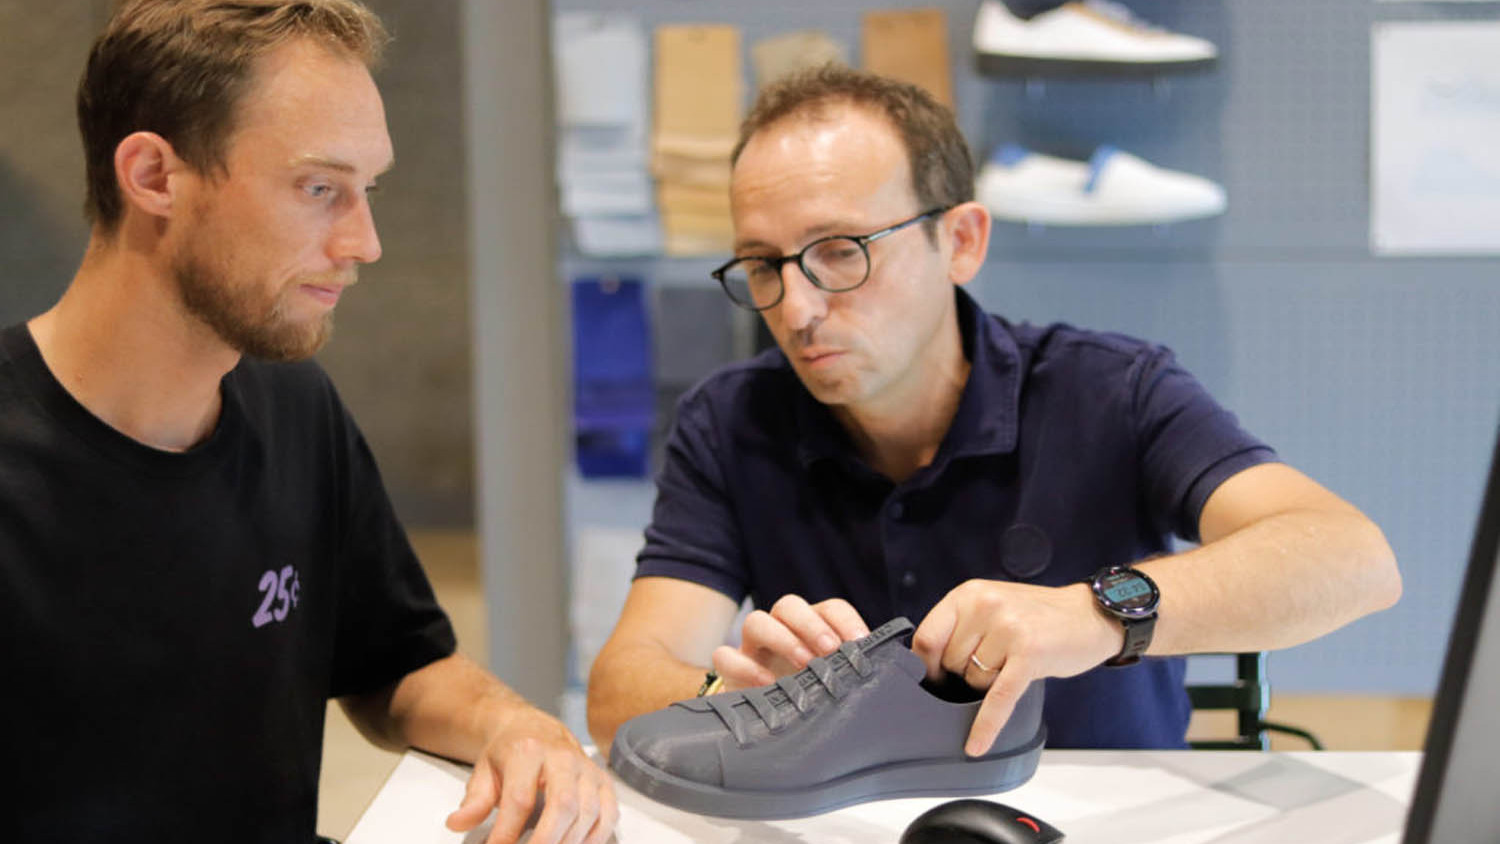
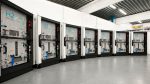
3D printing at Camper: IDEX machines prove their worth
Click here to read how footwear brand Camper use several BCN3D Sigma and Sigmax 3D printers to streamline its product development process.