

When Geomagic purchased Sensable back in April 2012, many in the traditional CAD/CAM world were puzzled.
Where was the synergy? How would the companies’ 3D design products, Geomagic Studio and Sensable Freeform, work together?
I’ve been in a privileged position to understand what the merging of Geomagic Studio and Geomagic Freeform means. Before joining Geomagic, I spent years at a major consumer product manufacturing company using these two tools to drastically reduce product development times and ensure manufacturability in the early stages of design.
Bridging the physical/digital divide
Much of the confusion about how these products can work together stems from the fact that many people don’t understand the individual tools.
Geomagic Studio is often considered a CAD-like tool that processes point data from 3D scans. But, it’s much more than that. Sure, it streamlines the path from 3D scanning to CAD. But its ability to generate watertight surfaces quickly and accurately is way beyond CAD; it takes a huge chunk of time out of what once was the most laborious, time-consuming aspect of reverse engineering and 3D model building.
Geomagic Freeform is almost always thought of as the sculpting software for the Sensable Phantom haptic device. I have a much broader definition, thinking of it as an agnostic topological engine: It accepts many types of models — meshes, point clouds, NURBS, voxels and polygons — and allows you to intuitively build a volumetric model that brings manufacturability upfront in the design process.
Combining these two tools eliminates much of the disconnect between design — the creative aesthetics of the product — and design engineering — what is required to bring a design into manufacturing reality. Add haptics — the ability to feel the product you are sculpting — to the equation, and you’re closer than ever to bridging the physical/digital divide within the product development process.
Geomagic Studio and Geomagic Freeform in action
I’ve created an example workflow that shows how Geomagic Studio and Geomagic Freeform can be used to design a product from the beginning with built-in manufacturability.
The kind of things I’m doing here with relative ease would send conventional CAD into fits. In this case scenario, a customer has asked me to design a new bottle for a high-end perfume line.
The customer wants an antique, old-world feel to the design. But the final model has to be completely ready for manufacturing using the client’s mould-making process.
A few days, rather than weeks
This entire project took me between two to three normal working days, including the original conceptual design.
The time-consuming parts were design and aesthetic decisions, not modelling or remodelling, which were done in a matter of minutes.
The same perfume bottle would take a week to sculpt in wax, removing blemishes, inflections and establishing a clean parting line. Developing the parting surfaces needed to create moulds or patterns would further increase the schedule significantly, perhaps by another week or more.
Any changes to the initial design or correcting problems (warping, sink marks, surface blemishes, voids), would further wreak havoc with the schedule and design integrity.
Marriage made in flexibility
The digital pipeline I’ve shown here is truly WYSIWYG from beginning to end.
With relative ease, I can replace any element at any point in the workflow or use CAD models or other design assets to create new blends of shapes and materials or to modify manufacturing parameters.
This unprecedented flexibility enables designers and engineers to adjust for bottlenecks in machinery, manpower and material resources.
The process outlined here is a nice marriage of digital and conventional, not a replacement for either. It represents a marked improvement in speed and flexibility compared to the typical design/engineering/manufacturing workflow.
It might not make conceptual designers and design engineers walk hand in hand or go out after work together for drinks, but it could be a big step in achieving a vastly more productive common ground.
1
In the first step, I quickly design a base model using a combination of subdivision and standard solid CAD modelling techniques:
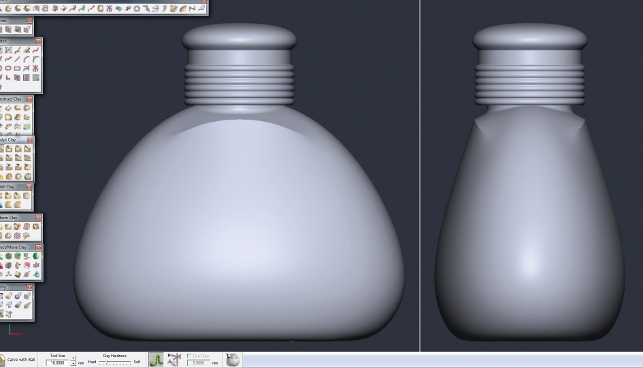
2
I use subdivision modelling for the main body, which is ideal for this type of form. Trying to model this with either standard solid or surfacing techniques would be very difficult and time-consuming.
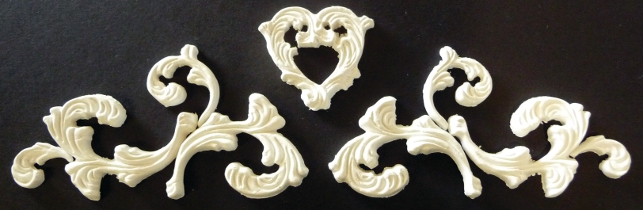
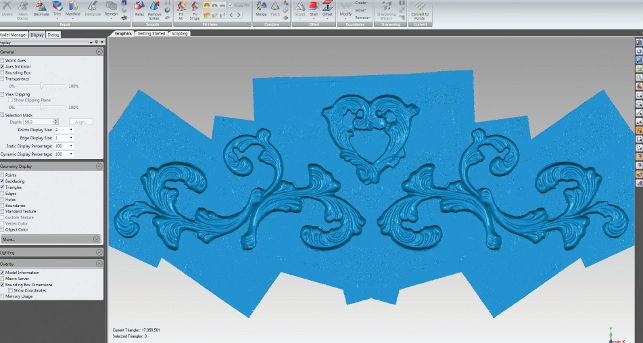
Next, I find an example of physical scroll work with a heart in the centre that meets the customer’s design aesthetic.
3
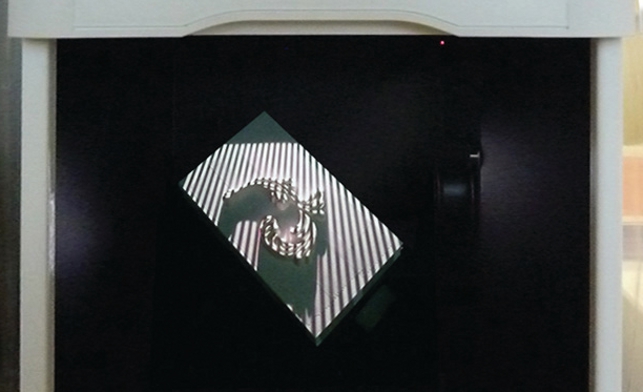
The challenge now is to accurately convert this physical model into a digital model, making sure it fits the form of the perfume bottle. And, of course, I need to make sure the complex digital model can be manufactured.
To bring the physical scroll work and heart into the digital world, I scan the pieces using a Rexcan DS2 scanner from Solutionix.
4
I then clean up the scans in Geomagic Studio, removing noise and outlier data.
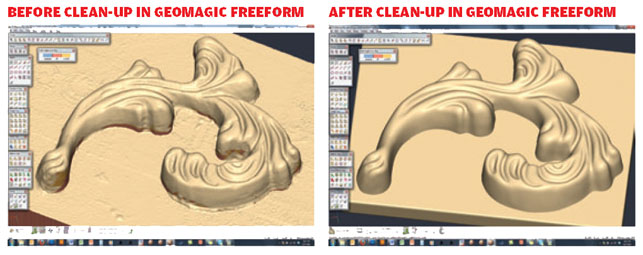
5
From there it goes back to Geomagic Freeform, where I clean up the model, further define features, and smooth, sharpen and refine in various ways.
While I do this, I’m also controlling draft to remove undercuts and other potential manufacturing issues.
6
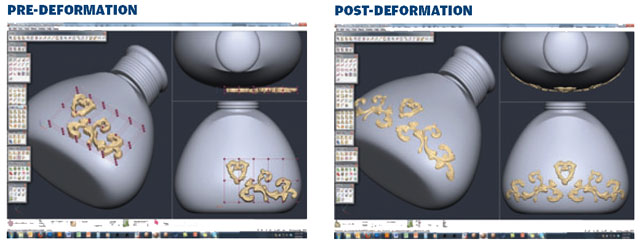
Next I integrate the scanned scroll work and heart into the base body. This is where we really see the power of voxel modelling in Geomagic Freeform.
I bring in the existing shapes and use the deformation tools to bend down the scanned forms into the base body. Because I’m using voxels as opposed to NURBS surfaces, for example, I can easily deform the scroll work and heart without worrying about tearing surfaces or whether the surfaces have enough flexibility to do the bend operation.
Real-time draft analysis tools in Geomagic Freeform allow me to see where any moulding problems are being introduced by the deformation process. I can then use automatic draft fixing tools to easily correct these areas.
Both the deformation steps and the previous cleaning up of the initial scan benefit from the use of touch. The voxels within Freeform give me volume and I can assign material properties for density and firmness.
I can feel the smoothness or roughness of the object. I can sense the shape and form. All the while I am sculpting there are mathematics working in the background, ensuring that what I model can be manufactured.
This is all happening in real time, with none of the tedium and emotional wreckage of seeing design intent compromised by repeated iterations between design and design engineering. Manufacturability is built into the design.
7
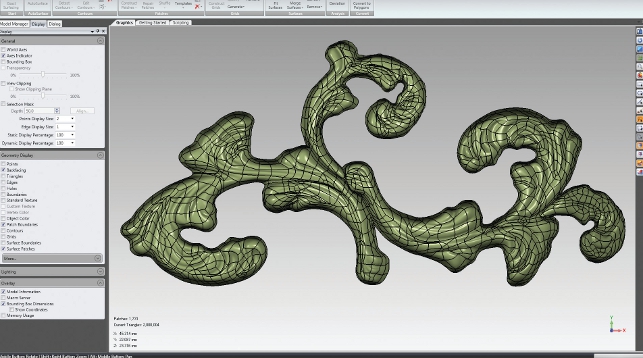
At this stage the design work is complete but we’re not yet ready to pass the design along to manufacturing because the digital model comprises a hybrid of BREP NURBS and voxels.
This is where Geomagic Studio’s surfacing capabilities come into play. Recreating these complex shapes in a CAD system would typically require a highly skilled operator to perform complex surfacing, generating the surfaces one by one and blending them together.
Inevitably, some detail would be lost. But Geomagic Studio’s ability to automate highly detailed surfacing eliminates a lot of tedious manual work and preserves design integrity.
8
The next step is working on the exterior of the perfume bottle, where I’ll bring the surfaces for the scroll work, heart and body into the CAD system (in this case Pro/E Wildfire) and stitch all the components into a solid model.
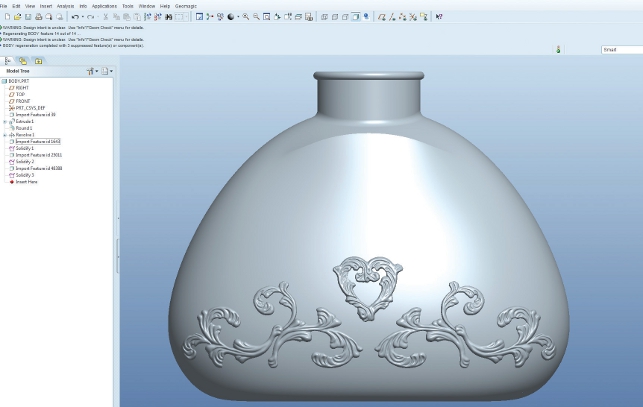
9
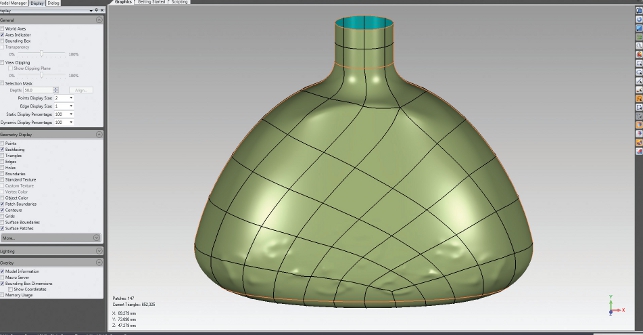
The final step is creating the internal shell. These surfaces are now so complex that most CAD systems could not generate them accurately, but voxel modelling in Geomagic Freeform lets me easily create the shell volume:
10
I then translate the shell volume into NURBS surfaces using Geomagic Studio:
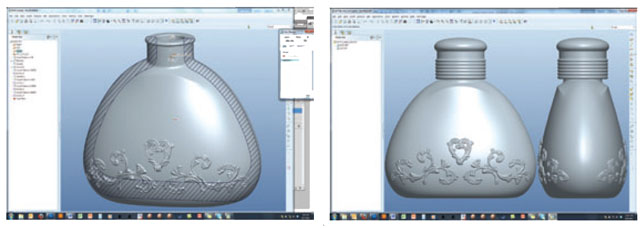
11
Finally, I use the internal shell surface as a cut surface in the solid CAD model to create the final digital model, fully drafted and ready to be sent to manufacturing:
12
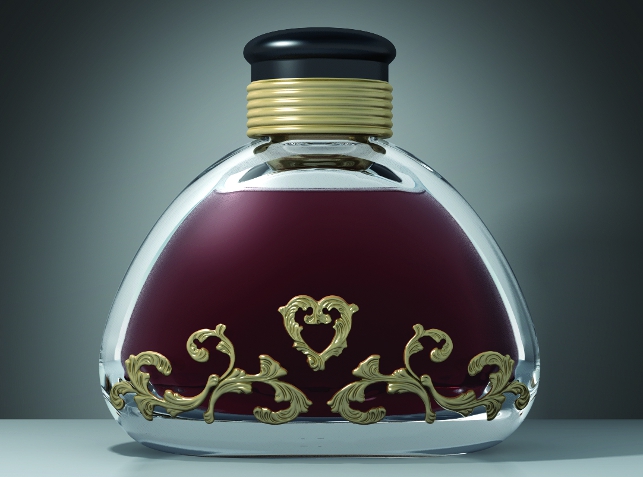
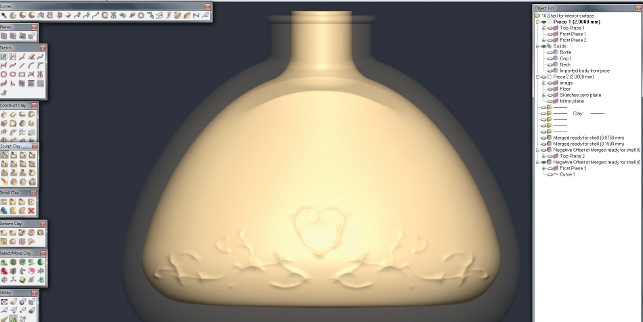
With design completed, we can do a photorealistic rendering of the bottle, adding lighting, reflections and shadows.
This gives the fictional client a life-like digital representation of what the final perfume bottle will look like and a dynamic image that can be used for future marketing. 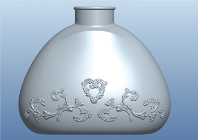
Bridging the physical and digital divides by merging two individual tools
Default


