If you’re into visualisation, then you know about HDR images. They’re becoming increasingly common in the world of rendering, with all the leading systems and their rendering counterparts including support for them. For those not up to speed, it’s best we turn to that oracle of all things slightly inaccurate, Wikipedia, which defines a HDR image as:
High dynamic range imaging (HDRI or just HDR) is a set of techniques that allow a greater dynamic range of luminances between the lightest and darkest areas of an image than standard digital imaging techniques or photographic methods. This wider dynamic range allows HDR images to represent more accurately the wide range of intensity levels found in real scenes ranging from direct sunlight to faint starlight.
In terms of their use in product development processes, HDR images give you the ability to both light your rendering scene quickly and to create basic background imagery.
It’s built into the likes of Bunkspeed’s HyperShot, Pro/E Wildfire 5, Modo (and hence, SolidWorks PV360), Autodesk Showcase, 3ds max (particularly with ART-VPS’s ShaderLight on the way), Maya and pretty much everything else. When used correctly, HDR images give you results quickly, with realistic results. But there are two issues:
a) Unless you shell out for or hire a Spheron camera, you are stuck with either stock scene options in your rendering tool of choice, or have to purchase stock images from the likes of DoschDesign, 3six0.net and many others. While these are good, they’re typically exterior shots, whereas the majority of users are looking for interior, studio like shots where reflections, highlights and details are paramount. Just as you would with a lighting rig, backdrops and a light tent.
b) When you’re obsessing over render details, trying to get those reflections right, get the highlights where you want them, having a single image controlling the light and reflections isn’t ideal. HDR images can be edited, but typically require editing the HDR image. Problem is, that’s quite tough to do. yes, Photoshop now supports HDR editing, but its not ideal in terms of workflow.
How about something a little more elegant?
Enter HDRLightStudio from the guys at Lightmap, a company founded by the team at Protograph, a well known visualisation outfit that’s been spearheading the use of advanced rendering tools for many years. Realising that they didn’t have control over the HDR input into their work, set about developing a software tool that brings that control back to the user. The result is HDRLightStudio, which allows you to create custom HDR images.
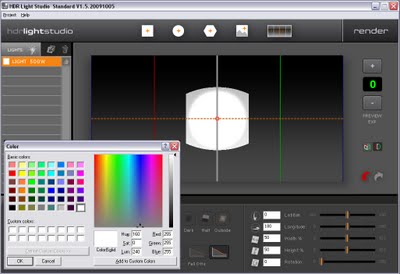
Within a single, easy to use standard interface, you have complete control over the colour of your scene and the lighting within it. There’s a number of standard shaped synthetic lights (circle, hexagon and rectangle) and you can position these anywhere within a HDR map (which is a spherical image that covers a 360 degree view).The system adapts each light you create to ensure that when used, the light retains the required shape and you have full control over luminance values according to real world values.
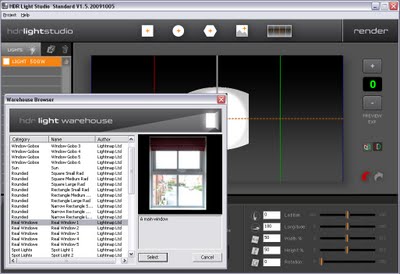
Alongside the Synthetic lights, there’s also a range of Light Packs. These are standard libraries of real-world lights, such as windows, bounce sheets, spotlights (with barn-doors on or off), Soft-boxes and many other lamps. These can be selected from the library and positioned and adjusted within your scene alongside the generic light types already there. This allows you to better replicate true lighting rigs for photo-shoots and get exactly what you want.
Here’s the basic workflow:
Figure 1: You can create synthetic lights from the standard forms or add realistic lights from the LightPack library.
Figure 2: Each light is fully controllable and adaptable to your requirements.
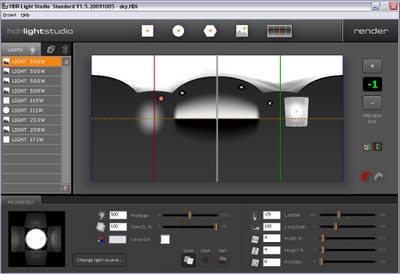
Figure 3: The preview gives physically accurate lighting and you have a number of guides to ensure that you’re positioning lights correctly. Once you’ve happy with it, it can be rendered out to .HDR or .EXR format – you’ll need to check your rendering software’s support for each of these.
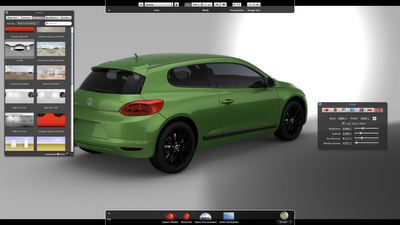
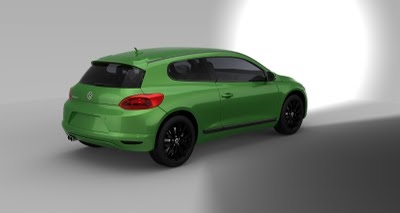
Figure 4: Load the HDR into your tool of choice (in this instance, HyperShot) and render away. 3D model courtesy of PK3d.com
Figure 5: The final thing – what says lovely more than a Volkswagen with green metallic paint.
To me, HDRLightStudio is a highly elegant solution to a particularly complex problem. People are getting more and more adept at recognising digitally rendered images and even the slightest thing can cause something of a negative reaction. All too often, you see product renders that over use marble, standard wood (seriously – what the ****is Bubinga?) materials and dodgy lighting schemes.
HDR image use lets you solve the lighting problem, but to get things really nailed, it doesn’t give you as much control over the process and the results as hand knife and forking individual lights – so you’re typically stuck with a choice between quick lights and no control versus excellent lighting and a lengthy set-up process. While for the CGI professional, time can be spent finessing the results, for those where rendering is a part of their job, usually under massive time constraints, you simply don’t have the time. HDRLightStudio gives you that control back, in a quick and easy fashion. Oh and it’s a bargain price (it starts at 149 quid) and if you’re interested, we’ve got a discount code for you to get a 10% discount if you order it – just enter ‘Develop3DNov09‘ into the online order page.


