NVIDIA has just released a series of plug-ins based on its Iray physically-based technology. Al Dean finds a system that takes advantage of modern GPU hardware combined with some clean efficient software to get you good results
Nvidia is perhaps best known for its graphics processing unit (GPU) hardware, but what you might not realise is that it has some serious skin in the software development game over and above hardware drivers.

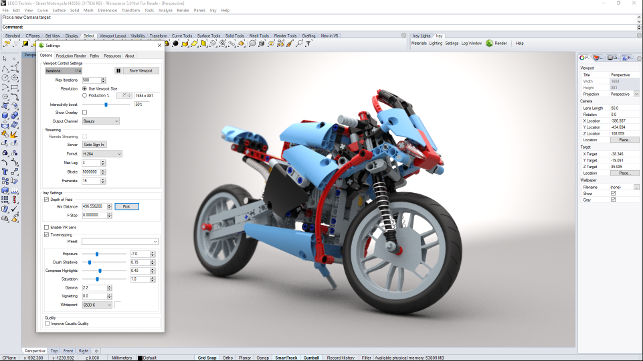
Iray for Rhino takes over one of the Rhino viewports, so you can switch between a geometry led view and a full screen viewport for dialling in details such as Depth of Field (which is accessible through the Settings dialog)
Since acquiring Mental Images the company has been offering a number of rendering engines, the latest of which is Iray. Unlike most physically-based renderers, which run on CPUs, Iray is optimised to run on Nvidia GPUs. If you’re a user of Siemens NX or Catia Live then you’re already using the technology.
To supplement this further, the graphics giant has recently released a set of plug-ins that bring Iray’s progressive, physically based renderer to a wider audience. The initial set of applications with plug-ins are 3ds max and Maya from Autodesk, Cinema4D and McNeel’s Rhino.
Considering our readership, we decided to test how it works inside Rhino.
Iray – Set up & first use
If you’re familiar with Rhino, then you’re 80% of the way there with Iray for Rhino.
All that changes is that you have a number of new toolbars that gives you access to the various settings, the materials library and light set-up.
Other than that, it’s pretty much a case of loading up your model and cracking on. We’re going to follow the process for setting up a render scene and then explore the various options and parameters that let you dial things in and get you a good usable result.
The first thing to know is that Iray uses a different set of materials compared to the standard Rhino definitions. This means that when you load your model, switch your viewport to Iray, then you’ll get a nicely rendered image of a white model.
Iray is a progressive renderer, so your viewport shows you result of your edits quickly — there’s no need to do a test render.
Iray – Materials sep-up
The first step is to replace any material definitions with those from the preinstalled Iray libraries.
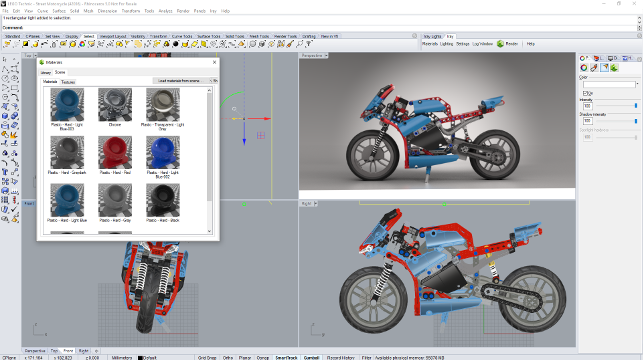
The good news is that the system is supplied with a pretty extensive set of materials that cover both product design and architecture. To get at these, you hit the ‘materials’ command from the Iray toolbar.
This pops up a tidy dialog that gives you access to all of the materials and their settings. They’re categorised in a sensible way, so this doesn’t require too much learning.
To apply the materials, you use the standard Rhino selection tools to select the geometry, find the materials and away you go.
It’s worth a few notes on how the library works. You have hundreds of materials, so this is a little unwieldy. To overcome this, you can add materials to that specific scene, without having to assign them to geometry. Grab the ones you want, add them to this shortlist and they’re there.
Another benefit of this approach is if you have a model and have all of the material defi nitions you need, it’s relatively quick to add in the materials you want (or the closest approximation) then rip through the edit dialogs to adapt them to your specific requirements.
As an example, the model we’re showing here had 8 different materials in it. It was a nice little workflow to add 8 different plastic variants to the scene, edit the colour parameters (which we had already written out), then use Rhino’s ‘Select by Colour’ tools to quickly apply them to all of the appropriate geometry in one go. It took minutes to do.
It’s also worth noting that Iray uses the MDL (Material Definition Language) to define its materials. This means that material definitions are interchangeable with any other applications that support it — which includes all of the other Iray applications as well as some third party rendered, such as Vray (which added support for MDL recently).
Once your geometry is set-up in terms of materials, then it’s time to look at lighting.

Iray is installed with more traditional CG lights that allow you to supplement and enhance the lighting derived from your HDRi environment map
Iray – All important lighting
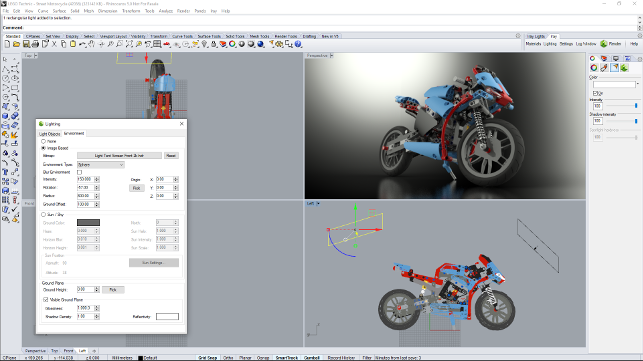
As with most of today’s modern rendering tools, Iray uses a HDR image map for light sourcing.
As we’re all aware, this saves a lot of time for set-up, there’s plenty of HDR imagery available to use and you can even generate your own.
What’s interesting in Iray for Rhino is that this method of lighting definition is supplemented with more traditional digital lighting techniques. On the Iray Lighting toolbar, you have access to a number of presets for lights, whether that’s a spot light, an omni-directional light, a box light (super useful for simulating bounce sheets) as well as more scientific IES lights (though this will be more useful for those involved in architectural style rendering tasks).
These are created and adapted in the familiar Rhino way and you have control over colour as well as intensity and a few other parameters.
The mix of HDRI-based lighting for the general scene and more traditional lighting methods makes for a lot of control and it’s pretty short work to get your model ready in terms of both materials and lighting.
Final tweaks
The last step in the process is to tweak the settings for your render.
The first thing you’ll likely need to do is to switch on the ground plane. This can, of course, be modelled up in Rhino, but Iray also includes an optional to do it automatically (found in the Settings options).
Here you’ll also find the toggle for Depth of Field. Once this is switched on, you need to select the part of the model that you want to focus on (it’s good practice to switch to the standard geometry views for this) and the focal distance (i.e. how wide or narrow you want your plane of focus to be).

Once you’ve got your model, materials and lighting in place, it’s a good time to get the final details set-up such as Depth of Field and switch on the ground plane to really bring your image to life
Iray – Render output
The benefit of the progressive renderer approach is because you have a version of your final scene in your viewport, you’re pretty certain that when you do carry out the final pass at it, the results are going to be what you want.
To generate that final render in Iray for Rhino, you need to first fine tune the settings and only then hit render. It doesn’t give you the options when you do so, it’ll run with whatever you’ve got set-up.
To access these, you open up the settings dialog and find the Production Render tab. It’s from here that you can tweak the parameters to your requirements.
These include the usual size and resolution settings (with some presets), then you get into the realms of format and the number of passes you want to run.
Here, Nvidia has done the sensible thing and given you the choice of doing it by number of passes or by allowing you to define a render time and it’ll work backwards from that.
More advanced options
While Iray for Rhino has a good set of materials, chances are that you’ll want to build your own.
These can be adaptations of existing materials or can be built up using the core underlying Iray material shaders. Using these takes a little time to get a handle on (particularly when applying decals), but having access to these is super useful for those wanting to push things further.
Another feature that’s interesting is the ability to switch on a VR lens. What this does is switch the camera in the viewport to give you a 360 degree view which can be rendered out.
In the product design space, this doesn’t make much sense — as you’re focussing on the product, not the environment itself — but it’s worth considering the potential here.
Firstly, if you’re working on architectural or interiors projects, then it’s possible to switch this one and output an image that can be loaded into a VR application so folks can pan around it — even using a smartphone based headset (such as the FreeFly or Google Cardboard).
It’s also possible to construct a digital scene and render that out for reuse as a HDR image, which can then be used again, without the overhead of lighting set-up.
Another more advanced, and frankly hidden, option is the tone mapping control. These allow you to add in effects to the rendered image, whether that’s adjusting the colour balance, adding in a little vignetting, or compressing highlights.
Conclusion
Iray for Rhino is brand new on the market and if you’re in the Rhino community, then it is worth exploring for product renders.
It’s pretty cost effective, gives you nice results and while dependent on your GPU hardware (it’s from Nvidia after all), does so quickly (we ran it with a K6000 card, so by no means a slouch or super new).
The workflow is pretty well thought out, though some consideration, to my mind, needs to be given to where the various options are located.
For example, if you want to find the ground-plane and Depth of Field options, these are buried in the Settings tab and could do with being split out into their own or be made available from the toolbars. It would be easy to miss them and it’s these options that make your renders better.
The same is true of being able to pop up the render options (particularly in terms of resolution and computation settings) before you start the render, rather than running into it blind.
But other than these, the system is solid, performs well and gives you plenty of breathing room to grow the sophistication of your rendered output.
It’s also worth considering that the same technology is available for a number of other systems including 3ds max, Maya and Cinema4D. It should also be noted that those systems’ implementations could differ, which is what makes Iray for Rhino such a nice system to work with in that context.
What Nvidia has done is take the platform of Rhino and build a set of rendering tools that take advantage of the benefits of Rhino and all that capability there, and give it some extra juice — rather than trying to redefine the whole workflow.
Being a first release, Nvidia has done a cracking job. With some fine tuning and some further additions to some of the options, it’ll be a killer plug-in for Rhino.

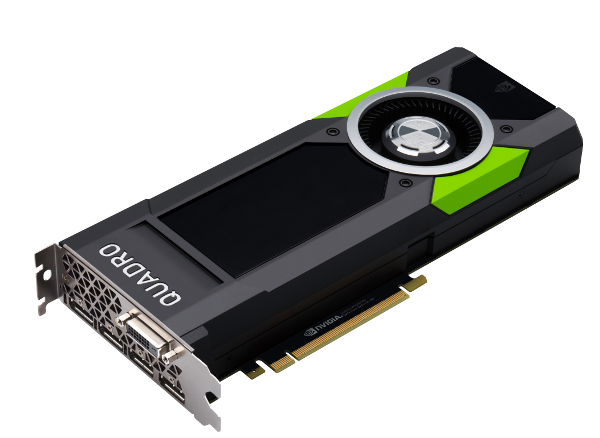
Nvidia’s Quadro P5000 — if you want the best performance, this beast is it
Render computation options: GPU, CPU & more
Iray is a GPU renderer, so it increases the importance of your workstation’s GPU.
The GPU not only needs to be able to smoothly zoom, pan and rotate around a 3D model but it must be powerful enough to number crunch through the computationally intensive ray trace calculations.
A typical CAD workstation GPU like the Quadro K2200 or Quadro M2000 can do a job, but if you don’t like waiting for renders you will probably want to increase your GPU.
The most common way to kit out a workstation for Iray rendering is to have two GPUs. One dedicated to interactive 3D graphics and a second (such as the Quadro M4000 or Quadro M5000) dedicated to Iray. This is because Kepler (K prefix) and Maxwell (M prefix) GPUs are not great at multi-tasking (carrying out ‘graphics’ and ‘compute’ tasks at the same time).
If you do try to use a single Kepler or Maxwell GPU for Iray and interactive graphics, your CAD model will likely jump about on screen, making it hard to orient it quickly and accurately. Of course, for overnight jobs or when away from your desk, both GPUs can then be used in Iray.
With Nvidia’s new generation Pascal (P prefix) GPUs this approach could change.
Both the Quadro P5000 and P6000 are architected with asynchronous compute engines, which allow both graphics and compute tasks to be performed at the same time.
In theory, this means the GPU could be crunching through an Iray render and still respond almost instantly when you start to spin a 3D CAD model in the viewport.
The advantage of this approach is that you can use all of your workstation’s GPU resources all of the time, regardless of whether it’s for a graphics or compute task.
Iray for Rhino also works with Iray Server, so fi rms can share GPU rendering resources over the network.
Check out our GPU rendering for CAD article for more information on workstation hardware, including some benchmarks for SolidWorks Visualize, another Iray-based rendering tool.
| Product | Iray for Rhino |
|---|---|
| Company name | Nvidia |
| Price | $259 per year |


