
Until recently, the number of professional grade applications that provided support for today’s HMDs could be counted on one hand — even if you’d lost three fingers in a bar fight. One of the first out of the block was Autodesk’s VRED system, which added basic support for the earlier development versions of the Oculus Rift (which we covered back in November 2015).

VRED now supports both the Vive and Rift devices. With the existing tools to create killer visualisation datasets, it just got a whole lot more immersive
Releases since have improved this support and with the introduction of production hardware onto the market, it was clear that it was time for Autodesk to formalise VRED’s capabilities.
This formalisation came with the VRED Professional 2017 release (HMD support isn’t available in the entry level versions), providing support for not only the Oculus, but the Vive as well. To supplement this, the 2017 Service Pack 1 release also brought some additional tools to make things much more interactive.
So to help I’ll give you an idea of how this works, we’re going to step through the basics of setting up a scene, then how you dive into a VR world within VRED.
The basics
VRED is a visualisation tool — no doubts about it. Its background is in automotive design and visualisation for both design evaluation as well as production rendering.
As such, it’s not simply a case of loading your geometry, applying materials and scene settings and hitting render — there’s a lot more depth to the application.
VRED has been gaining a much richer set of tools that allow you to conduct live design reviews. Whether that’s the addition of animation tools, capabilities for capturing design variants or adding interactivity.
As ever, the basic set-up workflow follows a familiar path. You load your geometry (and it has a rich set of data import functions, covering most of both native and neutral file formats). Geometry can be collated from various sources and positioned and tweaked as you see fit.
The system has to tessellate any geometry it receives and, thankfully, this is an automated process over which you have full control. Once you’ve got your data in, to the level of detail you want, then it’s time to start setting it up. Materials will be transferred across where possible, but the odds are that you’ll work through using a variety of methods to define the materials you require (based on a similarly rich set of presets — including more ‘measured’ materials — something we’ll be exploring in a forthcoming issue).
Next up, you’ve got scene set-up and lighting. Like all modern rendering systems, VRED takes advantage of HDR images as the source for lighting, but rather than using this as a means of simplifying the process, Autodesk has given you a lot more flexibility.
Environments can be constructed using hard geometry and the HDRi mapped onto them. If you want more geometry in the scene, then you can import this as you see fit.
Additionally, if you need to add in additional lights and there’s integration to HDR Light Studio, you can do that.
Once done, you’re into the realms of setting up camera views, variants (referred to as Vsets) and any animation sequences (both in terms of camera movement and moving parts).
All of these are handled with pretty simple tools and each has their own dialog for control.
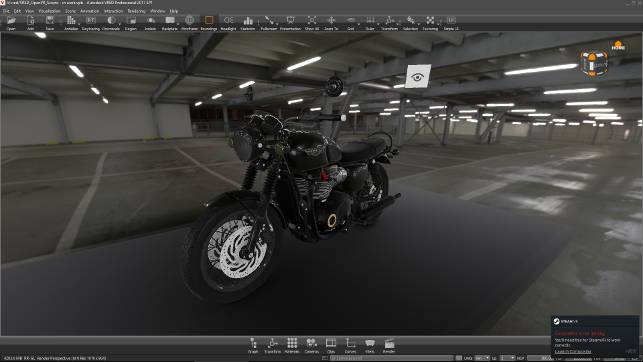
While it’s not a good representation of what to expect when immersed in a studio environment, this gives you an idea of what’s available
VRED & Virtual Reality
Out of the box, VRED works with HMDs.
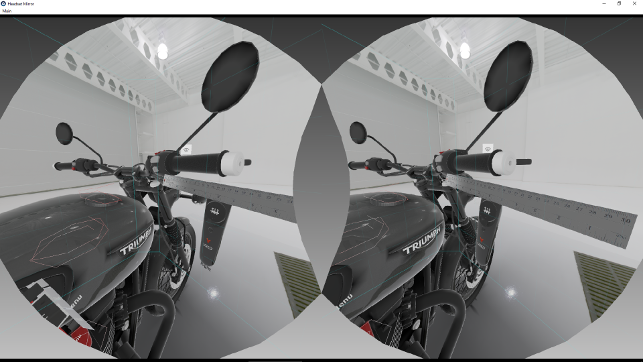
If you have your model loaded, you use the View/Display menu to switch to OpenVR mode. This switches your view from the desktop to the headset (while retaining a view on the desktop monitor).
At the very base level, the system supports head tracking, you can move around your model, using either the keyboard/mouse or a spacemouse to manipulate the model/scene. The same is true for both the HTV Vive and the Oculus Rift devices (including support for the Development versions).
For many vendors, this would be the limit of support, switch to HMD and move your head about a bit, but with the first Service Pack and with a little customisation, you can achieve much more.
By following the instructions in this post, you can gain access to a set-up that gives you a full design review for VR set-up.
Opening the template scene, you’ll find that you have a table, an environment, some sample elements but, most importantly, the scene is preloaded with a set of customised controls for the HTC Vive and its controllers.
My advice is to spend some time exploring these. You’ll find that your left hand has a set of menus for switching models (using the variants capabilities), controlling lighting environments, for measure, markup, sectioning and much more.
The menu is a four sided cube around the controller, looking much like a microphone and sign you see at press conferences. To rotate it, you use the thumb pad on the top of the controller.
Each side has a specific set of controls to explore. One has scale control, another has model variant toggles, another has display quality control (for example, you can switch Anti-aliasing on/off). The commands are activated by using the right-hand controller and a ‘laser’ like point with the trigger to activate them.
On the right hand, you have the same pointer (which is used to snap to different view points, represented with a white cube in the scene). It also allows you to switch between different tools. By default, the point is switched on, but there are measurement tools (showing a rule, with switchable units), a post-it note which can be placed on the model, markup (that creates live geometry on the model, rather than paint).
There’s also an interesting section tool. Once activated, this is live and as you press the trigger, you’ll be able to sweep a section through the model to inspect internal detail. If you release the trigger, the section remains where you left it.
Using your own models
Once you’ve worked out the structure of the file, it becomes a pretty simple task to switch out the demo models. Then you have a virtual studio in which to examine and review design concepts, alternatives — all of which are customisable to the nth degree.
If you want to switch out the environment options, you can. If you want to adapt the lighting, you can. If you want to change the standard view positions (which allow you to move around the object, should it be larger than the 5m square of the Vive Room Scale set-up) you can. It’s all there to experiment with.
Once you have an understanding of how the system works and how this file is structured, you’ve got a lot of potential for experimentation and adaptation to your needs.
In conclusion
VRED’s support for VR is something that comes naturally, after all, it’s a system that’s pitched at the higher-end of the spectrum.
That environment has meant that its customers are already looking to take advantage of lower cost HMDs for their own purposes and it has been introduced and subsequently matured quicker than almost everyone else.
What we have now is a system that’s built for advanced photorealism, has support for HMDs built in and, with the tweaks we’ve described, can be made to work as a true VR for design and styling review system.
Yes, it’s costly — the Pro variant of VRED costs £10,425 per year. Is Autodesk likely to introduce HMD support into the lower priced bundles? That remains to be seen, but I’m doubtful. Though with lower cost hardware, there’s room for addition of some basic functionality and reserving the more interactive elements, once formalised into product features, for the higher-end package. There’s also the ability to connect separate sessions (at different geographic locations) together to consider as well.
Pricing aside, VRED is gaining some very useful tools and if you’re at the higherend of the design review and visualisation spectrum, then it’s one to watch — it’s only going to get better with the 2018 release. There’s also a 30 day trial, so have it!
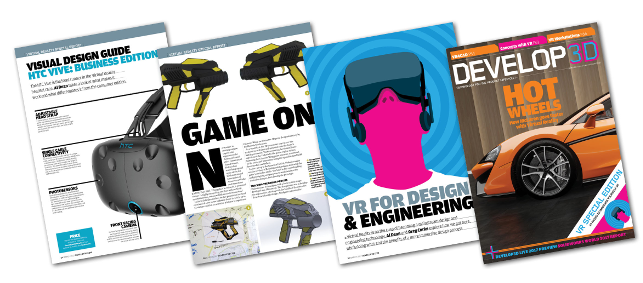
This article is part of a DEVELOP3D Special Report into Virtual Reality (VR) for design, engineering and manufacturing, which takes an in-depth look at the latest developments in software and hardware and what you need to get up and running.
Everything is for a reason How McLaren Automotive unleashes VR to create faster cars with more attention to detail
Quick guide: VR enabled applications A list of what’s out there now or coming soon
Virtual Reality challenges & future Six industry thought leader’s views on the future of VR
HTC Vive: Getting up and running Our experience of working with HTC Vive and how to avoid common mistakes
Workstations & GPUs for VR A back to basics guide to buying hardware for Virtual Reality
The future of immersive engineering Virtual Reality (VR) is the current hot topic, but Augmented Reality (AR) and Mixed Reality (MR) is on its way. We take a look at where things are heading
Game on Amalgam creates game controllers for Holovis
Virtalis VR4CAD Offering expertise in VR at a much more affordable level
ESI Group IC.IDO 11 ESI’s IC.ID0 is one of the most advanced Digital Mock Up tools available. With its addition of Vive support, we take a look at what the system is capable of and how it can benefit engineering
Gravity Sketch Beta An interesting take on Modelling in Virtual Reality
Google Tiltbrush A system for VR creativity that’s both cheap and capable
Oculus Medium A good contender for design experimentation
Amari Magnetar V25 This stylish workstation has been specifically designed for VR. But despite its slimsline chassis, you can still cram in incredible processing power
Nvidia Quadro P2000/P4000 Nvidia is changing the landscape of professional 3D graphics with a new family of Pascal Quadro GPUs, including a single slot ‘VR Ready’ card.
To read all the articles, as they appeared in DEVELOP3D Magazine, you can download the March Edition here.
| Product | VRED Pro 2017 |
|---|---|
| Company name | Autodesk |
| Price | £10,425 pa |


