Altair Inspire Studio 2019 – A look at a system built from the ground up for industrial and product design with some nifty tricks up it’s sleeve
Since Altair acquired Gestel, the developer of SolidThinking, the latter’s products have undergone a renaissance, having access to a wider audience and more development revenue.
Those who have followed these products closely will know that the SolidThinking Inspire application has attracted more attention recently, due to its usefulness in both topology optimisation and additive manufacturing, while SolidThinking Evolve hasn’t seen much of the limelight.
Originally, SolidThinking Evolve was a product primarily targeted at the industrial and product design market, looking to compete with the likes of Alias, Rhino and other surface-focused modelling tools.
It focused on the creation of complex and often organic models, using a combination of curves, surfaces, solids and more recently, PolyNURBS (Altair’s take on the sub-d modelling approach).
Today, the product – now known as Altair Inspire Studio – has undergone the most radical reinvention in its history.
This involves not just a change of name, but also the closer integration of technology from the Altair family and a complete redevelopment of how it looks and operates.
So, shall we dive in and see what’s new, updated and changed?
New user experience in Altair Inspire
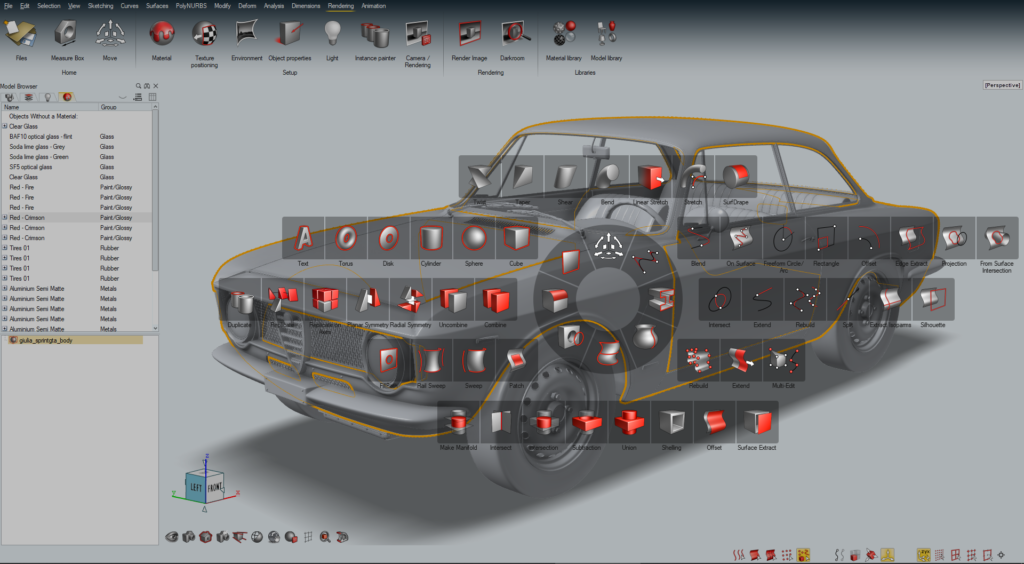
On opening Altair Inspire Studio, you’ll immediately see that the old, vertical palette-driven interface has gone, replaced with a brand-new one that follows Altair’s HyperWorks next-generation styling.
Unless you’re familiar with this, it looks a little overly fussy at first glance, but once you get what’s going on, you can dive in.
You’ll see a familiar object/scene browser to the left; at the top, a number of what appear to be menus; and a large modelling screen, topped off with large toolbars of graphically rich icons.
If you want to start sketching to build up geometry, then you’ll spot the sketching ‘menu’ at the top of the screen.
In fact, this isn’t a menu; it just switches the toolbar to bring up the 2D sketcher.
The sketcher is a feature that’s clearly seen a lot of work for this release.
It’s pretty much as you would expect, providing some nice graphical feedback as you work on your profiles or networks of sketch entities.
One thing worth noting is that this isn’t like mechanically focused systems.
You sketch your profiles to create geometry as usual, but you’ll then move them into position, to experiment with form and function in a very freeform manner.
What’s interesting is that, as you drag and drop those geometric blocks into position, the system tracks this and shifts the underlying sketches through the process.
You’ll also spot a number of other toolbars. Curves, in particular, will be of interest to product and industrial design folks.
The spline creation and editing tools are particularly impressive when it comes to adapting to the form you need.
You can add in vertices, extend the curves – all from the curve controls on screen.
Then you move into the usual array of surface modelling operations – extrude, revolve, loft, sweep and so on, as well as a number of primitives.
As you move through various commands and operations, it quickly becomes clear that much of the complexity behind these operations is hidden from the user.
If you want to dive into specifics, however, you’ll find both a toolbar at the top of the modelling window and your right-click menu to open them up.
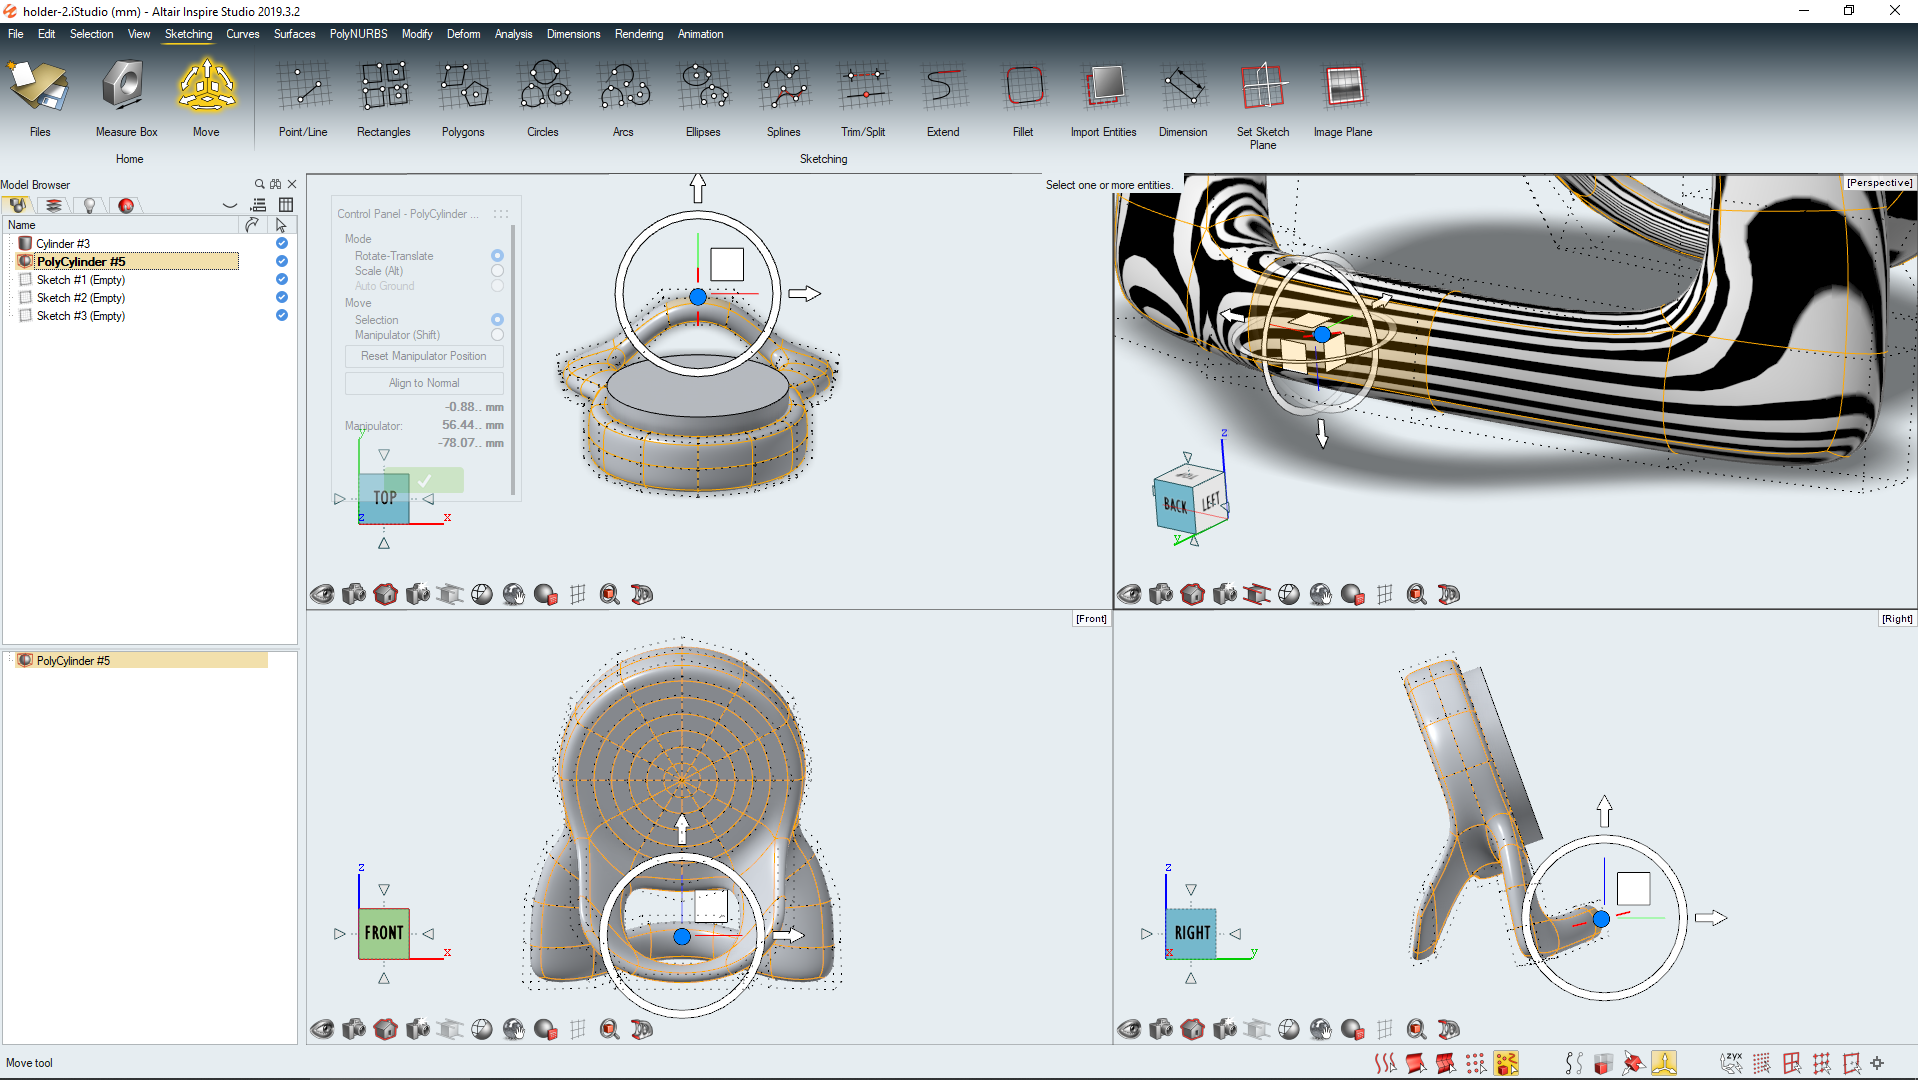
PolyNURBS in Altair Inspire
One area that’s particularly worth talking about is the PolyNURBS functionality in Altair Inspire Studio.
This, as previously mentioned, is the company’s own take on the subdivision (sub-d) surface modelling technology that many such systems now feature in one form or another.
Like most of these tools, PolyNURBS is a method of using cage and vertices/edge/face manipulation to push, pull and edit geometry into organic shapes, while maintaining curvature continuity where it’s needed and sharpening edges where it isn’t.
Once you get your head around the basics of PolyNURBS, then the power in the system becomes obvious.
It isn’t as constrained as some history-based sub-d modelling systems out there, and you’re much freer to switch symmetry on or off as needed, making use of push/pull workflows only as you see fit.
There are two key modes. First is the standard, low-resolution block model/control cage approach, which works nicely for pulling geometry into the vaguely correct shape.
When you want to see how it looks as a NURBS model, you hit the ‘nurbify’ toggle and this creates your curvature continuous form.
This isn’t just a preview; you can then dive in and work on the faces, edges and vertices in this mode too.
It just pushes your workstation a little harder, making it slightly less responsive as a result.
Thea render added
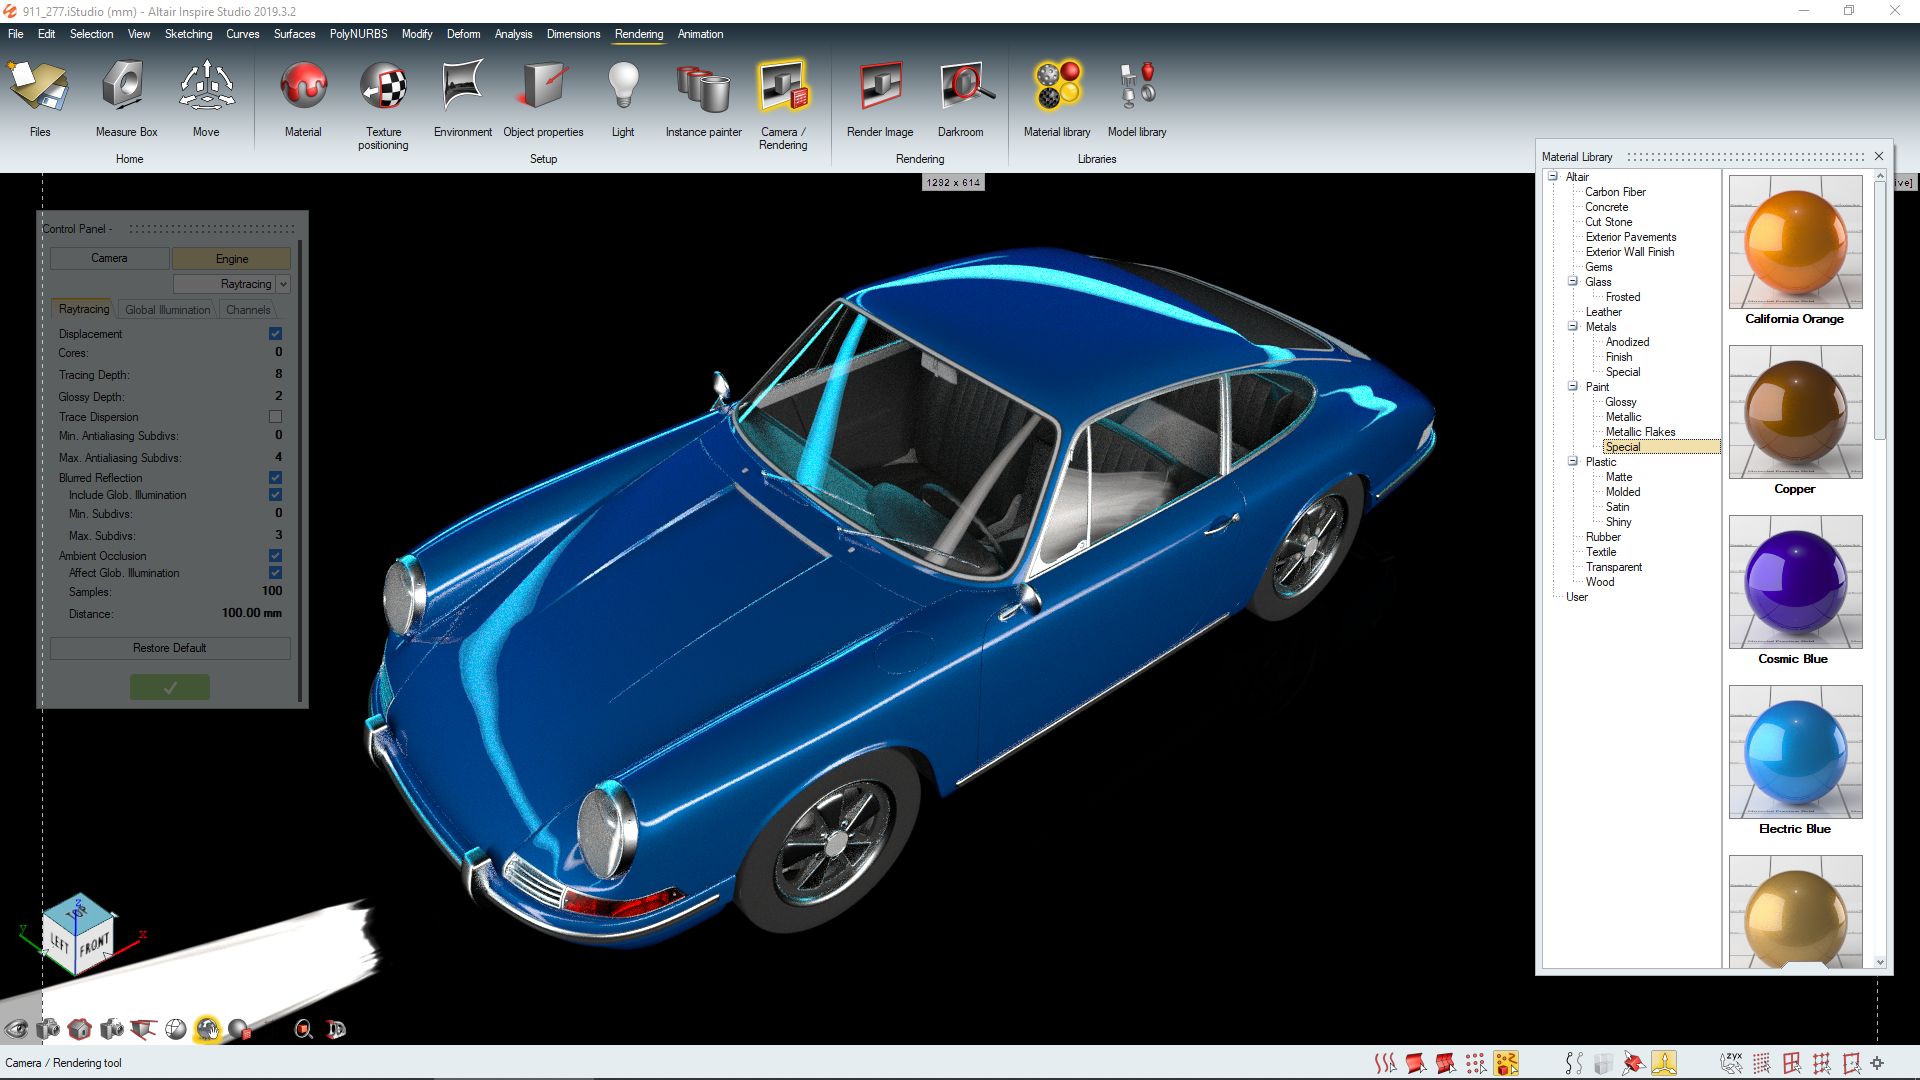
Rendering is an area that’s seen some focus for this release.
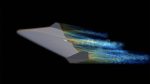
While not new to this product line, this release sees the previous engine replaced with the Thea Render technology that Altair acquired a few years back.
As you might expect, this is a progressive, physically based rendering engine and works in a similar manner to other products in this category.
Within Inspire Studio, rendering has its own tab and set of operations.
Your scene’s lighting is derived from an HDR image map, along with any other light sources you create in the scene.
Light set-ups can be changed, with a library of presets, and you can also load your own HDR images in, adapting them to the specific project’s needs in time of size, reflectance of floor, and so on.
Materials are dragged and dropped from a library and tweaked to your needs. The existing library is pretty good starting point.
Texture positioning and mapping, meanwhile, has been worked on for this release, too, so you can really dial in how your materials look and add those all important details such a labelling.
If you’ve used a modern rendering system, you’ll be familiar with how this all works; the image streams to your window and shows you how the final render will look.
There are some neat capabilities and tricks in here to bear in mind.
The first is that there are a couple of different rendering engines in the system and you can choose between them.
If you go for the Presto/IR engine, then you’ll get access to things like a denoiser (using Nvidia’s libraries) and it’ll push your GPU harder.
If you go for the full progressive option, then you get that full calculation, but it switches to your CPU.
What’s useful is that there’s no difference in material support; you simply find the best settings for your current work and run with those.
For the 2019 release, there’s been a ton of work done to provide users with built-in image correction tools, as well as photographically led controls over things like depth of field and bloom.
Some of this can be applied directly in the rendering window, but you can also do much of it after the fact, using a separation window application called Darkroom.
In conclusion
Inspire Studio’s interface is something that I’ve been thinking about a lot while writing this review.
Part of me wondered if it’s wise to make such a dramatic alteration from how users expect software to work.
After all, pre-existing expectations and knowledge play a huge role in the discovery stage of learning new tools – software based or otherwise.
Then I realised that there’s no real need for all software to look exactly the same, is there?
Surely we’re better off if we have a set of tools tailored to the job at hand? This is what Inspire Studio provides – and it does it very well.
The combination of clearly laid-out, graphically led toolbars and icons works extremely well with a very rich set of on-modelling and in-modelling screen feedback.
Take the example seen at the top of this review: what you’re doing here is creating an extrude from a profile.
Within the graphical preview, you have control over distance and extents; draft angles from each direction; capping options to leave the extrude open, cap it with a planar surface, or close it out with a G2 continuous form.
And you can do all this without ever touching a dialogue or toolbar.
Inspire Studio is a clever shift for Altair.
The company’s simulation-heavy focus is something that appeals to a specific audience, but an audience that doesn’t really intersect a great deal with industrial and product design.
What’s strange is that Altair itself is not only an engineering software provider, but also has in-house product design teams working on all manner of projects, from smart lighting for warehousing to data science and technology.
What’s clear is that Inspire Studio builds on the solid foundations that Gestel established with the SolidThinking products and then moves the product forwards in some quite radical ways.
In this newly revamped product, we see the introduction of fresh technology such as the new rendering engine, but also the results of the company taking a careful and considered look at existing toolsets and workflows and then finding new ways to make them more efficient and more effective for users.
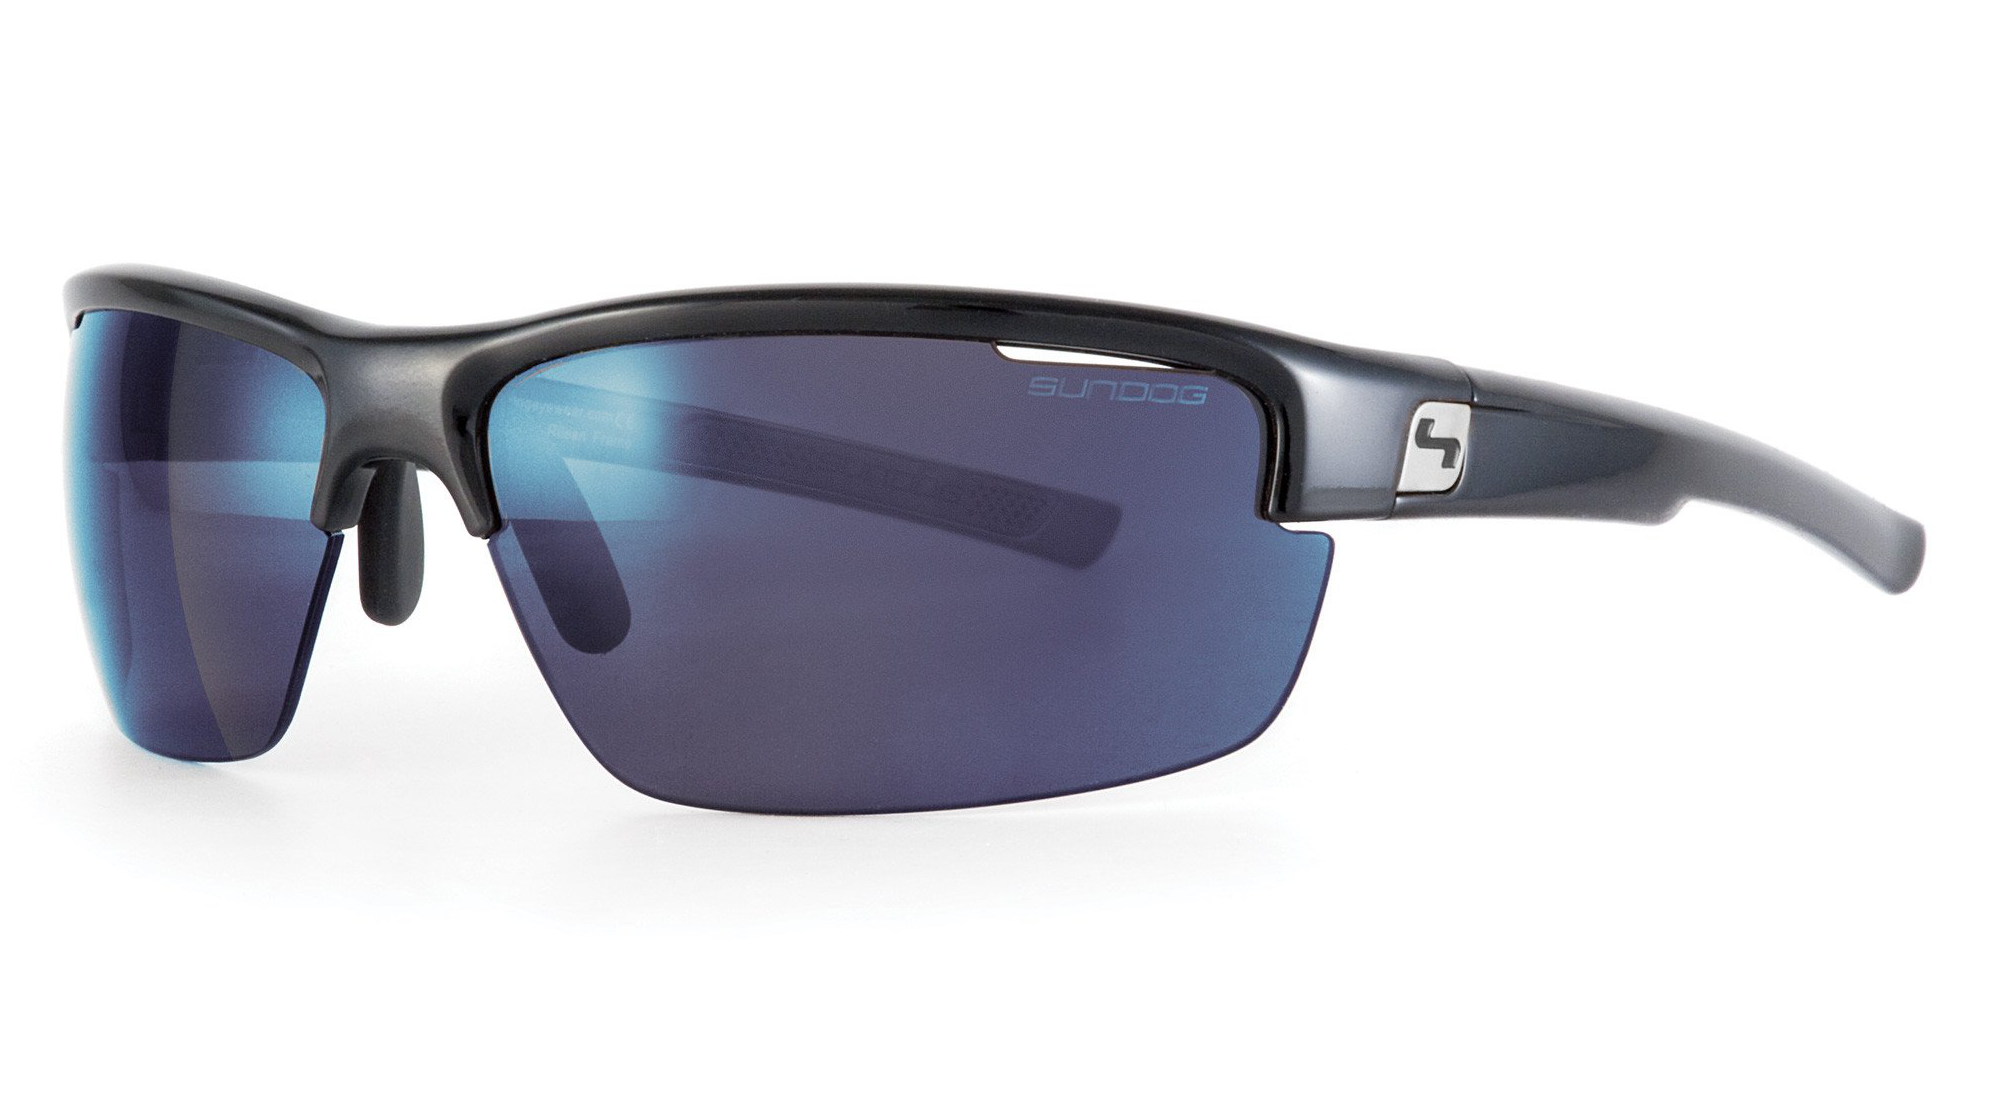
Inspire Studio in use: How Sundog develops new eyewear
In business for over 30 years, Sundog Eyewear provides its customers with genuine performance in eyewear comfort, protection and style.
The company is constantly changing to provide products that fulfill its commitment to genuine performance in terms of outstanding value, impeccable styling, dependability and most importantly superior protection from the elements – and a core part of its toolset is Altair Inspire Studio.
This allows Sundog’s designers to start with an initial sketch, explore styling alternatives and visualise new products with realistic renderings, all before exporting the digital models required by others in the product development process. Says creative director Michal Hrk, “it allows me to get better products out to the market quicker.”
Hrk had years of experience in the advertising and graphic design worlds before joining Sundog Eyewear as creative director.
Over the past few years, his role has evolved from traditional graphic design and communications to product design and styling of sunglasses in both the performance/sport and casual/lifestyle categories.
Although he didn’t have any formal 3D modelling experience prior to joining Sundog, Hrk knew he needed to move from 2D Photoshop renderings of design ideas to detailed representations. This meant he needed a tool that he could learn quickly.
“I was looking for something that offered simplicity in the user interface, ran on the Apple machines I was familiar with, and could help me move rapidly from a 2D sketch to a 3D model.
Once I found Altair Inspire Studio in 2009, I never looked back,” he says.
Hrk is particular when it comes to every detail of the product. With a 3D model created in Altair Evolve, he can now communicate even the smallest intricacies with people across the world, including suppliers.
As Hrk states, “If a picture is worth a thousand words, an exported geometry file that I share with our manufacturers is worth ten thousand. They can see exactly what the intent of a particular design is.”
One specific area of eyewear design that Hrk has found Altair Evolve excels at is the modeling of a wraparound-style frame.
“These glasses are not a simple geometric shape and require an organic modeling approach,” says Hrk. “The detailed control over surfaces in Altair Evolve allows me enormous modeling freedom without complexity.”
An Altair Inspire Studio tool that provides an essential functionality for eyewear designs is Stretch. The tool allows the user to interact with complicated surfaces using a simple 2D approach.
For example, it allows Hrk to create a complex 3D surface and stretch it into a linear surface to easily apply precise trims for the final shape.
It then allows him to re-apply the newly trimmed surface back into its 3D position, so he can integrate his 2D workflow into his 3D models, enabling him to work quickly and efficiently to create complex organic designs with the required precision.