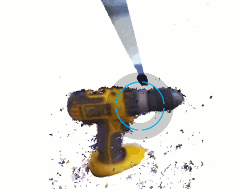
Much of the media attention on 3D printing has had a side benefit for the professional in that 3D scanning has also become a focal point.
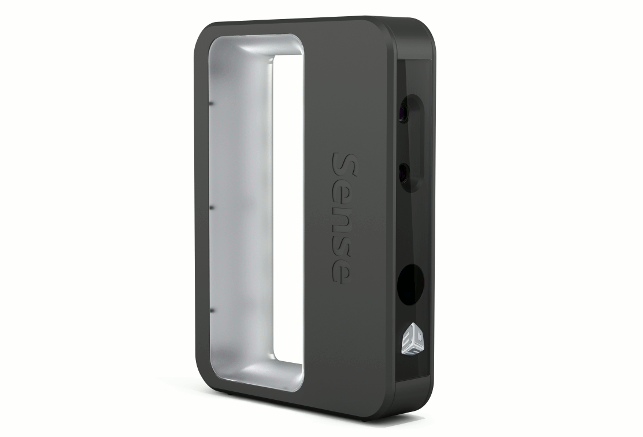
3D Systems’ Sense scanner
This has seen not only an expansion of the market and companies active in the space, but has adjusted the cost of devices — they’re lowering at the entry level.
With its acquisition of both RapidForm and Geomagic in recent years, it’s perhaps no suprise that 3D Systems is also getting into the 3D scanning game. It currently has two hardware products in the market.
The Capture is a higher-end device, the type you’d typically use for high resolution scanning for reverse engineering and perhaps some metrology.
The subject of this review, the Sense, is the entry level product, intended for not only the consumer, but also the professional needs to be able to capture 3D geometry quickly, cheaply and without too many worries about accuracy and resolution. So let’s explore how it works.
Device set-up
The Sense is a pretty nifty hand-held unit that’s about the size of a milk carton. It’s USB connected and plugs straight into your workstation (or a laptop might be more usable for larger objects). The set-up process for the Sense is pretty simple.
Visit the URL that’s in the packaging, download the software and start the setup process. I tested the unit (on loan from the Concurrent Design Group) using a Windows-based install, but a more recent software update has also brought Apple OS X support as well.
One point to note is that you need to activate the device with 3D Systems and the install process gives you a code. It’s worth jotting this number down so you can reinstall the device or download the software for another machine. Once that’s done you’re ready to get scanning.
Preparing your first scan
As with all laser scanning devices, it’s worth spending a few moments discussing the optimal conditions and set-up for using a device like this.
As with all optically-based scanners, the Sense uses a combination of a camera and laser strips to project, capture and triangulate points where the laser meets a physical object.
If you’re done this type of work before, you’ll know these things, but it’s worth noting that the surface material (particularly its reflectance or lack of) can have a large influence on the quality of your scan — if the material is too light or too shiny, it reflects and scatters the light from the laser and creates poor quality data. If the lighting conditions are off, that can also have an effect (darker is better, in my opinion).
Another factor to consider is the surrounding objects. The Sense can, in the software, be configured to work on small or larger items and works with a specific field of view and distance from the device.
It’s also worth experimenting with a clean work area and perhaps a turntable.
CDG (who supplied us with the review unit) sell a bundle that includes a turntable, but a cake decorating stand works — I’m sure those with workshop facilities could also knock one up with a few bits of ply and a spare couple of washers.
If you’re going the turntable route, it’s also worth noting that the Sense has a standard camera tripod mount in its base. So, with your object, scan work area setup and scanner ready. What’s next?
Ready? Let’s go!
3D Systems has done a pretty bang on job of stepping you through the set-up process, asking just a few questions to get you the correct settings.
It asks if you’re working on a small or large object, then asks if you’ll be holding the scanner in portrait or landscape mode (the choice of which, I suppose, is down to preference and the object you’re working on).
It then fires up the scanner and the window shows the view from the camera in the unit.
Again, the benefits of well thought out and intelligent software come into play. You’re shown the object you’re pointing at and the system uses its object sensing technology to highlight the object it thinks you’re work on in green. As the Sense has a quite deep distance of scan, you’ll see any surrounding objects and these might be captured (but can be trimmed out at a later stage).
The scan process is kicked off by hitting the spacebar and you move the unit around your object (or rotate it on the turntable). You’ll get visual feedback on the screen if you’re too close or too far from the object. It’s a little tricky at first, but once you get the hang of it, it’s pretty easy.
The screen shows you how complete your scan is and you continue till you’ve got all the data you need. Although the Sense is tuned for capturing (and then printing) 3D scans, it’s perfectly suited for pure partial scans as well.
Once complete, you hit space bar again and work through a series of activities that let you trim away unrequired areas of the scan, crop it and, if needs be, it’ll run through a capping off process to give you a watertight scan.
Once done, you can then share the data (if that’s your bag) or save it out to STL for reuse elsewhere. The device captures both the 3D form and colour.
Personally speaking, in a professional environment where the geometry is the interesting part, the colour is a distraction and can be turned off in the software settings.
Conclusion
The Sense is an impressive bit of kit considering it’s under 300 quid. Compared to tests I did with a Microsoft Kinect (around the same cost) around 12 months ago, what can be accomplished with a device in this price range is improving.
What it shows is that you need a combination of hardware and software to make the scanning process work. For those used to higher resolution devices (and higher cost), the results might seem a little rough around the edges – but this would miss the point.
The Sense gives you 3D data that’s accurate enough for specific purposes and it’s a low cost of adoption meaning that the investment is more easily justified. It’s a handily little device to have around the design office – assuming you have a need for it.
The alternatives
Makerbot digitizer
It was inevitable that Makerbot, having rewritten the 3D printing rulebook, would have a stab at the 3D scanning market.
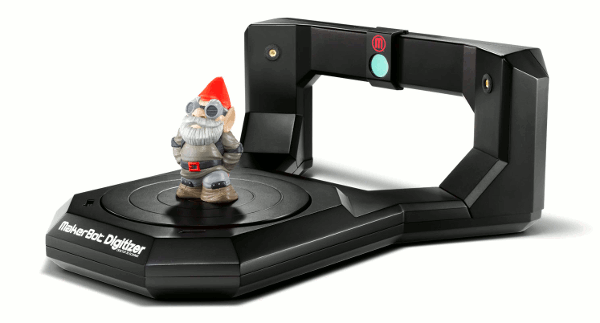
The Digitizer is its first product in the space. It combines an integral turntable (which limits scan volume to 203mm dia. x 203mm high cylinder), resolution is around 0.5mm, accuracy is quoted ±2mm, claims full automation and it’s priced at $799.
makerbot.com
Microsoft Kinect 2
The original xBox Kinect motion controller kick started a storm of hackery and app development when released.
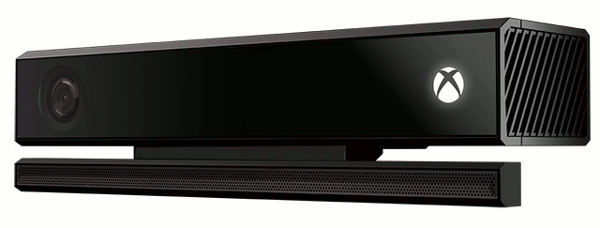
With greater resolution, the Kinect 2 should be see the same level of action, updating of software and all round goodness when it comes out of beta.
Developer kits are currently available (though volume limited). If you can’t wait, the original Kinect, combined with any of the various applications, lets you get in on the action for around 300 quid or so.
microsoft.com
NextEngine
The NextEngine product range has been around for a good 10 years or so now, but it was perhaps the first of the lowercost scanners.
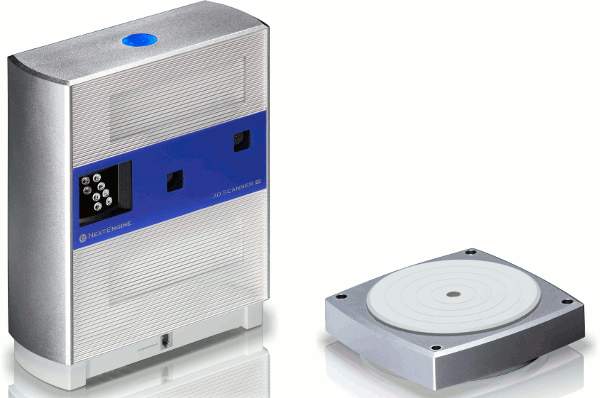
While it costs more ($2,995), the results are finer resolution than others we’ve covered here.
The company has also expanded its range of accessories with the MultiDrive, which replaces the turntable with a mult-axis assistative device that should help automate the scanning of a complete object in a single process.
nextengine.com
| Product | Sense |
|---|---|
| Company name | 3D Systems |
| Price | £279 |


