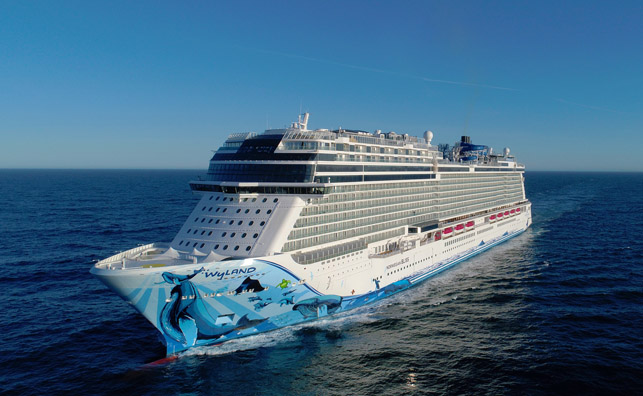
Meyer Werft constructed and delivered the Norwegian Bliss to Norwegian Cruise Line in April 2018 Credit: Meyer Werft
Over the years, some 45 luxury cruise liners have emerged from the Papenburg, Germany shipyard of Meyer Werft, along with numerous other types of maritime vessel. While all of these cruise ships have been large, modern and sophisticated, each one is also unique.
A great deal of technology goes into their creation. Since 2010, for example, Meyer Werft has been using a Leica laser scanner for geometric analysis and image documentation. A LizardQ camera system, meanwhile, is used to create 360-degree panoramas – up to 8,000 of them every year.
For 3D comparisons and precise adjustments of complex point-cloud models, Meyer Werft’s metrology engineers use Geomagic ControlX inspection software from 3D Systems.
The journey from CAD blueprint to finished ship is a long one, during the course of which many challenges need to be navigated.
Ralph Zimmermann, head of metrology/quality management at the company, offers a useful analogy that reflects the difficulties involved: “To get an idea of the complexity of the task we face at Meyer Werft, you have to imagine building a complete, floating town every six months, including water and sanitation, logistics, accommodation for thousands of people, restaurants, food service, theaters, movie theaters, and a host of other leisure attractions, ranging from water slides to go-karting tracks.”
Meyer Werft – Quality management
Around 30 million components are used to assemble every cruise ship, says Zimmermann, and even the smallest of these components – known as sections – can have dimensions of 30 x 30 x 2.5 metres.
“When the ship is then assembled,” he says, “everything must fit together perfectly. For the geometric measurements and point-cloud modeling that we perform every day, we use Geomagic Control X.”
Quality management, then, is a crucial factor in the successful, on-time delivery of cruise ships, and software from 3D Systems helps Meyer Werft in this mission, with Geomagic Control X inspection software delivering reliable results quickly and easily.
In fact, geometric measurement has been part of the quality management process at Meyer Werft since 2012 and encompasses the entire production process for building a new ship.
The metrology/quality management department under Zimmermann is responsible for all metrology tasks and works closely with the construction supervisor at the shipyard. One of the key tasks of the department is comparing target and actual states.
Work begins with the scanning of components and their virtual assembly on a computer. Checking to ensure an accurate fit before assembly saves a lot of time in the shipyard, as it significantly reduces the required number of physical adjustments.
In ship building, all materials are subject to changes caused by external influences. Welding causes changes in metal parts due to thermal action. Components are also affected by mechanical influences during transport and assembly, which can lead to deformation.
Even the temperature conditions for the time of year can have an effect.
A component that fitted perfectly in the blueprint and during production and virtual adjustment may exhibit problematic deviations when it comes to final assembly.
Target versus actual comparisons are therefore essential and are created using 3D analysis in Geomagic Control X. Current requirements include surface analyses, geometry inspections, fit checks and virtual reality.

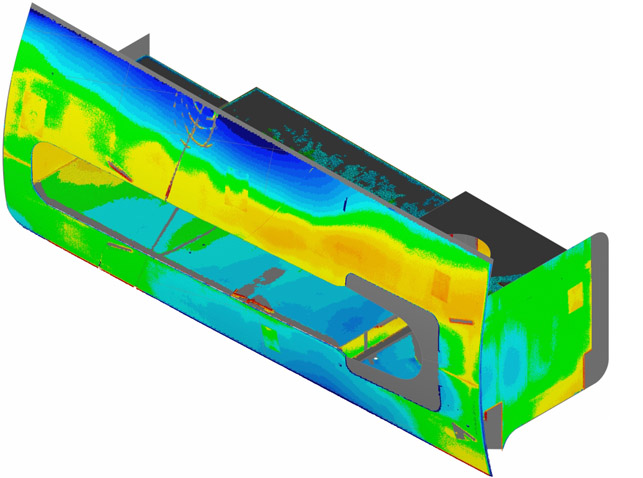
The scan result for a stabiliser shows a clear difference between the target and actual state in Geomagic Control X Credit: Meyer Werft
Surface analyses
As André Schreiber, technologist in the metrology department at Meyer Werft, explains: “In our surface analyses, we aim to identify deviations from the target state in a fully assembled section. Once everything has been captured with the laser scanner, we edit and analyse the point cloud with Geomagic Control X.
The software makes the entire process much easier for us, as it can handle large volumes of data. It is also suitable for all component sizes.”
Another advantage is that Geomagic Control X can be used in combination with all scanner types and technologies, enabling all users to measure and validate objects geometrically and create test reports.
Surface analyses clearly show where there are real elevations and hollows on the deck surface compared with the target state, for example. Surface unevenness of just a few millimeters on the sundeck of a cruise ship can result in puddles. Deviations of this kind can also occur below deck. For example, some areas of the ship are tiled and an uneven floor could cause floor tiles to crack.
If the commissioning shipping line were to discover such problems upon delivery of the ship, the result would be expensive repair work. Thanks to the work carried out by the metrology engineers at Meyer Werft using Geomagic Control X, such problems can be rectified at the shipyard.
The relevant areas are reworked and the deck surface is leveled by calculating precisely the amount of leveling compound required, meaning no puddles and no passengers arriving at their sunbeds with wet feet.
Deck analysis follows a similar process; CAD model data is compared with actual conditions on site and deviations can thus be identified immediately and tackled.
The 3D analysis makes it possible to intervene in the construction process if, for example, adjustments are needed due to pipes being positioned at different heights. The 3D analysis also prevents structural complications at a later stage when decorating the interiors.
Meyer Werft – Tackling deviations and change requests
Geometric inspections of the ship’s hull are essential. In the stabiliser pictured above, for example, the edges of the shell surface are incongruent; the scan result will thus be visibly different from the CAD model.
In the quality assurance process, the 3D comparison is used to decide whether a deviation due to expected deformation lies within the tolerance range.
Zimmermann explains: “The 3D analyses provide us with a clear picture of all deviations. It may be necessary to adjust the component in question if its functionality is restricted, if the deviations generally make it more errorprone, or if it does not comply with safety regulations.”
At the same time, it is not unusual for a client to request changes to areas of a cruise ship or its equipment during construction.
“In one case,” says Zimmermann, “a customer wanted a higher capacity for the lifeboats, which were to be produced by a supplier in Italy. The design of the boats was therefore significantly modified and they no longer had our originally planned dimensions.”
He adds: “At the shipyard, we had to ensure that the resized boats would still fit in the intended lifeboat davits and could be lowered properly.”
A simple comparison of the dimensions (length, width, height) was too risky. Given that the only other viable alternative would have been to physically transport a lifeboat from Italy to Germany for adjustment, the lifeboat was instead scanned by Meyer Werft engineers who visited its manufacturer’s premises.
The metrology department then performed a fit check using Geomagic Control X. The result was positive: the new lifeboats fitted perfectly and no further modifications to the ship’s structure were required.
Tools such as laser scanners and powerful software for metrology and quality management have become indispensable in modern shipbuilding. They play a key role in ensuring that components fit together perfectly when assembled, that any changes required can be made in good time, and that the ship is completed and delivered on schedule so that a cruise line operator can start using it to take paying customers on their dream vacations.
As Zimmermann explains, “We have to be able to rely on our measurement results at all times. With 3D Systems, we have a reliable partner by our side who understands our needs and is constantly improving the inspection software.
This enables us at Meyer Werft to build amazing cruise ships, ferries and research vessels.”


