
The world has gone rendering crazy of late. It’s a field that’s been active for decades, but with the recent advances in computing horsepower and a major shift in technology, it’s a fantastic time for anyone looking to produce stunning photorealistic imagery and animations.

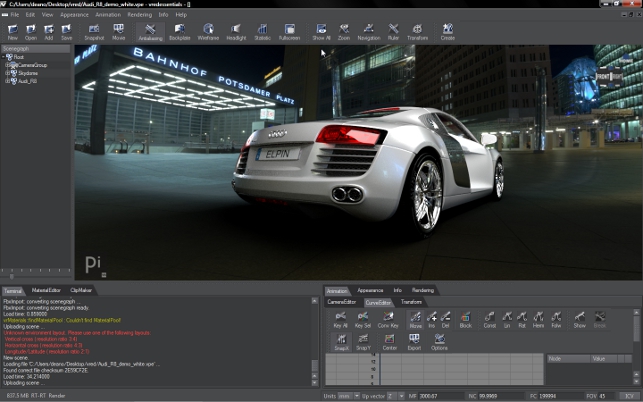
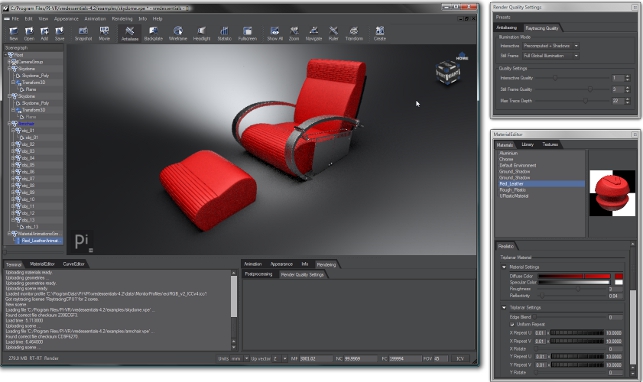
Unlike most CAD rendering tools VRED’s interface is not stripped back and provides access to a multitude of commands including the Scenegraph (left) that allows users to organise their data, making material assignment easy
One of the most recent entrants to the market is PI-VR, a German outfit that’s been serving the higher-end of the rendering market for a couple of years with its VRED range of products. These are relatively costly solutions for those looking to produce incredibly highresolution photorealistic images. This year sees the release of an entry-level product, VRED Essentials and I’ve had the pleasure of playing with it in the run up to its full release.
As with many rendering tools VRED is a real-time raytracing progressive renderer. This means it gives a very good preview of work in progress and users can see exactly what they are going to get in terms of lighting, materials and camera controls. Then once the user is happy with the setup the final render is done, which is usually a lengthy pass.
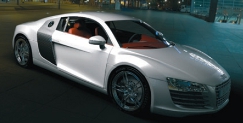
I won’t pretend that VRED Essentials is the easiest rendering tool to pick up and learn but with a little bit of patience you can create some truly stunning imagery
Once the software is licensed and up and running, you are presented with an interface that initially looks quite complex, but once you’ve learned where everything is, it’s pretty straightforward.
While other systems tend to hide away the more complex settings, VRED does the opposite and offers control over almost every single command and option. The user has complete control over scenes, HDR or image-based lighting conditions, additional lights, materials, textures as well as camera animation and control (such as Depth of Field, lens attributes, true 3D motion blur). As such, it initially seems rather overwhelming but I’m glad to say that Pi-VR has done some excellent work on the tutorials and documentation as the system has been brought to market.
The starting point is to import your geometry. Here, there are a couple of issues. As standard, the system supports a limited range of 3D data formats, namely, Rhino .3dm and FBX files but there’s an additional module that adds more common data formats including STEP and IGES, but bear in mind these cost €500 apiece.
The majority of the UI is taken up with the model/render viewing window. Across the top there are the usual set of pull-down menus and below that a series of icons that control what is seen in the render window. To the left there is the Scenegraph. With VRED, this is vital as it provides full control over both selections and visibility. Every part that is loaded into the system is broken down into a tree-like hierarchy. For those working with highly complex scenes, this will prove invaluable for organising data. Also stored within this tree is any geometry created by the user (the system supports basic primitive
creation) as well as lights and cameras.
Within the UI there are also separate tabs for render controls as well animation tools, material libraries and such – all of which are fully customisable.
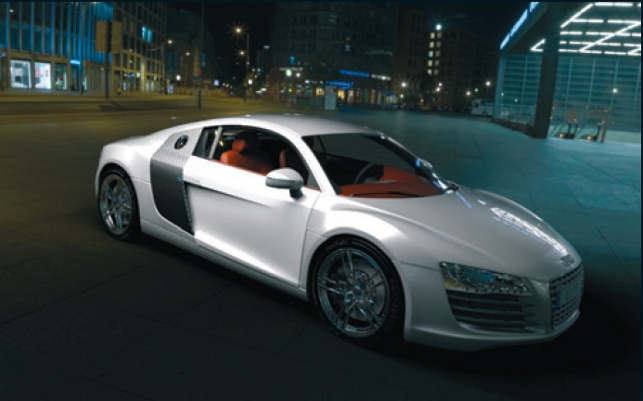
Audi R8 rendered in HD with eight rays
One thing that’s worth noting is that when you’re using a high-definition display, running the real-time render window large won’t give you the most responsive feedback as you manipulate the scene. It may be better to tear off the specific dialogs and run the render window in a small size until you’re ready to render out, depending on the power of your workstation.
Scene set-up
When CAD data has been imported you’ll notice that the system doesn’t display a great deal. To start creating images there are several steps you need to go through.
While VRED Essentials allows users to build an environment and scene from scratch, a better option is to add in a pre-existing environment. This can be done quickly and efficiently and once it’s in position, the next step is to modify the environment map.
These use HDR images to great effect and allow users to set-up lighting very quickly indeed. HDRs are available from all over the place these days and it’s a case of picking one you feel suits your needs the most (or creating one from scratch using LightMap’s rather lovely HDRLightStudio – www.hdrlightstudio.com).
If you need to add highlights and such, then the system also includes a pretty easy-to-use light definition tool, allowing you to place and control lights wherever needed. Once done, it’s materials and texturing time.
Materials and textures
VRED is supplied with a pretty extensive materials library and while it might be hard to find exactly what you’re looking for, the chances are you’ll find something on which to base it, making the process much easier.
Materials assignment is easy. You select the part (or a group of) from the Scenegraph, find the material in the library and assign it. As you start to add more materials the scene will come to life and you’ll see the benefits of working with a progressive rendering system, as the view of your model becomes photorealistic is a very short space of time. Obviously a system like this is hardware dependent, but even on the most modest of laptops, it’s workable.
Camera definition
The final stage (at least in how I use this system) is to adjust the camera settings. I think it’s best to get the lighting, materials and scene done, then adjust the final set-up on your camera.

One of the major benefits of VRED Essentials over other rendering tools is that it offers very in-depth control
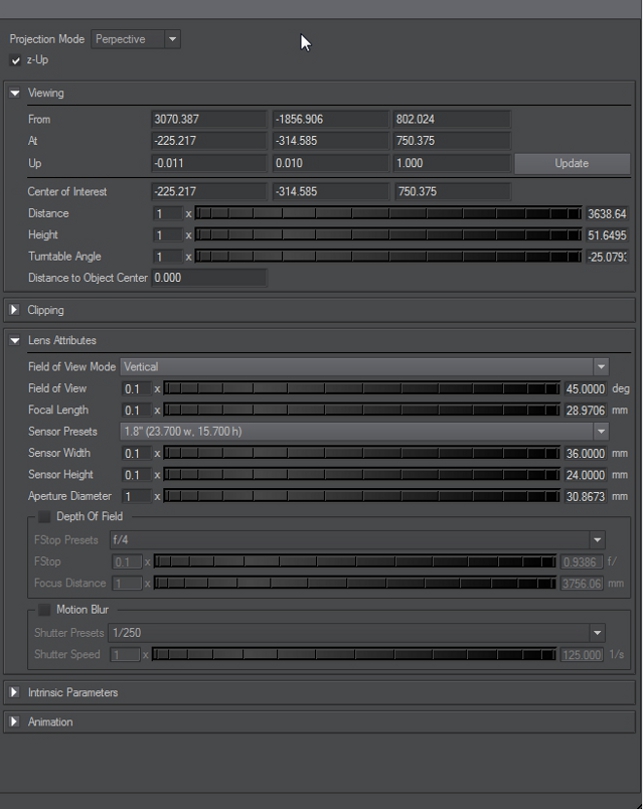
VRED includes a lot of options for cameras, from their position and into more specialist values, such as the Field of View, the sensor presets and, of course, the all important Depth of Field.
What’s interesting is how the developers have created these types of tools to match the professional photographer’s terminology and if you’ve got awareness of how these work, it’s a snap to use. If not, any basic photography manual will give you a good idea on what you have to work with.
Output time
Once the scene, materials and lighting are set up, the next step is to render out the image. As with all ray trace rendering systems, the settings you choose have a direct impact on two things: the quality of the output and the time it takes to create that output.
Careful adjustment of the settings (such as the Anti-aliasing quality, the number of bounces that a ray tracing renderer will perform) means you can get a good final result in the quickest time. VRED Essentials has a few limitations in terms of final rendered output. It’ll allow output to 1080 HD resolution in a variety of images, with or without an alpha channel and all render passes as you need them.
Adding motion & animation
VRED Essentials doesn’t just do still frame animation – it has a wealth of animation tools within it. As you would expect, this follows the usual keyframe animation method, where positions of both geometry and cameras are set-up at specific intervals, then the system interpolates between them.
You have full control over how this is done and there’s a raft of tools to make the fine adjustments needed to create animated sequences. While I’ve purposefully chosen not to concentrate on the animation aspects of the system (as most users in the design and engineering field are focussed on stills), it’s important to note that these tools are still available and usable.
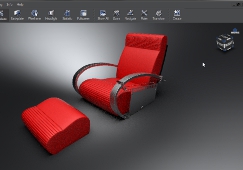
The materials library within VRED Essentials is pretty extensive and provides a good basis on which to build custom materials and textures
One aspect that’s particularly impressive is how the system handles motion blur and even when you’re creating still for products in motion, the ability to add motion blur to an image is very useful indeed and will save a fair amount of Photoshop work to add it in after the fact.
Conclusion
There isn’t exactly a shortage of rendering technology out there at the moment and for those looking to create photorealistic renderings it’s certainly a good time to be buying. Regular readers of DEVELOP 3D will know I’m a huge fan of progressive renderers as you have a very direct connection between what you’re doing and the results on screen.
You play with the values, adjust lights, the model and the results are ready to inspect, then you rework. It’s much better than waiting an hour for a final pass render only to find you’ve made an error. With VRED, the results you get in the realtime window are those you get at the final render (obviously at your specified resolution).
The question is: with an already crowded marketplace, what does VRED Essentials offer that other vendors don’t? The main answer is control. While some systems provide a very direct route to the end image they often lack control. For many, that’s a good thing, but for those looking for the ultimate control over an image, it might not be sufficient. VRED gives you control over pretty much everything.
In terms of price, VRED Essentials costs €999, but the final render output is limited to 4MP and it doesn’t include any animation tools. VRED Essentials Extended ups the output resolution to 8MP and adds animation for a price of €1.999. It’s also important to look carefully at how you will get data into the product as the CAD file importers come at an additional cost.
I won’t pretend that VRED Essentials is the easiest tool to pick up and learn but with a little bit of patience you can create some truly stunning imagery, largely due to the level of control that’s missing in other progressive rendering applications. For a first release, this is impressive and I can’t wait to see what they do with it next.
| Product | VRED Essentials |
|---|---|
| Company name | Pi-VR |
| Price | from €999 |


