

Accurately capturing the form of a physical part within a digital context is a major challenge. The complexity of part forms calls for sophisticated solutions, both in terms of how the form is captured and
how the resulting data is processed into something useful.
While there are many software vendors operating within the reverse engineering space, Geomagic is one of the leading exponents. Its range of solutions is now split into several core areas, each relating to a different workflow.
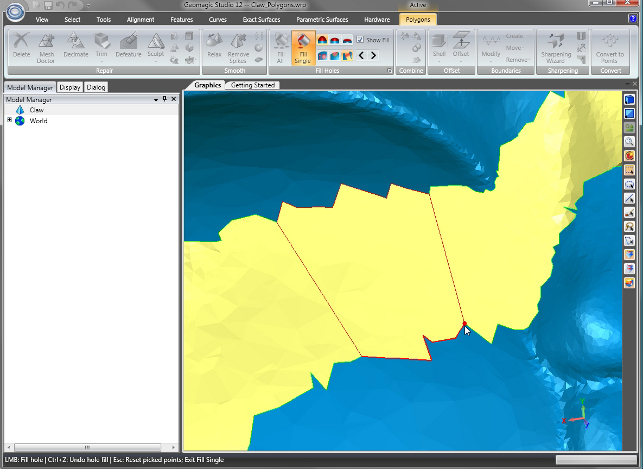
A new interactive command in Geomagic Studio 12 provides visual feedback on the bridge shape before filling in holes
Geomagic Qualify provides an environment in which to conduct metrology and inspection processes using a combination of laser scanning and hard probing. It helps gain an understanding of how the produced part differs from the nominal 3D data.
Meanwhile, Geomagic Studio occupies the front of the design process, providing tools to take part scans and use them to aid the product development process.
The Studio software has many diverse applications. It can be used to capture a concept model that needs to be brought into a digital environment for further work. It can be used to match an existing part in terms of form and remanufacture it. This is common in high-value industries (turbomachinery and aerospace spring to mind) where there is no original data or the form of the part has changed over time and no longer is a true representation of the nominal CAD data.
The latest version is a major new update. While the last few releases have seen the system gain more and more power in terms of processing of point cloud data, there has also been a lot of work done on improving the process of bringing captured data into a workhorse CAD system as analytic surfaces. That work continues with this release but there has also been a major focus on user interface (UI) and interaction.
For this release, and across of all of its products, Geomagic has adopted increasingly ubiquitous in this space.
Gone are the complex toolbars, and the user interface is now extremely clean and well organised. While I’ve never been a huge fan of engineering software blindly following the current en-vogue UI stylings
of Microsoft, in the case of Studio it makes perfect sense. The Ribbon is well suited to highly linear software, such as Studio, where there is a clear workflow and process that’s followed and the user typically moves through distinct stages.
To assist with getting started, the welcome screen now gives quick access to ‘what’s new’ guides, tutorials and help. It also provides quick shortcuts to recent files, to load or import data or to connect to
specific hardware. This could be a Faro or Perceptron arm, a Konica Minolta scanner, a Creaform Handyscan or many of the measurement devices that currently possess a Geomagic plug-in.
All of the commands that would commonly have been found in panels and dialog boxes are now contained within the Ribbon. There are distinct panels for viewing, selection, alignment, and features and the Ribbon has also given Geomagic the opportunity to separate out areas of functionality that might have previously been hidden away in a complex dialog. For example, the feature identification tools that previously would have been in a single dialog, now have their own panel.
Unlike many other Ribbon-based applications, the user can customise the Studio interface to expose the most commonly-used commands and options and strip out those that aren’t used. Customisations can be saved out as an XML file for backup or standardisation – something that Microsoft hasn’t implemented in its own solutions to date.
Exact & parametric surfaces
In previous releases, Geomagic Studio featured two separate modules for dealing with scan data. Geomagic Shape provided the tools for capturing exact form, while Geomagic Fashion was used to take scanned data and recreate it with exact surfaces for use in a 3D design system. This has now been is simplified with two sets of tools integrated directly within Studio: Exact Surfacing is used for shape capture and Parametric Surfaces, as the name suggests, is used for creating explicit surfaces.
To see an exclusive D3D Geomagic Worklow click here
When using the Exact Surfacing tools, the goal is to find a balance between fixing any problems with the scanned point cloud data and improving upon the form of the part. Aside from ‘noise’, one of the most common problems is that some features simply don’t scan well – in particular sharp edges. This release introduces the Optimise Edges command that provides a generic sharpening tool that allows users to sharpen up edges by rearranging the mesh interactively. While this tool is useful in many applications, an obvious example is the reconstruction of blade edges in turbomachinery for repair or remanufacture.
To aid with this process, and helping ensure users have the best view of a part, Geomagic Studio now offers greater control over the lighting used to display the model/mesh. This can now be adapted with more lights added so areas of shadow can be removed. Another complementary tool in relation to Exact Surfacing provides users with the ability to perform a 2D area calculation on a selected set of geometry.
Moving onto the Parametric Surfaces tools, these have been rationalised. While they still work in the manner whereby the user identifies the various constituent surfaces (such as planes, extrusions,
revolves, etc) and transfers them to a CAD system, the need identify and build an extension network (for connecting surface definition) has been removed. Essentially the Detect Regions operation is run and this finds the various constituent surface types that make up a part. The user then connects them into a single set of surfaces if required.
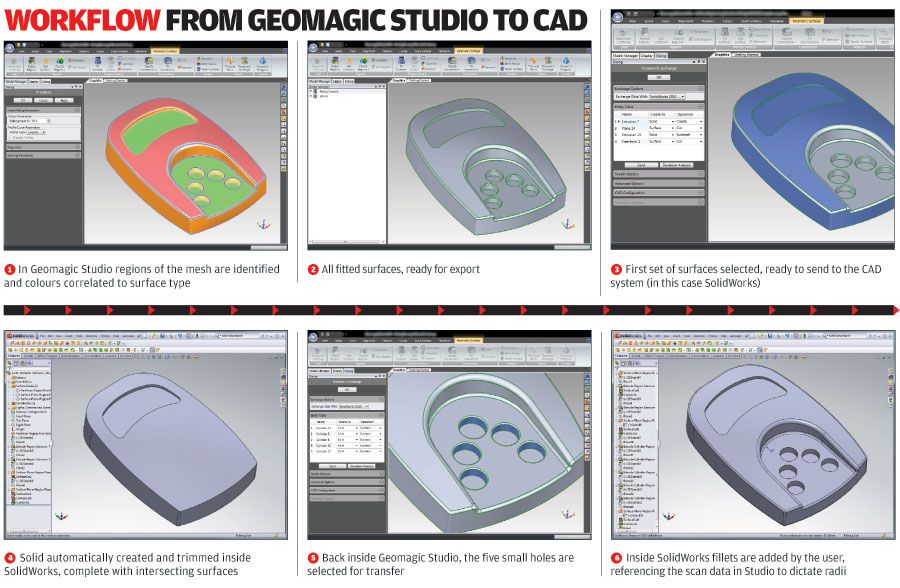
The system uses a colour-coded display to show where the various parts are found. For a particularly complex part, the interactive Repair Surfaces feature can be used to step through the component, fix any problems, define each surface individually when problems occur, then step back into the process to complete the job.
A face feature can be selected in Geomagic Studio and in real time it automatically pops up in the CAD system as a native, parametric entity
Once the various faces and features have been identified, the next stage is to transfer them to a CAD system (Geomagic Studio currently works with NX, Catia, SolidWorks, Inventor and Pro/Engineer). The transfer process can be automated so the complete surface set will be transferred, but a more intelligent, and perhaps more useful, method is to create each part feature by feature. Here, a face or feature can be selected in Geomagic Studio and in real time it automatically pops up in the CAD system as a native, parametric entity. The connection isn’t plain geometry, but rather at an API level, so native CAD parts are being built from the original physical form.
This release doesn’t change the workflow much, but it enhances it with the ability to send the geometry along with CAD-system specific operations. For example, the user can grab a feature or face, add the subtract option, and send it. Not only will the geometry transfer but it will also it will force an operation to be carried out.
Reports / Windows updates
The new release now includes support for 3D PDF output and while this makes much more sense in the context of the inspectionrelated reporting tools in Geomagic Qualify, it’s a good way to quickly share work with peers. Switching on the 3D PDF option will create a document that not only contains a static image but also, with the click of the mouse, switches into a full 3D view that can be panned, zoomed and rotated.
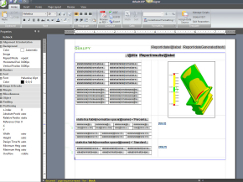
Geomagic Qualify 12 introduces a new report designer with ability to embed coloured and annotated 3D models directly in a PDF
Operating System support has also been enhanced and in addition to certification for Windows 7 there have also been improvements made to the 64-bit release.
When working with laser scanning, users are typically dealing with huge amounts of point cloud data and polygon meshes. By taking advantage of the near limitless amount of RAM available in a 64-bit workstation, larger models can be loaded directly into memory and bottlenecks removed.
Conclusion
Geomagic Studio is maturing well as a product. While previous releases had all the functionality under the sun, the user interface was much more complex in comparison to how it is now. Commands
and options are much more discoverable and that will make life much easier – for both new users and veterans looking to expand their knowledge.
In terms of new functionality, the way that the Fashion module has been removed and the two streams of tools for working with the data (Parametric and Exact) have been integrated makes huge sense. And with particular reference to the parametric surfacing tools, which have both advanced and become less complex by removing stages, it’s great that the development team has managed to do this without impacting usability.
In summary, if you’re in the market for a more advanced, or more intelligent system for working with data derived from physical objects, then there is no doubt that Studio 12 should be high on your list.
www.geomagic.com
| Product | Studio 12 |
|---|---|
| Company name | Geomagic |
| Price | on application |


