Volume Graphics CT data analysis software suite has added further capabilities in version 3.5, for users looking for better ways to inspect parts and improve designs, whatever the manufacturing method.
For engineers exploring novel materials and manufacturing methods, CT scanning is being used more to achieve accurate, non-destructive evaluations of product robustness and performance.
Volume Graphics version 3.5, which includes VGStudio Max, VGStudio, VGMetrology and further more specialist products, now provides more powerful automated design-geometry adjustment and repair tools that can be used to correct and/or offset issues that stem from the manufacturing process itself.
Mould makers, casting shops, and additive manufacturing providers alike can employ the software to detect and visualise design and material defects before using the tools to correct CAD designs.
Volume Graphics, which is now part of Hexagon, states that for version 3.5 a key change is that it has completely reworked the manufacturing geometry correction module.
This module benefits users working with any kind of mould – injection moulders or casters – with enhancements in usability, allowing continuous updates and feedback on quality, which can give the CAD designer valuable information to improve manufacturability.

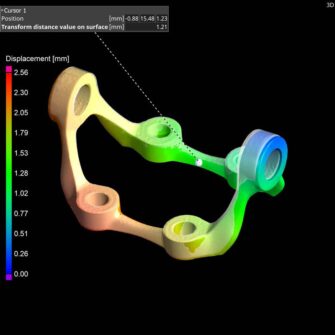
For those working in simulation and 3D printing, the new Enhanced Mesh Compensation module now provides easier navigation and understanding of the relationships between elements for better interpretation of part warping, deformation and displacement.
Additionally, the module is able to automatically compensate designs to correct for such deviations from manufacturing intent.
Volume Graphics suggests that its mesh updating is now 10-times faster, with improved results when scan and reference objects differ greatly in size or show other significant deviations.
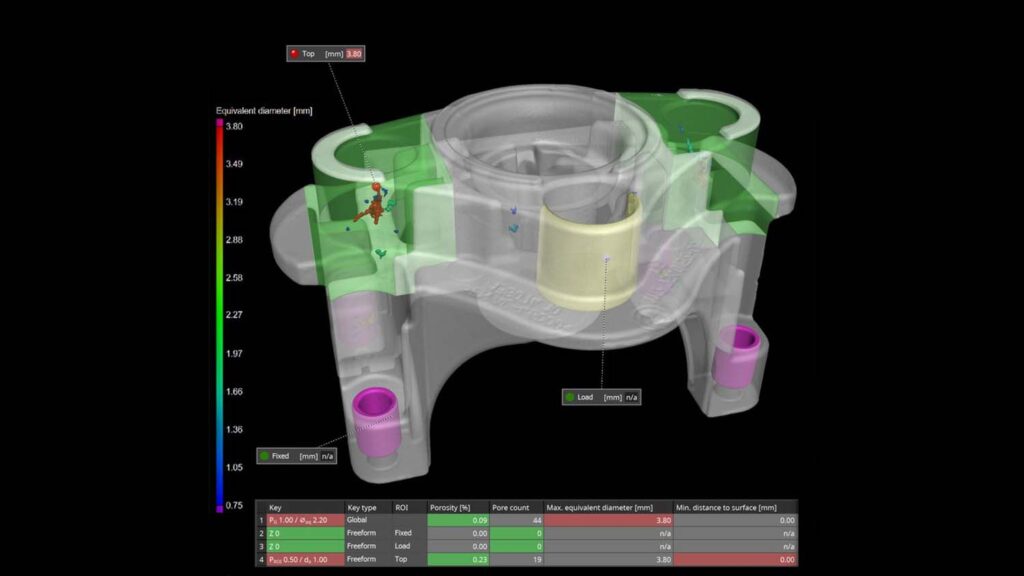
The new porosity and inclusion analysis for castings is billed as one of the most significant features in version 3.5. CT scans of cast parts can now be inspected for porosity and compliance with Reference Sheet P 203 of the Federation of German Foundry Industry (BDG).
With the help of the BDG P 203 porosity key, users can perform a 3D evaluation of detected volume deficits both in the complete casting and in freely defined sub-areas, such as functional areas with special attributes.
The software enables inspection of multiple, different regions of interest in a part to see if porosity is within tolerances and whether there are any post-machining issues in the finished part. The data from this analysis is then ready for Q-DAS process control.
Other enhancements in version 3.5 look to strengthen existing functionalities, such as updates to advanced reporting, which has been made more user-friendly and fully integrated with viewing.
A powerful nominal/actual comparison module has also been made more user-friendly with easy-to-understand visualisation of deviations of scanned objects from their reference data sets.


