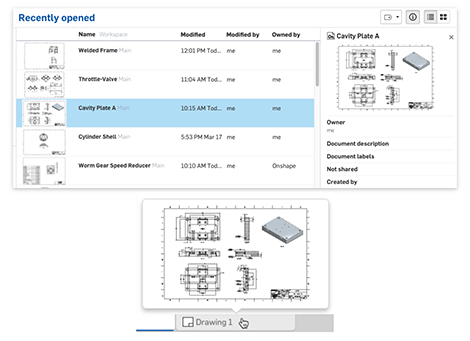
Drawing thumbnail images, easier to find what you want, and now displayed on the Onshape Documents page
Onshape’s seemingly always-active updates have this month added improvements to Onshape Drawings, voted for by its users.
As always, the more votes a requested feature gets in the Onshape Forums, the faster it appears in the product – with the community clearly hankering for some symbols action in recent weeks – so now ANSI and ISO weld symbols can now be added to drawings.
The sheet standard used determines the weld standard and dialog layout. Spot and seam welds, second fillet, symmetric and staggered welds are currently not supported, but will be added in a future update.
Additionally, adding dimensions to hidden lines or adding centerlines to hidden holes can now be done (although, as Onshape point out, although it makes a drawing easier to understand, it’s not good practice).
Drawing view can now be adjusted, allowing for priority to be set for both viewing and selection, making it useful if two drawing views are on top of one another and you want to select the view below.
This priority setting also applies to images, so users can place views on top of images to create effects like watermarks.
Elsewhere, Drawing thumbnail images are now displayed on the Documents page and also in the tab previews inside a Document, making it easier to determine which Document or tab you need before opening it.
The image displays the drawing when it was last modified or closed, so for multi-sheet drawings you will see the sheet you viewed last.
In addition to the new drawing updates, improvements have also been made to overall stability and performance across the Onshape platform.


