Physically based renderers were supposed to make lighting a scene easy, but often just dumb down the process. If you want more control, you need a better set of tools. Al Dean takes a look at HDR Light Studio, which really makes your project sing
When it comes to design visualisation projects, we need to consider three fundamental factors: geometry, material and light. Given accurate representations of all three, any good visualisation system should be able to conjure up a useful representation of your design.
With a little bit of knowledge and attention, it can become breathtaking. But more often than not, the visualisation field focuses heavily on geometry and materials, at the expense of light.
The reason might be that the advent of physically based rendering systems made lighting a scene quick and easy. Back in the old days, when you had to create each light source manually, things took time and understanding. Today, throw in a HDR environment map and you’re done, right? Not exactly.
Whether you’re creating lights from scratch or using the benefits of PBR rendering based on HDR environment maps, controlling lighting is fundamental to creating good, impactful images and animations that convey what you want them to.
This is where HDR Light Studio comes into play. It began life as a tool for both creating and editing HDR environment maps, developed by a team who also ran a visualisation studio.
Since its debut, the team behind HDR Light Studio has grown the system way beyond performing that relatively simple task. Today, the system is a fully fledged lighting definition and editing tool, which integrates with all of the leading systems out there. Given that we’re also looking at Blender in this issue of DEVELOP3D, I thought it would be good to link the two together, as they represent a pretty low-cost, but solid tools combination. So shall we explore it?
HDR Light Studio – Getting started
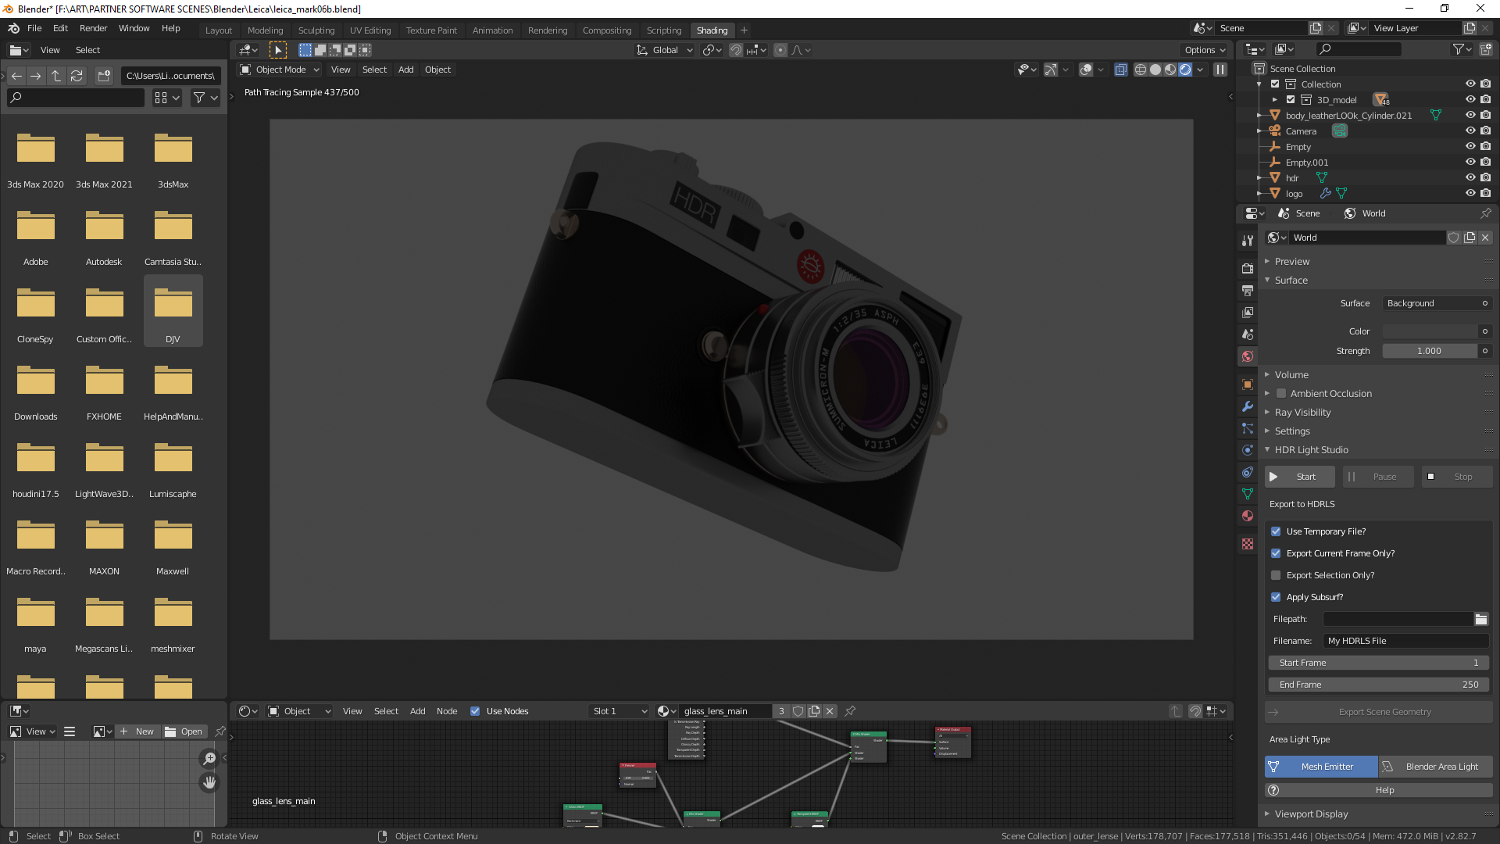
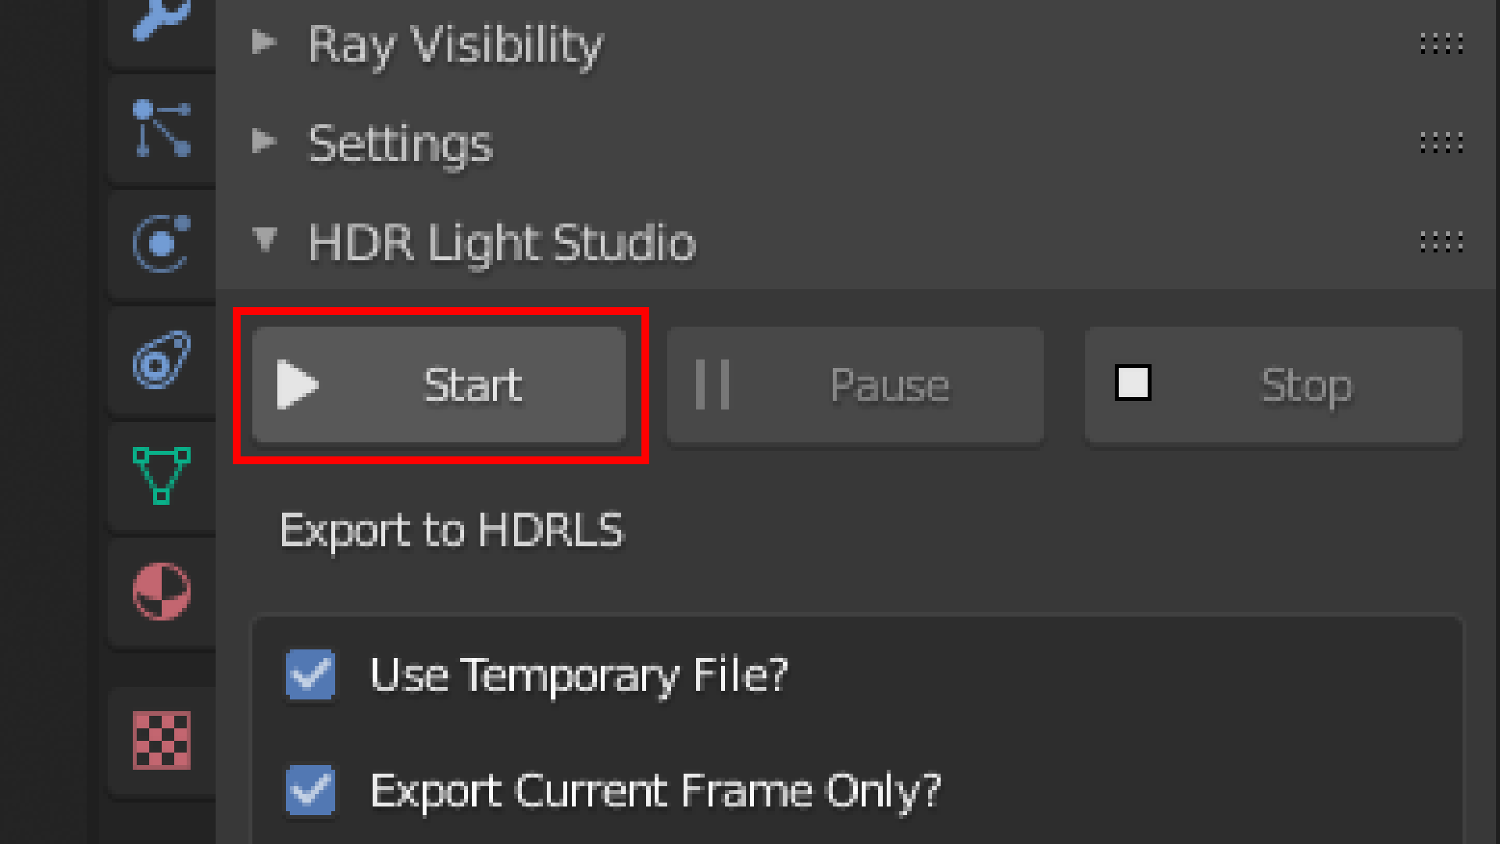
Once set up, you’ll effectively have your geometry in your Blender window, with your materials applied, and you’re ready to go. To make the connection live, it’s a simple case of hitting the Start button. This connects the two systems, so you’re driving the appearance of the Blender render window with HDR Light Studio.
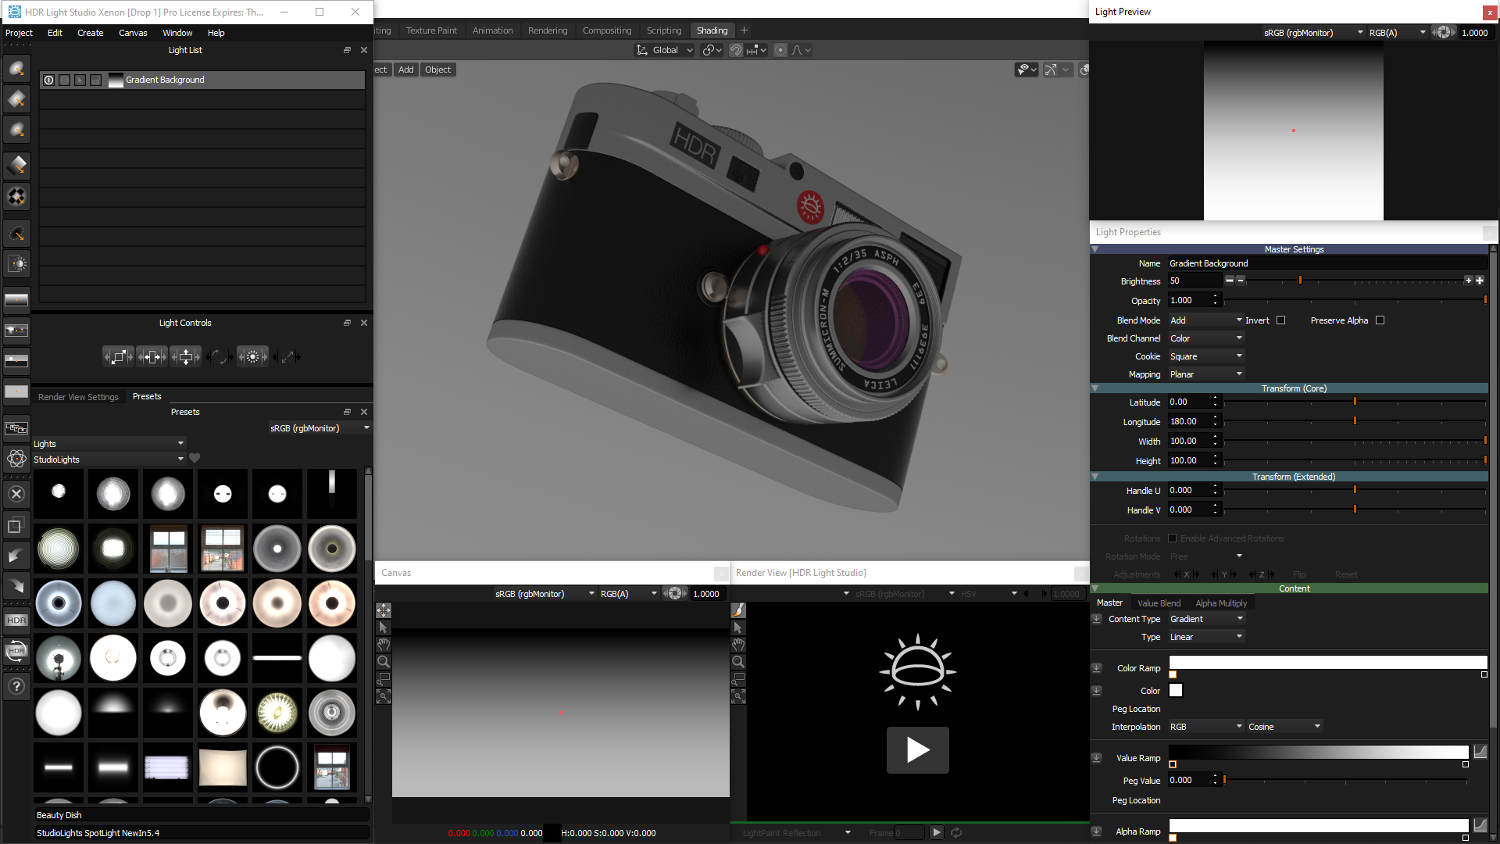
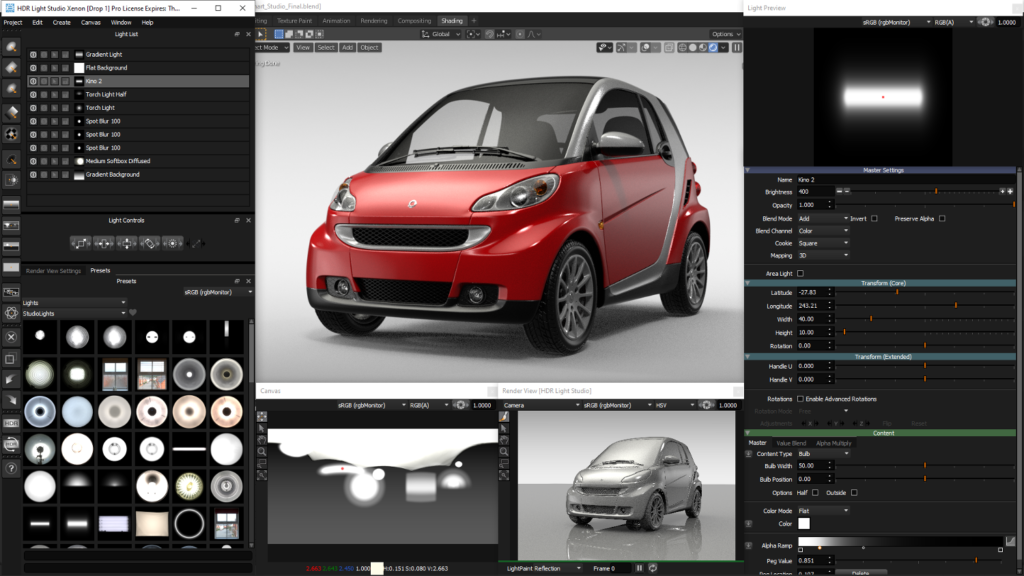
You can now start to explore HDR Light Studio’s capabilities. At its most basic, the system allows you to build up your environment map, adding in and adjusting images, adding gradients and colours to define your lighting basics.
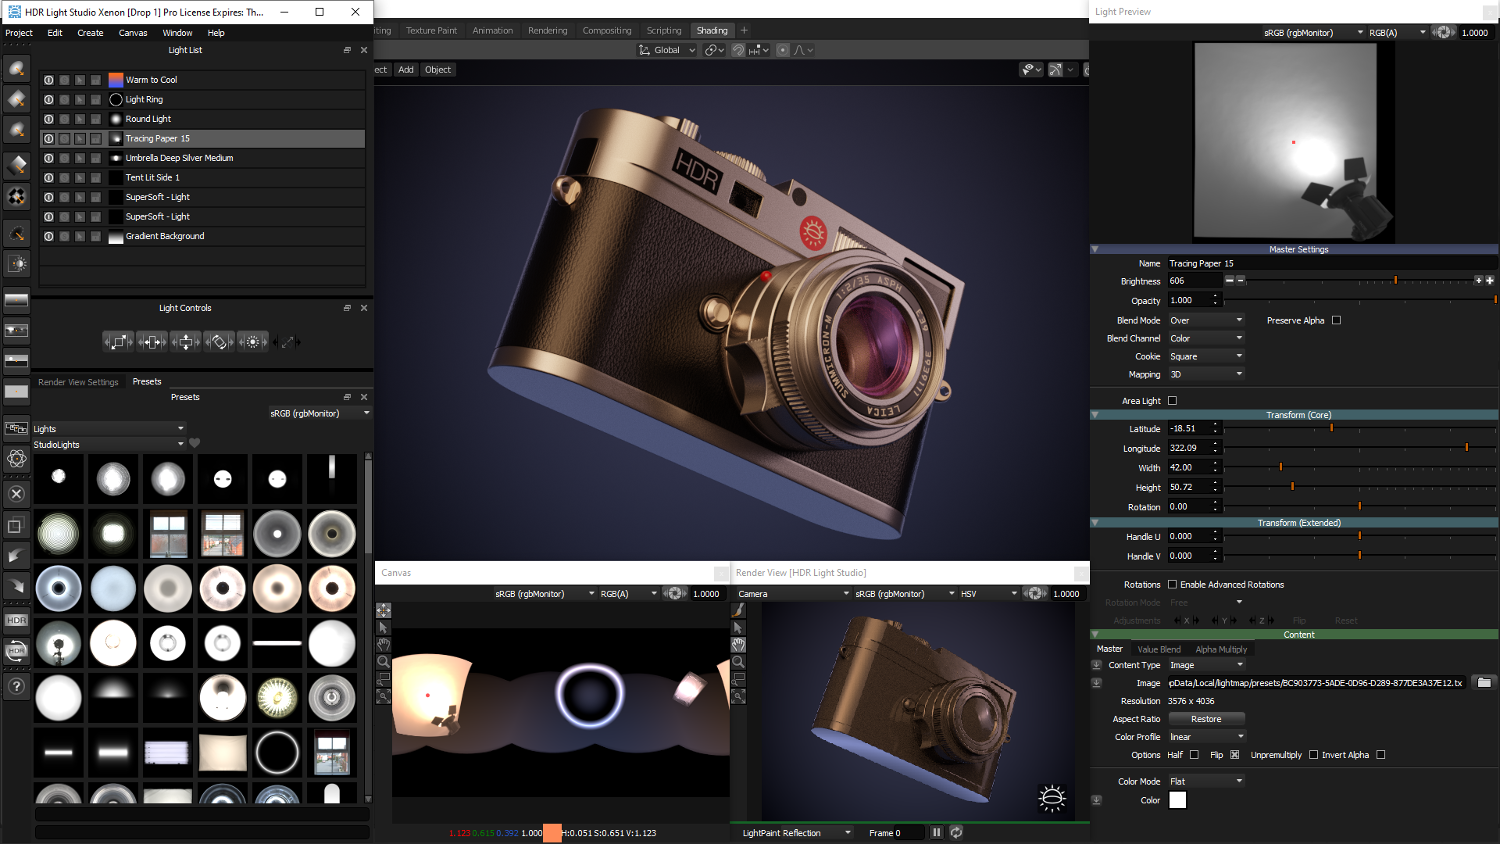
If you’ve worked on product photo shoots, consider this part the equivalent of selecting your backdrop sheet. You’ll see the environment map flattened out at the middle bottom of Figure 1 (above) and 2. Into this window, you can start to add in larger elements to build up that background.
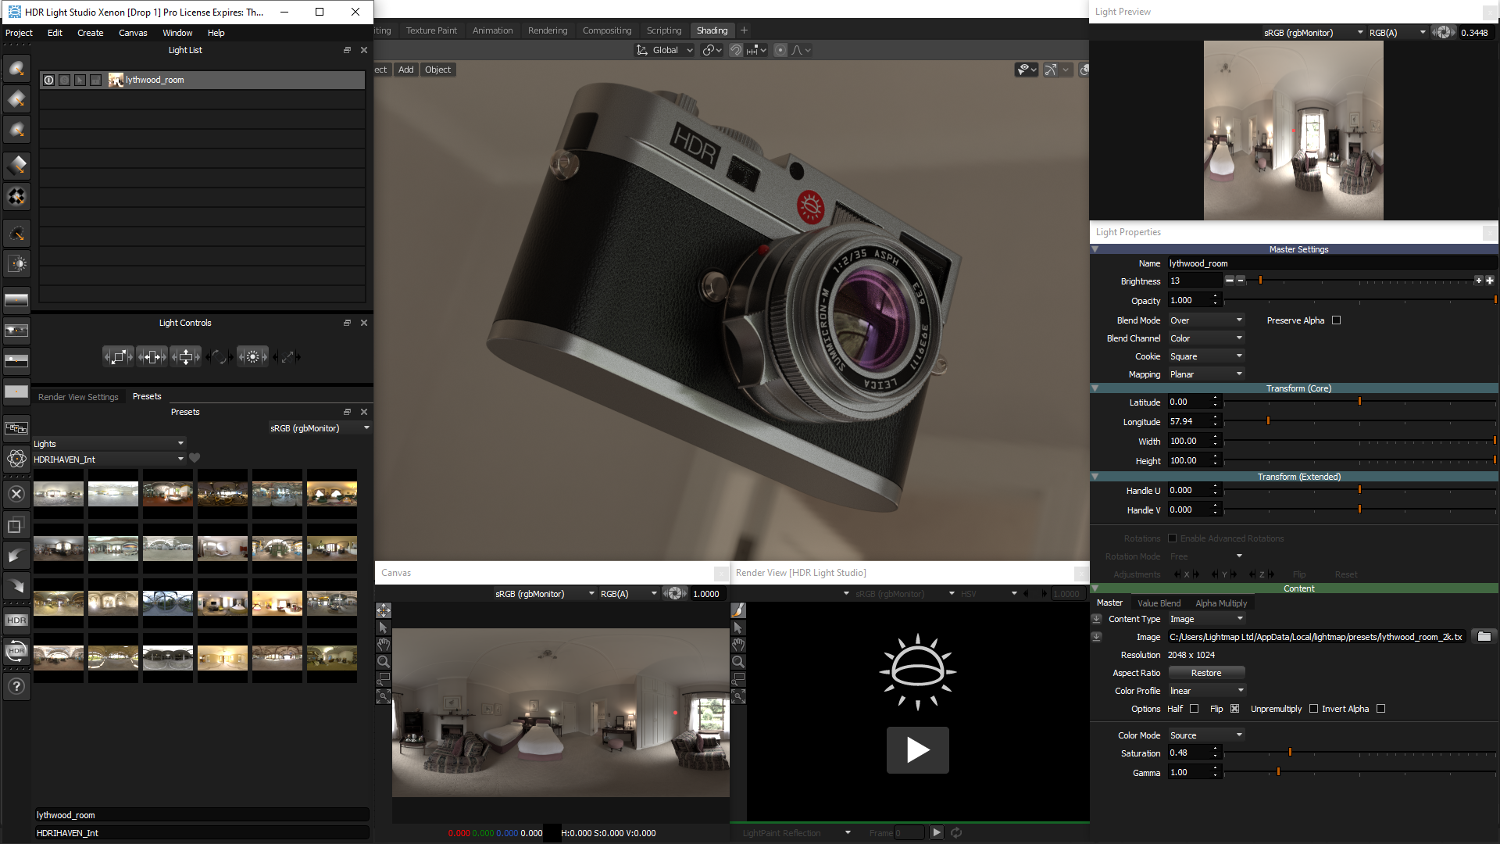
HDR Light Studio includes all manner of assets that can be added to your scene, from photo studio backdrops with accurate colour and light definitions, to colour gradients and image-based representations of real lights as you’ve seen in a studio, with bounce sheets, spot lights and so on. There are currently over 400 preset lights built by the Lightmap team, either manually or using real-world measurement and capture techniques. Each is adjustable for size, colour, and more.
As you position these in your environment map, you’ll see the Blender window update and show the influence those edits have on your scene. Entities can be adjusted as you see fit, since they’re much more than simple images. Instead, they hold the dynamic range of data you need for accurate lighting.
While positioning these in your environment map is a good start, the real fun starts with HDR Light Studio when youhave your 3D model ready and your basic scene and lighting in place, but want to fine-tune your highlights (or indeed, your low-lights and shadows).
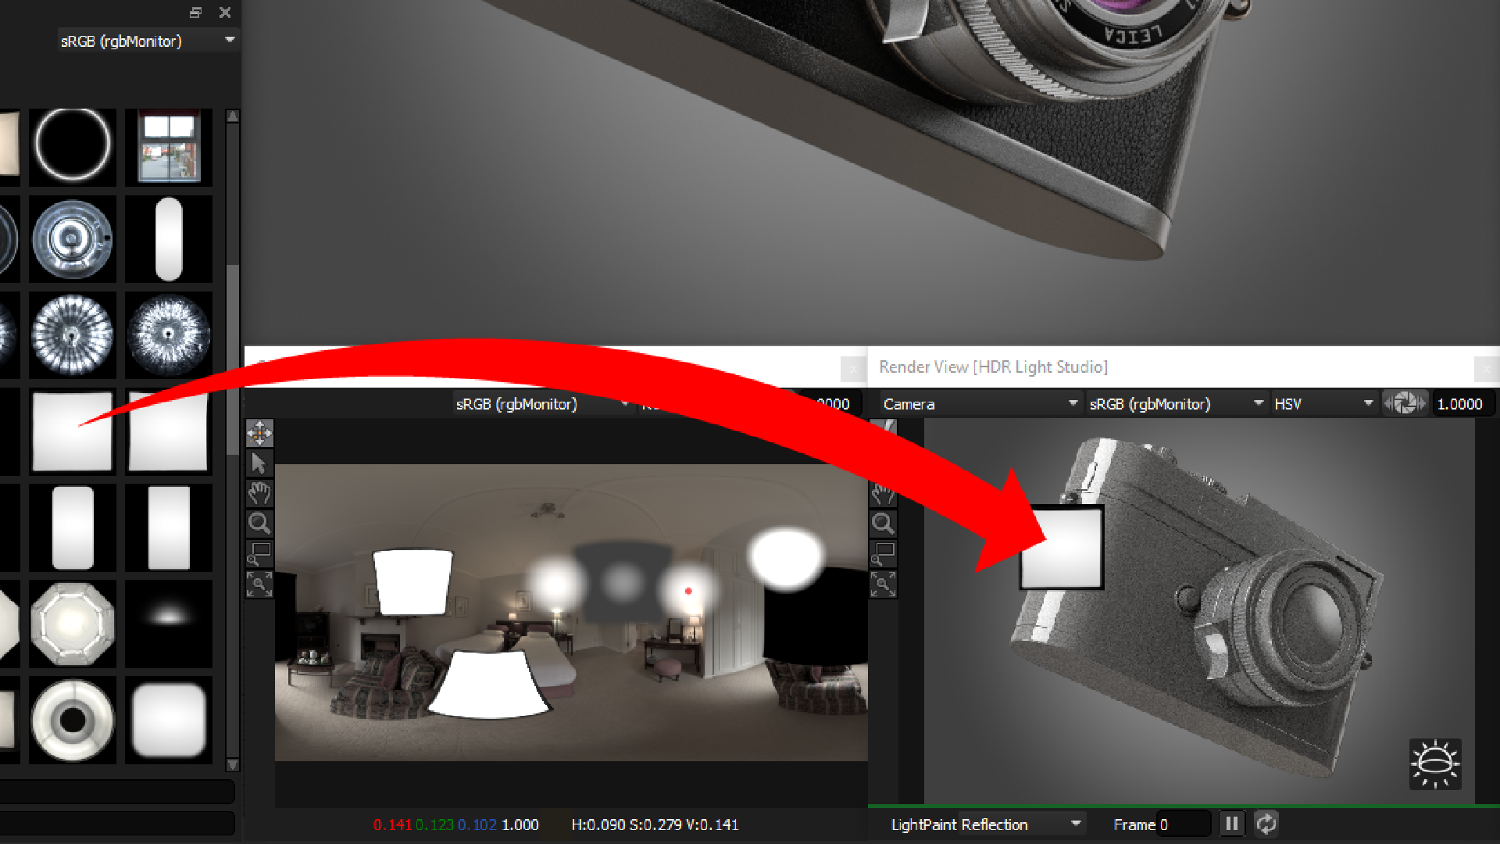
Here, the concept of LightPaint comes into play. Rather than trying to work out the arbitrary position of a light source on a spherical environment map to get the highlights where you want them, HDR Light Studio allows you to paint the light on the model, then work backwards to position the light in the environment map to achieve the desired highlight.
To do this, you need to bring your render scene into HDR Light Studio Render View window, which is accomplished with a few clicks. (When using Blender, it transfers the data using the Alembic format.)
Now you can add additional lights from the asset browser, but position them by dragging your cursor on your scene, directly to where you want the highlight to be.
This will instantly show how things look and allow the fine-tuning of a light’s controls in the Light Properties window to the right.
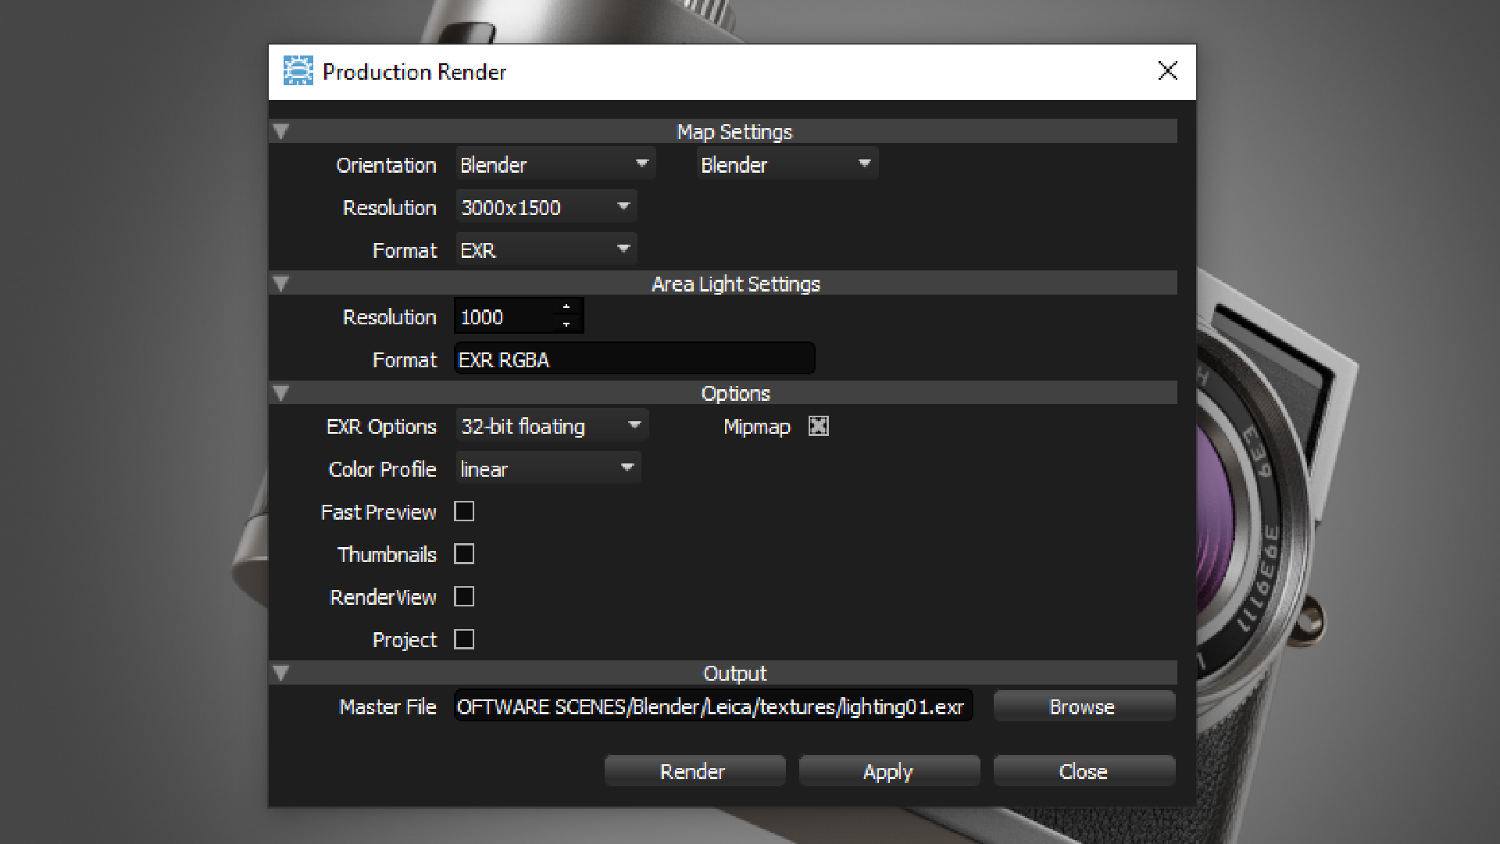
HDR Light Studio – Area lights
Everything that we’ve detailed so far relates to the creation of light sources that are resident in the environment map for your scene and are linked to specific highlights positioned on the surface of your model. As such, they are inherently external to your scene, emitting light into the environment.
But what if you want to add lights that are in amongst the model, that are used to highlight specific features that can’t be accessed from the ‘exterior’ environment map?
This is where 3D Area Lights come into play. Area lights provide the same realism and adjustability as the lights in your environment map, but can be placed in 3D space.
They are controlled in real time in your 3D software and mapped with a live HDR texture from HDR Light Studio that represents the appearance of the light.
This means that where geometry occludes the light from those sources, you’ll get realistic lighting conditions and the effects that you want.
Normally, you’d need to dive in and start adding in physical 3D lights, but with HDR Light Studio, you’ve got the ability to turn all of the product’s measured, accurate and controllable lights.
In conclusion
While we’ve talked here about the work done in the Xenon release to integrate HDR Light Studio with Blender, it’s worth discussing which other systems with which it pairs.
That list is extensive and broad. It includes 3ds Max, Cinema 4D, Maya, Modo, Houdini, Vred, Octane, Rhino, Solidworks Visualize, Maxwell Studio, Lightwave3D and Deltagen. All of these options create a live connection between HDR Light Studio and the visualisation system, so that any edits made to the lighting design in HDR Light Studio immediately show up in the host render system.
It’s also worth talking about pricing at this point. HDR Light Studio is not expensive, by any stretch of the imagination, particularly given the highly specialised nature of the software. Its developer Lightmap recently introduced a tiered pricing scheme.
If you’re a small startup, with annual revenue under $100,000 and you don’t want integration into Vred, DeltaGen or Patchwork 3D, and are OK with email-only support, it’ll cost you £95 a year.
If your annual revenue is over $100,000 and you want a subscription and email support, then you’re looking at £295 per year. If you want the more costly integrations, along with email, phone and web-meeting based support, then an annual subscription will cost you just under £1,000.
There are other options available for floating licences and permanent licenses, but these tiers cover the basics.
While we’ve barely scratched the depth of functionality in HDR Light Studio, it should be clear that this is a system that’s built for a single purpose. That purpose is not to help you edit a HDR environment map. It’s not to help you define lights in a 3D space.
Instead, its purpose is to help you create the exact lighting scheme your visualisation project needs. The mechanics of how that is achieved, meanwhile, change with time and focus.
So yes, you can build environment maps from scratch with this product. And yes, you can paint light and shadow onto your model, to achieve the focus and appearance that will show off your product to best advantage.
At the same time, you can also define 3D lights, based on real-world, measured assets more quickly than using traditional light definition methods. And, yes, the system helps you manage your visualisation assets more clearly than just having a Dropbox folder called ‘HDRI maps’.
HDR Light Studio certainly does all of these things and more. But above all, where it really excels is with helping designers, engineers and digital artists to solve that final riddle in the visualisation process: How can I use light to maximise impact and really make my project sing?
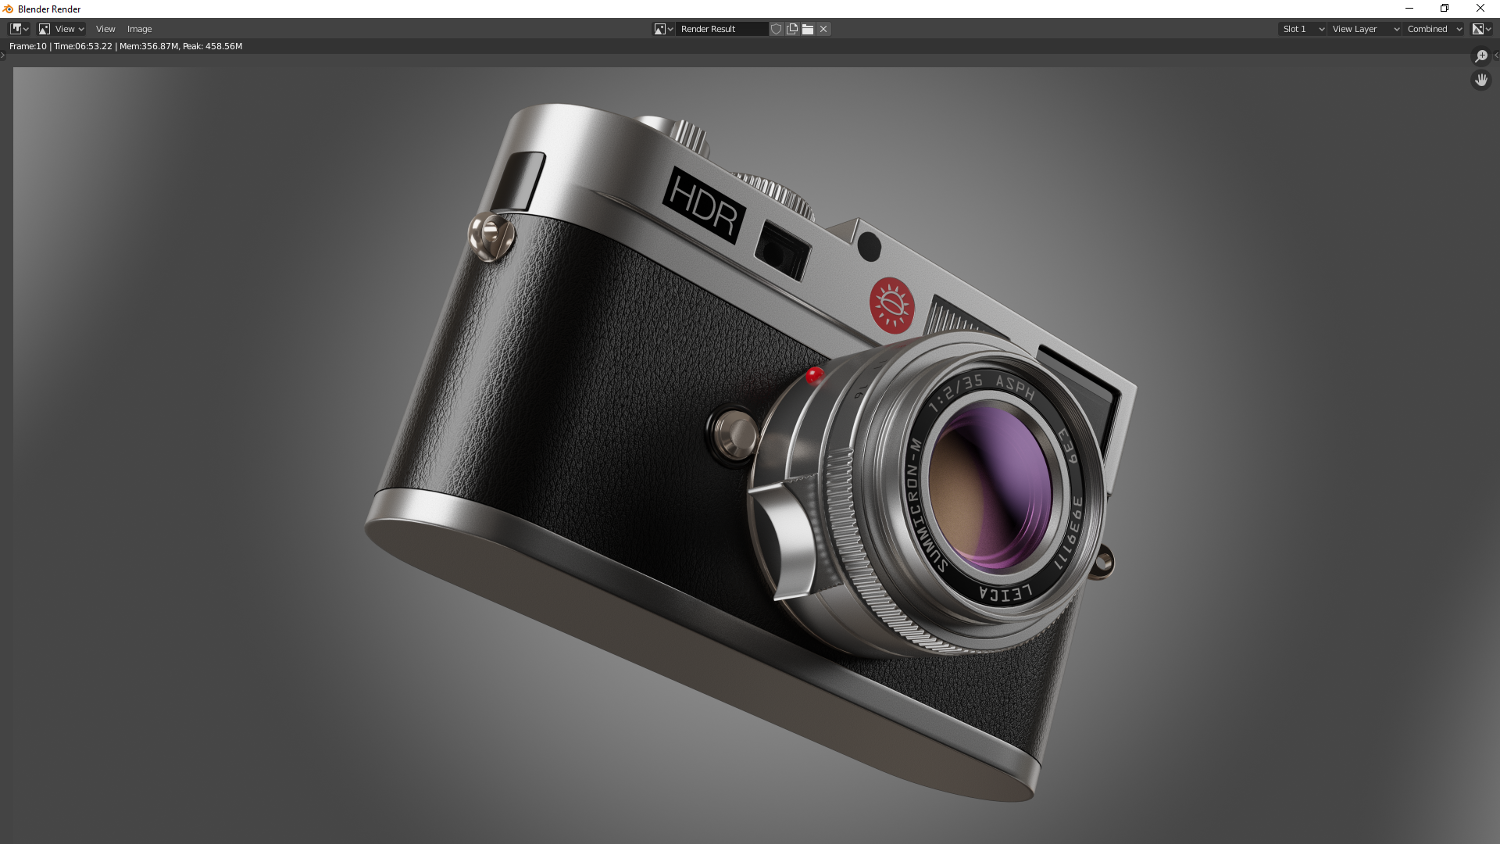
Workflow: From a standard Blender scene to a beautifully lit scene with HDR Light Studio & Blender