
SpyderX Studio – As multi-monitor set-ups become the de facto professional standard, differences between displays have brought colour calibration back into focus. We look at the latest device from Datacolor to help keep things consistent
It may seem like an age or two ago, but back when the professional computing world was dominated by the cathode ray-based display device, the use of display calibration techniques was pretty widespread, particularly among those for whom accurate representation of colour was very important.

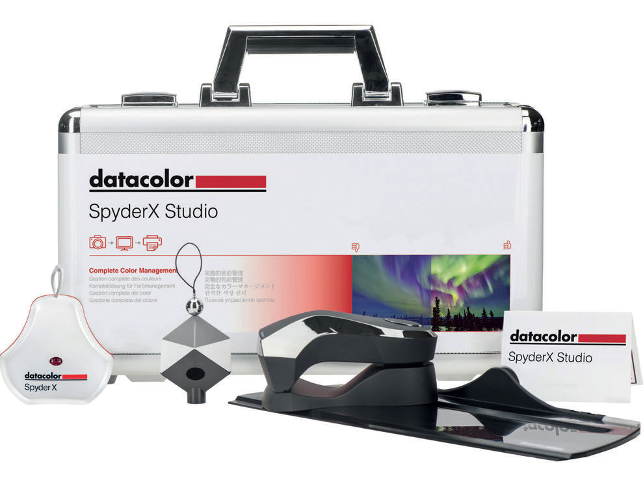
The SpyderX Studio including devices to help with display, camera and print calibration
The issue was that having a display that functioned on the basis of firing electrons at a wire mesh was never going to deliver 100% consistent results. That, in turn, could impact the accuracy of how well they represented colour, a problem that tended to increase with age. In response, calibration devices were used to monitor and adapt software settings to offset the effects of degradation.
But then along came the flat panel with its less-archaic inner workings and its more consistent componentry. These screens, it was promised, would be accurate straight out of the box, and so it has proved for the majority.
For some users, however, the consistency of these modern displays still isn’t good enough to match their professional needs. And, in cases where multiple monitors are in use (perhaps a desk-bound monitor and the screen on a mobile workstation), it’s not unusual to notice distinct differences in how colour is displayed between the individual monitors – and not just between monitors from different manufacturers, but sometimes between monitors of the same make and model, from the same manufacturer.
In short, there’s still a clear need for technology that enables users to gauge these differences and account for them.
This is where Datacolor has been active for many years, with its Spyder range of devices. If you’ve ever used a display calibration device before, chances are it was one of Datacolor’s products, or a rebadged version of the same.
More recently, the company has launched an update to its product line, with the SpyderX range. We got the chance to spend some time with the SpyderX Studio, which brings together the company’s display calibration device, its rather clever software, and a couple of other devices that will be handy if you’re also engaged, as many of our readers are, with the generation of printed materials (for marketing or packaging, for example) and photography.
So let’s dive in and see what we’ve got here.
SpyderX Studio -display calibration
The SpyderX Studio comes in a nifty bit of packaging, in the form of an aluminium flight case, with the three core components safely tucked away in foam.
First out of the box is the star of the show, the SpyderX. This is a small, white USB-connected device that plugs into your workstation once you’ve got your software downloaded and licences organised. (The license card is also contained in the case).
You’ll then be guided through several workflows, the most immediate of which is to calibrate a single display. This workflow runs through a number of tasks that involve both adjusting your monitor’s settings and hanging your SpyderX in front of the monitor at the specified times.
It’s essentially a colorimeter, which is measuring your display’s colour output and finding ways to adjust it to match the real world. The process takes around five minutes to complete and you end up with a corrected display and an ICC profile that might prove useful in other applications that support them (such as Photoshop and KeyShot).
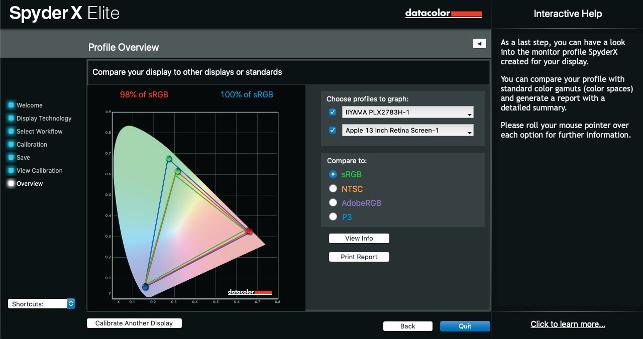
The SpyderElite software steps you through the process, calibrating single or multiple monitors
SpyderX Studio – multiple monitors
The other key workflow available in the Spyder software is Studio Match. This is ideal for a couple of tasks. The first is to ensure that all of the monitors connected to your workstation are matched and displaying colours consistently. The workflow runs through a similar routine as described previously, but this time, it cycles through your monitors to match them together. We tested it on a Macbook (the software runs on both OSX and Windows), running the internal Retina display alongside two 27” Iiyamas.
The process is pretty painless and the end results were surprising. While the two Iiyamas were pretty consistent with each other, the MacBook’s display was way out. A couple of button clicks later, however, all was resolved and consistent.
Studio Match also allows you to carry out the same process across multiple monitors across your office or studio set-up. It does means taking a single machine and plugging into each monitor individually, but it brings things together nicely.
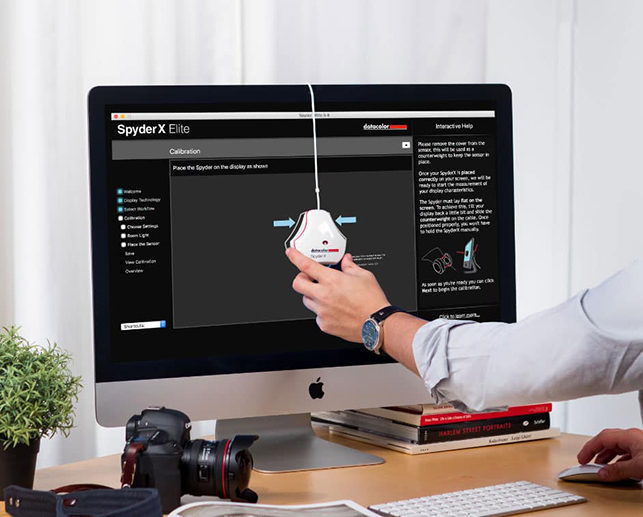
The SpyderX device is small, compact and USB-connected
SpyderX Studio – photography & print calibration
Alongside the monitor calibration device, the SpyderX Studio also includes two other devices that might prove useful to the creatives out there.
The first is a printer profiling system, so that your direct output matches what you see on screen. Use is pretty straightforward: the software guides you through printing of a proof sheet over which you pass the Spectro device which measures the colours reproduced by your printer. Once you’ve got a set of measurements, the system allows you to adjust your printer’s output so that the colours are accurate.
The second device is the SpyderCube. This is a small analogue widget that allows you to measure the white balance and provide contrast levels during photoshoots. If you’ve ever used a grey card, then you’ll be immediately familiar with how this works, providing a small, portable device that can be placed in each shoot location and snapped. This can then be used in your editing software as a frame of reference as the cube represents 100 and 96% white, 18% grey, and 4% and 100% black.
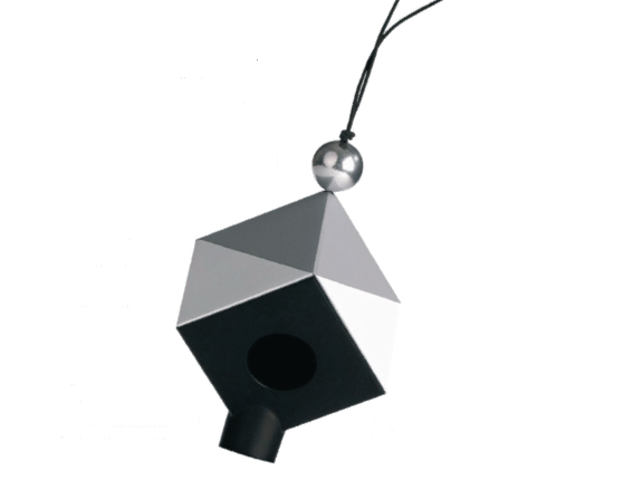
The SpyderCube is an analogue device to help calibrate lighting and colour balance during photoshoots
In conclusion
Datacolor’s devices have been on the market for a long while now and the company’s experience shows in this latest iteration. The experience is well thought-out and as painless as can be.
Remove the kit from the fancy case, install your software, do your calibrations and get back to work.
The system will them remind you to perform the process again every few months (you specify the frequency) and, in this more advanced take on the software, also tracks how those monitors change over time. It also makes it easier, as you don’t need to do a full recalibration each time. Instead, you use the shortened ReCal option that gets you dialled back in quickly.
Ultimately, an organisation needs to ask itself if its use of colour really demands great accuracy. For many working with or more advanced visualisation, this might well be overkill.
If, however, you’re using a mix of systems, reliant on rendering for both digital presentation and printed output (either for presentation to clients or to produce packaging), then having accurately calibrated displays, printers and photoshoots is a musthave.
Plus, considering all of the effort that gets you to that point, it doesn’t seem like such a huge ask to make sure the last stages are as accurate and consistent as they can be.


