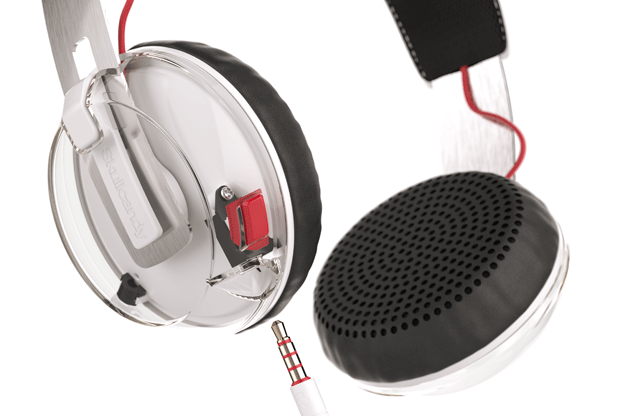

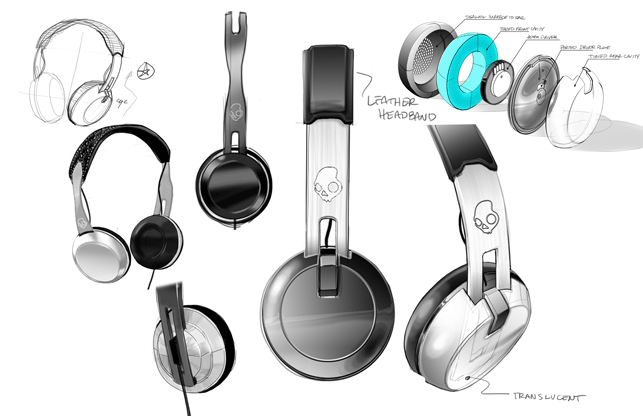
The Skullcandy Grind
headphone with a low profile, classic design
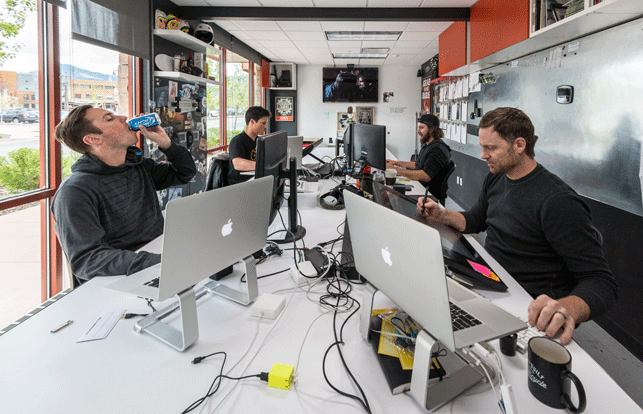
At Skullcandy we work in such a fast paced market, so 3D rendering and visualisation is the only answer when it comes to generating quick and accurate imagery for new product launches, rotating colourways, and custom SKUs.
Being able to prep and align all our departments, from marketing to packaging to digital to retail, is key to a successful product launch, and being able to produce product visuals months before actually having physical samples in hand is one of the keys to this alignment. Working through product updates is also a massive benefit of generating visuals on a digital platform.
Anyone in product development knows that last minute changes (whether it be in engineering or manufacturing) can sometimes completely change the accuracy of previously generated visuals and assets.
If it’s new part geometry, or changing the materialisation and finish of a component… being able to open a 3D file and modify within minutes is a countless time saver vs. any combination of photography or post production modification.
Aside from static assets, 3D animation and motion graphics adds another level of product and brand representation that you just can’t physically do via standard photography and videography.
Currently we use renders from top to bottom throughout the company’s infrastructure. Our Industrial Design team uses 3D visuals to pitch new concepts and functionality, including but not limited to photorealistic imagery, computer animations, and even motion graphics.
Our Mechanical Engineering team uses some lightweight 3D rendering to help communicate design issues with both the internal Product Development team, as well as the factory and supplier teams. But then it spreads out to other departments that aren’t directly related to the product development process.
Our Creative team of graphic designers uses these assets for all branding imagery for print, web, and electronic distribution. Our Packaging team uses the images on all retail boxes to showcase the product, as well as educate the consumer on specific product features and SKDY tech in each model.
When it comes to marketing, our images are used on pretty much any advertisements we generate. High-resolution generation is great for larger assets like banners, billboards, or vinyl wraps on vehicles and buildings.
The same imagery is also used in the Skullcandy web-store, as well as by online retailers and resellers. The same can be said for social media and these images are used for product promotion, as well as education around new product launches or collaborations with industry partners.
Finally, our rendered assets are used to help our training team showcase new product to our in-store retail associates and product reps all around the world and of course, used on all point of purchase displays (POP) and video assets played on listening stations.
Getting the job done
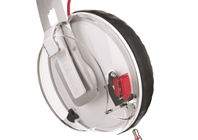
We use Modo for rendering and the starting point involves importing the CAD data into Modo. From there, clean-up is done to fix any problems with the CAD after conversion. In most cases all soft areas such as ear pads, and any other cushions are remodelled by hand in Modo to give it an organic feeling that you just don’t get in CAD. We also add all stitching by hand as well.
This gives us a lot of flexibility in getting the look we want from the fabric areas. Tension on the headband is also corrected. Generally the ear pads are touching when we receive the CAD and they receive a 4 degree bend in each direction to give clearance for the ear pads.
At this point once modelling is done, the lighting is created, using a combination of chrome and black plastic materials combined with HDR Light Studio to get a lighting setup. A custom colour checker has also been developed to ensure that the colours being rendered aren’t too bright or too dark, much like you would in photography.
After that we switch over to Illustrator and grab our different product colour layouts and start creating the textures needed for use in Modo. For the most part, this just entails grabbing images from the guide creative made and saving them out as a PNG.
From there, we create a base setup for the materials, look at all our colours for the product then start assigning materials to each part. This then gets grouped using a name for the product colour, then added to a pass group. By using pass groups we can then duplicate the original materials for the next product variation and add it to a separate pass.
The result is a very readable system. Even if someone else opens the file they will easily be able to navigate it and figure out what they are doing. We will also start doing UV mapping at this point for anything that needs something more robust than standard mappings.
Rendering for design review
For review and initial presentation we use a preview render from Modo that takes seconds to get a good image for reviewing. This way, if there are any changes that need to be made, no time was wasted rendering out a full resolution image.
This allows us to dial in the exact view and look we want for each product quickly. This is especially important for specialty views where creative has a vision and we are working together to reach it.
Rendering for downstream
For packaging needs we render out all views and colours for the specific product and do any corrections in post that are needed. These then get passed on to packaging as 16-bit TIFs in their high res formats. For a large part of our online assets and advertising, we use an internal system that dynamically resizes images allowing for other departments to use them where they need to.
These are also sent to them as high res 16-bit TIFs so that each department has high res imagery if needed. Having this system on the backend greatly reduces the amount of work we have to do after rendering as we no longer have to hand deliver whenever someone needs imagery.
This can be time consuming as needs are always different for resolution and format.
We pitch a lot of different combinations of physical product, combined with countless colours, patterns, graphics, and materialisations.
Being able to quickly, and accurately, mock up the endless options helps us as a group narrow down the directions we want to pursue in the product lineup. This significantly cuts down sampling time and development, and allows us to externally validate colour-way development with test markets before we commit to physical products.
Challenges of big product ranges
We have around 40 different products and each product generally will have anywhere from 3 to 5 views associated with it. For example, Crusher has 24 variations each requiring 5 views to be rendered for a total of 120 rendered shots.
It’s not uncommon that we do final renders for a product and all its variations, only to have something change on the engineering side and have to create a revision.
Some products go through several revisions before we are happy with them. Grind for example was a product that went through many render revisions. For that product alone we have done probably 200 + renders. Everything from a CAD change, to a colour change needs to be rendered over as we try to keep the render as true to life as possible.
We also get requests from other departments for specialty views that exist outside the standard views. We get those often for big product launches and flagship products. These specialty views can range from close ups to detail shots of certain features we really want to showcase.
■ skullcandy.com ■ lightmap.co.uk ■ thefoundry.co.uk
DEVELOP3D Visualisation For Design And Engineering Special Guide
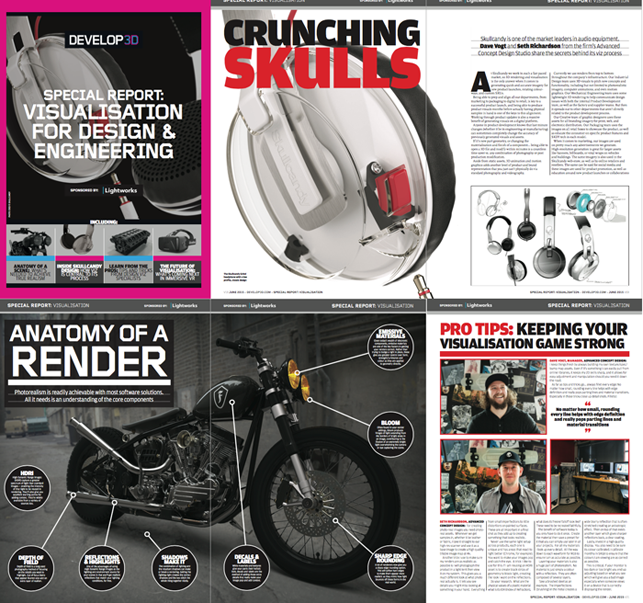
Download our free guide to the latest viz software and hardware, plus exclusive pro tips and views on where everything is heading in the future. Not signed up to DEVELOP3D yet? It’s simple and free to do, and you can download our monthly magazine for product designers, engineers, makers and anyone else wanting to join the party – Sign up here.
A look at the expert design viz process at Skullcandy
Default