

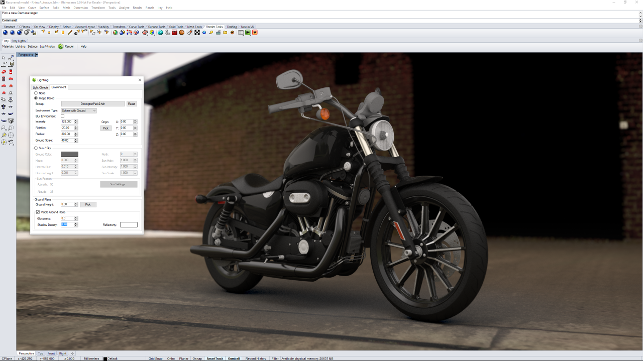
One of our test subjects captured at Donnington Park and using the new Iray for Rhino remderer
The use of visualisation technologies has, in recent years, become far more prevalent amongst the 3D design and engineering worlds than has ever been the case before.
While it was traditionally associated with the high-end industrial design and automotive world, a much larger percentage of CAD using designers and engineers are now generating photorealistic assets during the development process. Whether that is for concept sign off , customer approval or pre-manufacture marketing, it seems that everyone is getting into the rendering game.
Part of the reason for this is that rendering technologies have moved from the traditional, overly complex methods of yester year to a more efficient, more intuitive and much more realistic way of working. The rise of the physically based renderer (PBR) as found in V-Ray, KeyShot, PhotoView 360, Modo et al. has meant that it’s no longer a week long set-up process to generate good, usable results.
HDR images as the source
PBR-based visualisation tools have one thing in common and that is their nature.
The systems, irrespective of which engine they use, will allow you to define accurate materials and textures. But they also allow you to take advantage of image-based lighting (IBL).
Where a traditional system would require that every light source is individually created within the scene, IBL allows you to do it with an image. That image is typically a highdynamic range image (HDRi), wrapped around the 3D model and used to provide lighting as well as reflections in refl ective surfaces.
In the photograph world, HDR images are described as a means of capturing not only colour at each pixel, but also that pixel’s intensity. In the visualisation world, HDR images are useful because they contain the colour information about a scene as well as the intensity of the light at each pixel in the image.
Almost every rendering focussed technology is delivered with a range of HDR images and they’ll be described as scenes, environments or lighting sources. Every system has a different selection of varying degrees of usefulness.
The good news is that there is a wide range of sources for these images, to extend your quick set-ups. Some resources are free whilst many are paid for, with some being very expensive indeed.
If you want to capture your own, there are a number of options. One workfl ow involves using a series of images shot into a mirrored ball using multiple exposures of the same shot, then a complex arrangement of software to patch them together. The other alternative is to hire a Spheron camera. Both are costly in terms of cash and time.
But we recently discovered, thanks to a talk given by animator Steve Talkowski (sketchbot.tv) at the KeyShot World event earlier this year, a more cost effective way that might prove interesting to many.
A lower cost alternative research
It turns out that the current boom in virtual reality and immersive capturing hardware is going to give us some benefits – there are now more 360 degree cameras on the market than you can shake a stick at.
One such device is the Theta S model from Ricoh. The Theta S is a small, compact unit and features two 180 degree lenses with associated 12 megapixel sensors, mounted on either side of the device.
Internal storage is a respectable 8gbs and you connect to it via an internal WiFi access point or micro USB cable.
The two lenses allow you to capture the full 360 degrees surrounding the camera in one shot – with some smart software that stitches it all together on board the device.
Now, the clever part comes in two features. The first is that Ricoh has an open API, so some enterprising folks have been able to develop their own applications to control the camera. The second is that the system allows you to capture different exposures for each shot. This is where it gets very interesting.
If you’re manually creating HDR images, you need to be able to capture multiple exposures (often referred to as bracketing) of the same scene. Some cameras and smart phones do this already – try switching on the HDR option on your iPhone or Android device.
What this means is that the third party developers can remotely trigger the camera via WiFi and have it capture a series of exposures of the same scene. This is exactly what these apps do. So, let’s explore how it works in practice and the results that are achievable.
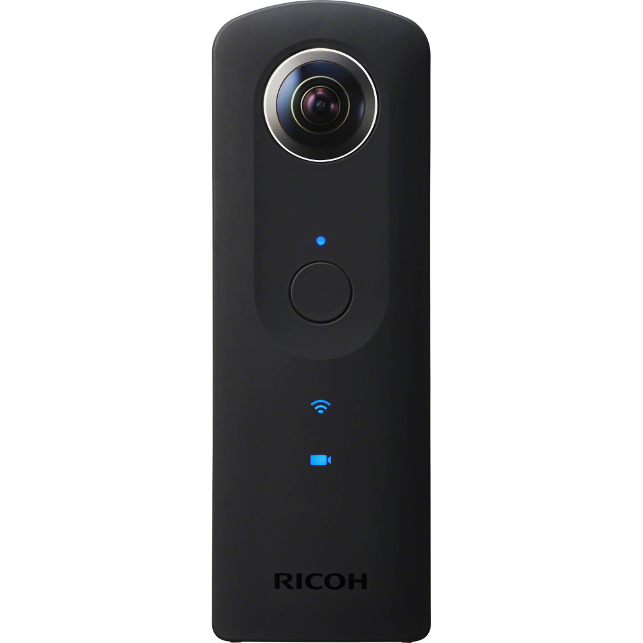
The Theta S from Ricoh is a small, compact unit and features two 180 degree lens with associated 12 megapixel sensors
Getting set-up
The Theta S is a small, compact unit so if you’re going to capture a scene that you want to use in a rendering application, the chances are that you’re going to need a tripod.
We’ve been testing the unit with two Mannfroto tripods, one which is perfect for table top work whilst the bigger unit is perfect for those large expansive scenes.
Whichever you choose, it’s worth considering the scene, the application in which you want to use it and your intended workflow.
See below for our main tips:
#1 Camera position is key
This is a big thing to consider. The camera will capture everything from a single point in space. If you intend the final result to feature the environment as background, then you need to be mindful of where the camera is placed.
For example, if you’re rendering a small object, you can simply place the camera where you need the object to be (without a tripod if it’s level).
If you’re working with a larger object and the possible view points will be at eye level, then you need to make sure that your camera is where you’d typically look – that’s where the tripod comes in useful.
Some systems will allow you to adjust the environment (VRED, KeyShot and others do a good job of this), but CAD integrated applications typically won’t. A bit of forethought and experimentation here will be benefi cial in the long run.
#2 App settings
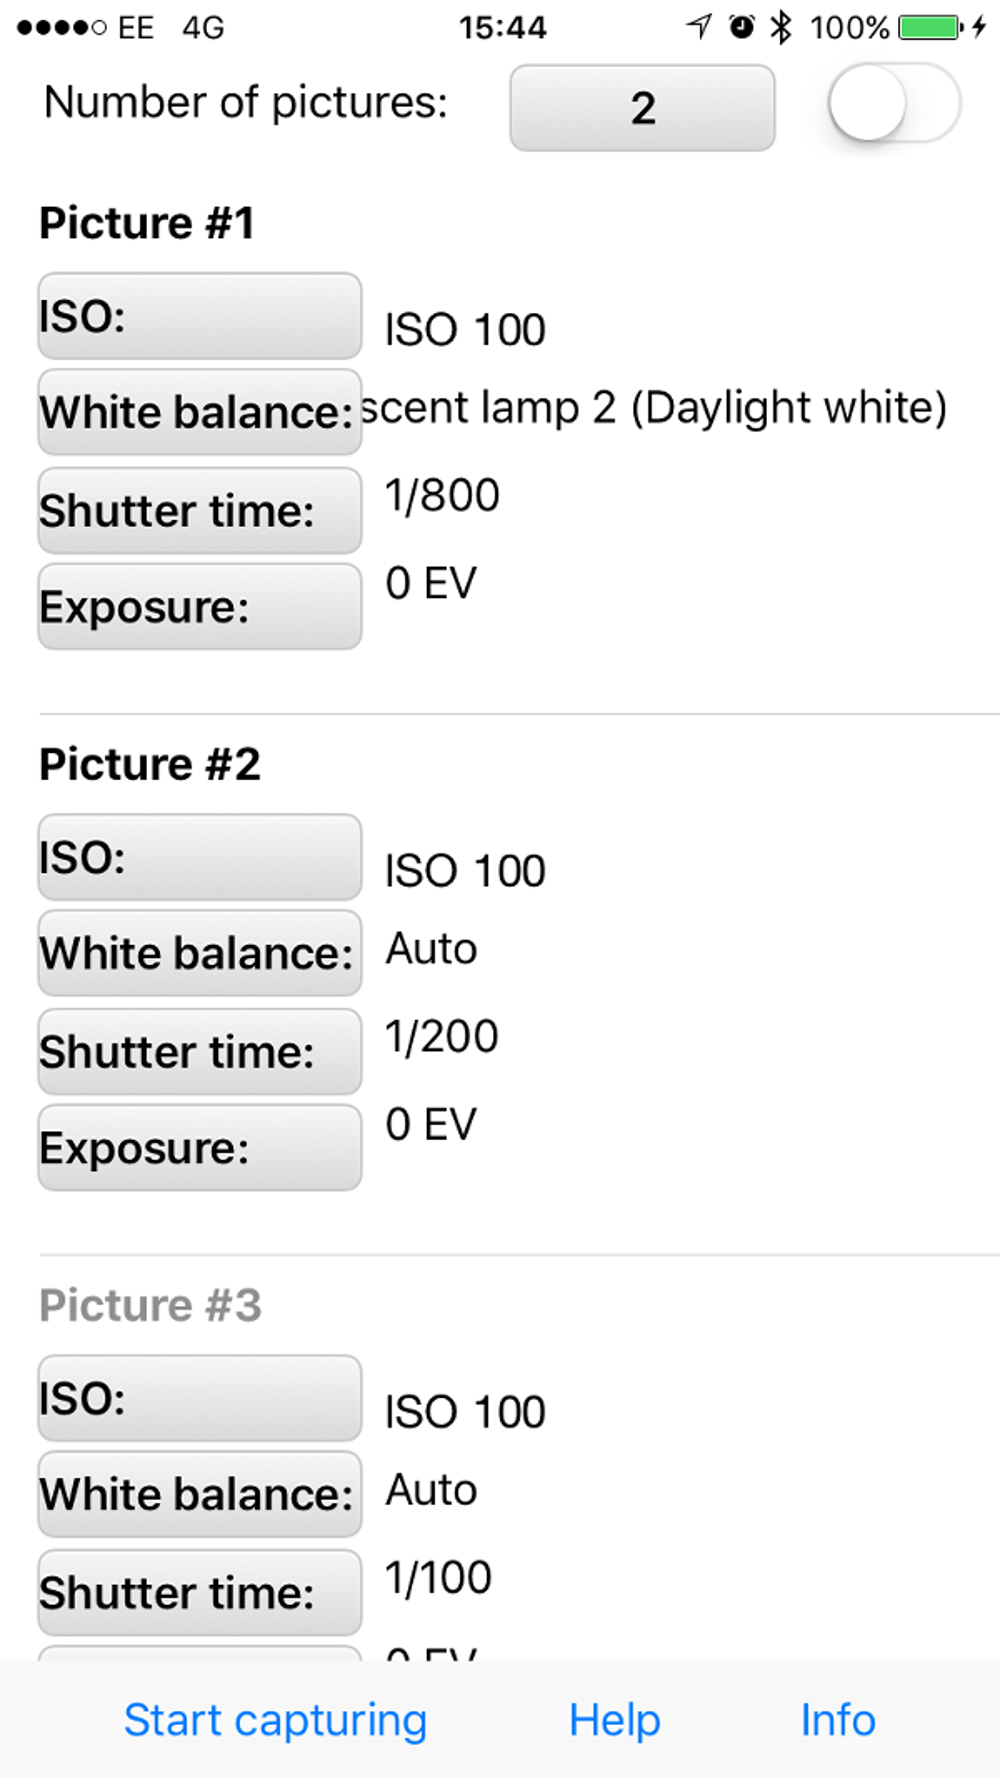
We’ve detailed some of the apps available to do this opposite, but whichever you use, you need to make sure your settings are right otherwise you’re just wasting time.
Things to look out for are exposure requirements and the number of images captured. The most that the system will handle is 19 at a time.
This is done using the ‘Full Range’ setting in the HDR 360 app. I found this the most useful (if a little pricey at 50 quid) because it’ll automatically compensate for different lighting conditions and sources (such as artificial light) and has some nice presets if you’re working at night.
#3 Timing is everything
Depending on the app and your settings, the camera takes between three and five minutes to capture the images you need.
That doesn’t sound very long but, trust me, when you’re stood with 300 quid’s worth of camera in a busy-ish place, it is.
This is particularly true when you’re a good few metres away from it so your shiny, new HDR environment doesn’t have you starting at the camera as a focal point.
The Theta S’s WiFi means you can get out of the way, but it also means your camera is stood on its own. That’s fine if you’re working in a studio or a client’s premises. But if you’re in the wild, then you’ll panic in case someone runs off with your expensive kit. It also means that there’s a greater chance of someone accidently walking through one of the images. Timing, as they say, is everything.
#4 Lighting chances
Following on from the timing issues, it’s also worth considering the lighting conditions with respect to time.
As previously said, if you’re inside, this isn’t so much of an issue, but if you’re outside and it’s a bit windy, that means that the lighting is changing as clouds move across the sky.
As you’re essentially capturing a time lapse that is merged into a single image, this means that your main light source (the big bluey/grey thing above you) is going to be mostly grey or white.
#5 Back plates & capturing everything
If you’re out capturing a few scenes (and this set-up is readily portable), then you’ll also want to snag a few backplates – particularly if you’re using a rendering system that supports them.
This allows you to use a proper photograph for the background, but derive the lighting from a matching HDR environment – a perfect mix. If you’re working on the lower end of the resolution spectrum, a smartphone photo will work nicely. Failing that, pack your DSLR as well.
Whichever you use, make sure that you capture everything you need – for both environments and backplates. You might not get another chance and, if you do, the lighting will have changed since you first did the shoot. More is definitely better.
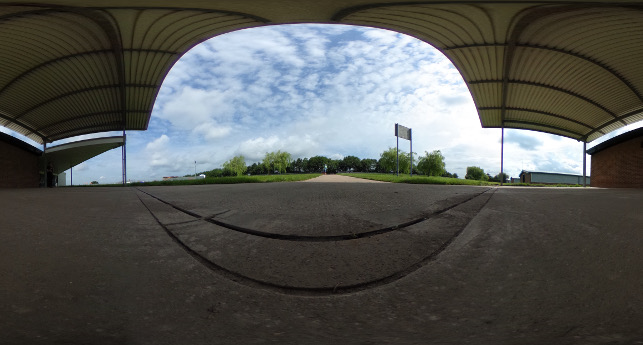
The environment used to render out the bike in the image above – captured in five minutes at Donnington Park
Post processing
So, you’ve been out, captured your image sets and transferred them onto your computer. What next? How do you take 19 separate images and turn them into a HDR environment? The answer is simple.
Photoshop. Handily, Photoshop now has an automation routine that will take your images and merge them into a single HDR image.
It’s found under File/Automate/Merge to HDR Pro operation. This pops up a file selection dialog (either grab the file individually or put them in a single folder). Photoshop then does the processing for you.
It’ll remove any ghosts (where items have shifted between images) and even do any alignment needed, though this should be minimal in this instance. You then have the option to work with the image as is or have it transfer to Adobe Camera Bridge to do a bit of adjustment. This latter option is useful for images shot under artificial lighting conditions.
Once done, you simply save the image out. There are a number of formats for storing HDR imagery, but perhaps the most common is the radiance format (with the .hdr extension). Best to check with your renderer to make sure you’ve got a good match.
The last task is to load it up into your favourite rendering tool and see how it looks. Honestly, it’s that simple.
Conclusion
Image-based lighting is a brilliant way to get your renders to look the part, but more often than not, you’ll find that the stock images don’t work exactly how you want them to.
You could go off and buy a closer match or you could spend hours on end modelling one up or fiddling around with a mirror ball and a camera. Or, you could spend a couple of hundred quid and be able to capture them whenever and wherever you like. It sounds flippant, but there’s a real business case here.
How would you rather show your client that product – in an abstract environment or where it’s actually going to be installed or used? The latter is always more convincing.
Or consider the amount of cash often spent on product photoshoots, just to find that there’s a new design change and a reshoot needs to be done. What if you captured the photo studio at the same time and used that to render out a new version of the prototype? That’s money saved, right there.
An environment capture with this workfl ow isn’t going to be 100 per cent perfect but for many instances, it’ll be perfectly suitable and be available whenever you need it.
Of course, you can always dig in, expand the workflow and adapt things with both a little Photoshop work and add in some additional lights in your chosen renderer to really nail it.
It’s a nice combination of consumer level hardware (in the form of the camera and your smartphone) and some clever software that can solve a real issue for many of those interested in visualisation.
Apps for HDR capture

Product: VFX HDR
Supplier: hdr.vfxgenesis.com
Platform: Apple iOS
Price: £1.99
Notes: Super simple. Connect to the camera’s WiFi, load up the app, choose the resolution you want (a choice between 5376 x 2688 or 2048 x 1024) and off it goes, capturing 13 exposures of your scene.
Product: Theta S HDR
Supplier: tequnique.com
Platform: Apple iOS/Android
Price: £39.99
Notes: This one is more complex. You can define the number of exposures (up to 12), have full control over ISO values, shutter times and exposure compensation. Complex but powerful.

Product: HDR 360
Supplier: bradherman.com
Platform: Apple iOS/Android
Price: £49.99
Notes: This one costs a lot more but it’s worth it if you find the workflow useful. Full set of presets (for both lighting conditions and lighting sources), automatic tone mapping — the full works.
Product: Theta S app 360
Supplier: ricoh.com
Platform: Apple iOS
Price: Free
Notes: The Ricoh app doesn’t do much but it’s useful for browsing the images on your camera, transferring to your phone (for a quick email out) as well as switching into VR mode, which is pretty slick.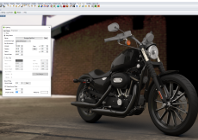
Tutorial: creating your own High Dynamic Range environment
Default


