

I’ve spent the last few months since it shipped working with Inventor on a wee modelling project to dig into the latest release of Autodesk‘s flagship product. While our role as a magazine is to get readers up to speed with not only what’s in these systems, it’s also to give them a use case. While this corner of internet’s been mildly abuzz with talk of how direct modelling is the next big thing, one of the things you don’t often see is a use case.
Fusion has been tagged with that Direct Modelling flag, but looking at a couple of workflows, it’s clear that it holds much more than just pushpulldragdropsurface. One of those in the Form Editing tool. This allows you to grab a geometry and edit control points on the edges to create the form you require. For those that are used to tools with heavy surface modelling, this might seem pretty basic, but for those that are new to surfacing, it’s worth exploring.
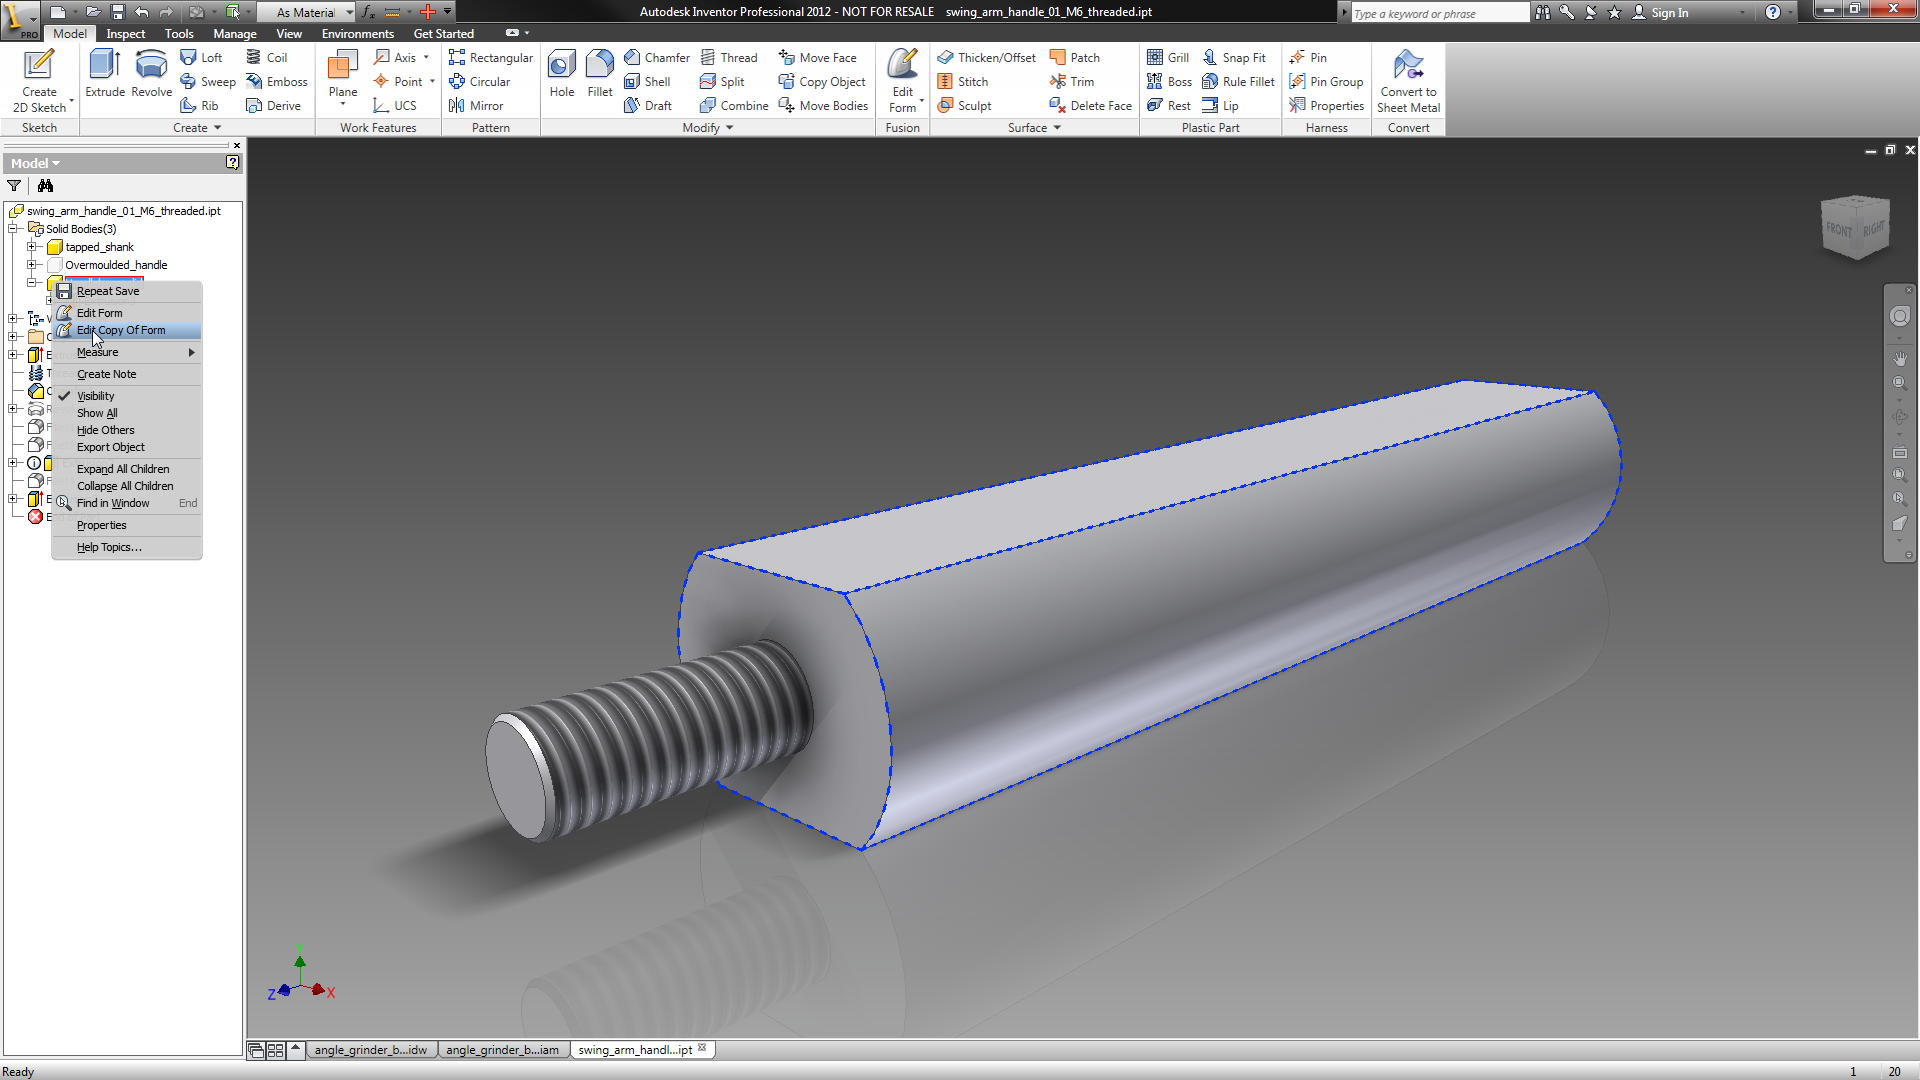
The start point, particularly if you’re an Inventor user, is a solid body. Here you can see a basic handle built using multi bodies (for reasons that willl become apparent). I found it makes life easier to open the part on its own, rather than in-context.

Here’s your part. Notice that there are two bodies. One is the threaded shank that you don’t want to change. What you really want is to edit the overmoulded form. Find that body in the tree, right click on it and hit Edit Copy of Form. This is key. Rather than buggering about with your basic geometry, a nice workflow is the ability to automatically have the system copy it and allow you to work on that.

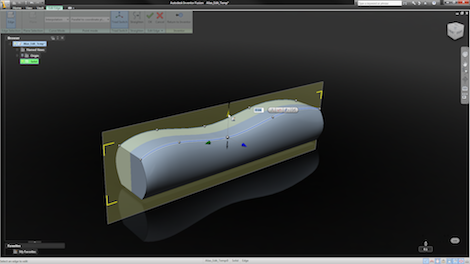
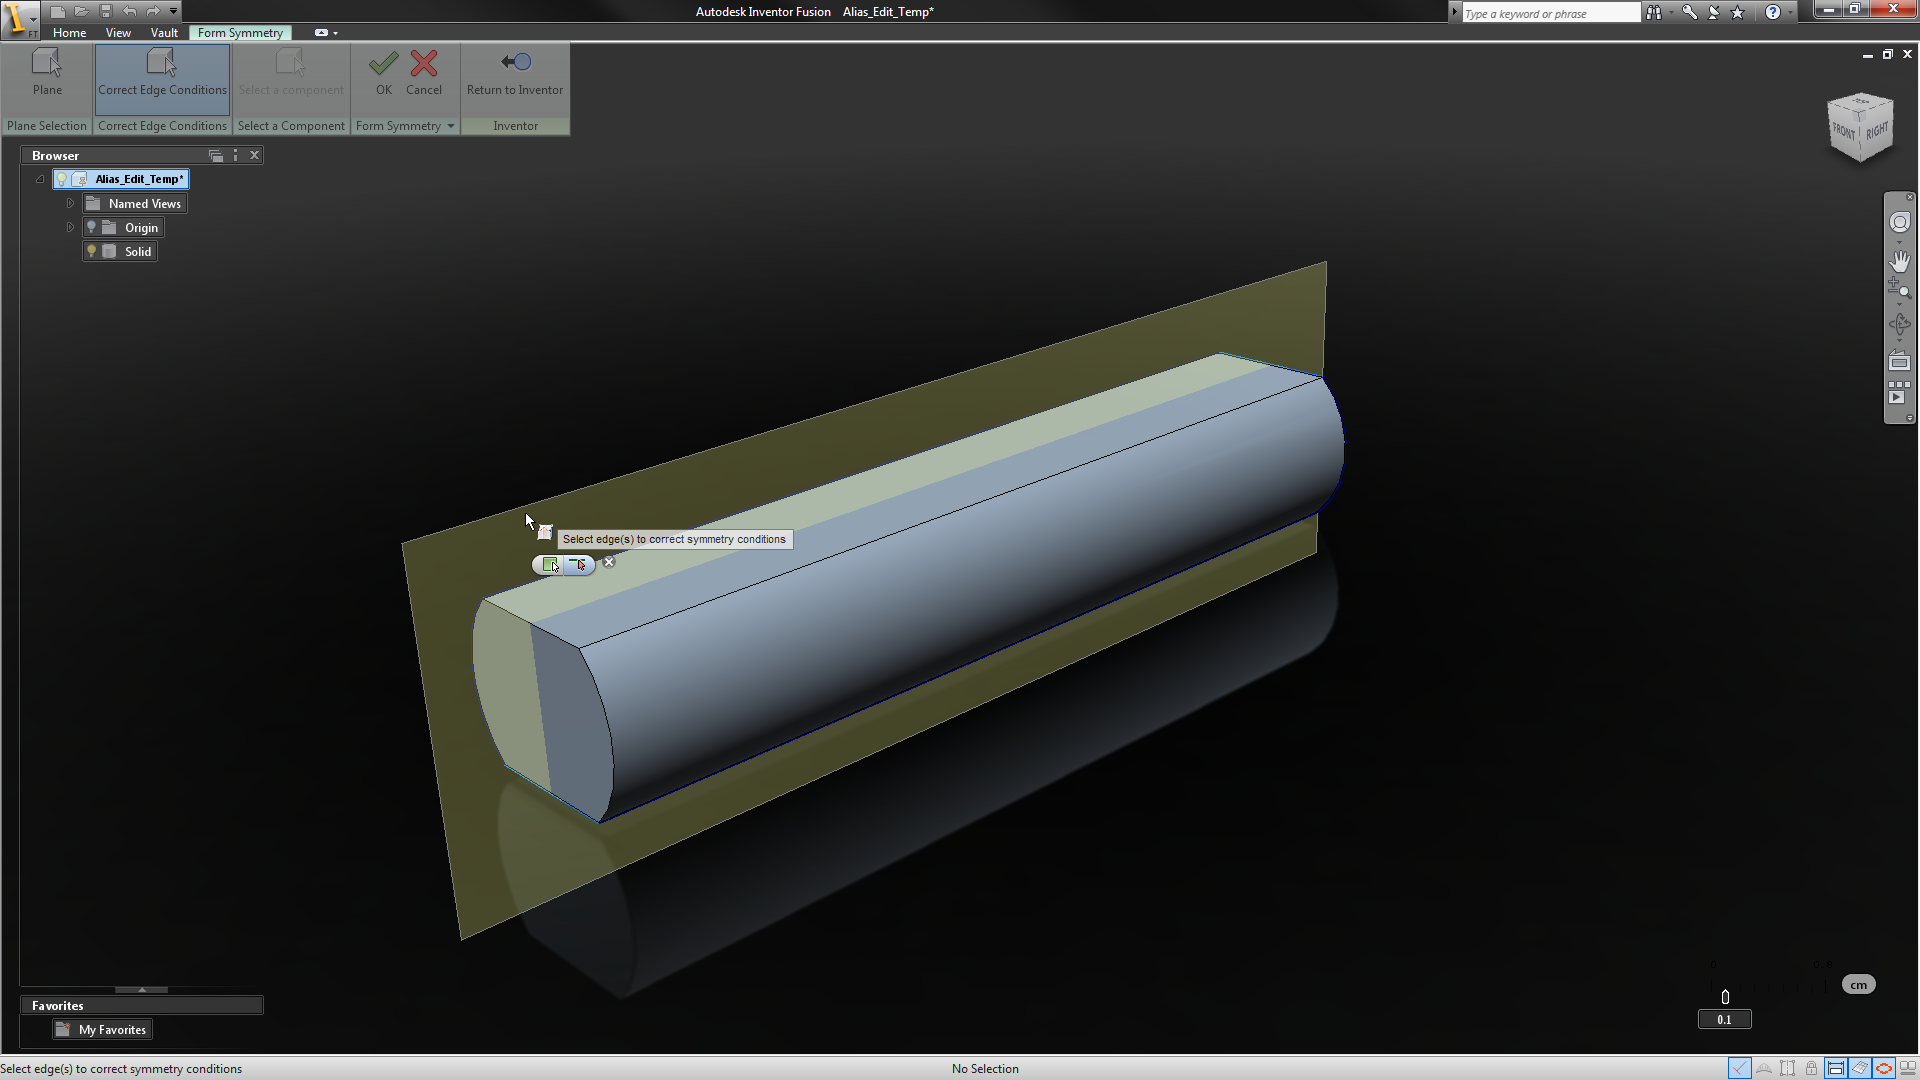
This kicks off a copy and transfer to Inventor Fusion. Once the system has started up, you need to consider the form you’re working on. A ultra useful tool is the Symmetry functions. This allows you to use a reference plane to define a plane of symmetry. If you’re working on a component like this, it’s ideal. It means less editing, less messing about trying to match edges and control points – and if you’re working on an injection moulded component, working like this should give you a nice clean split line if you have the plane bang in the centre.
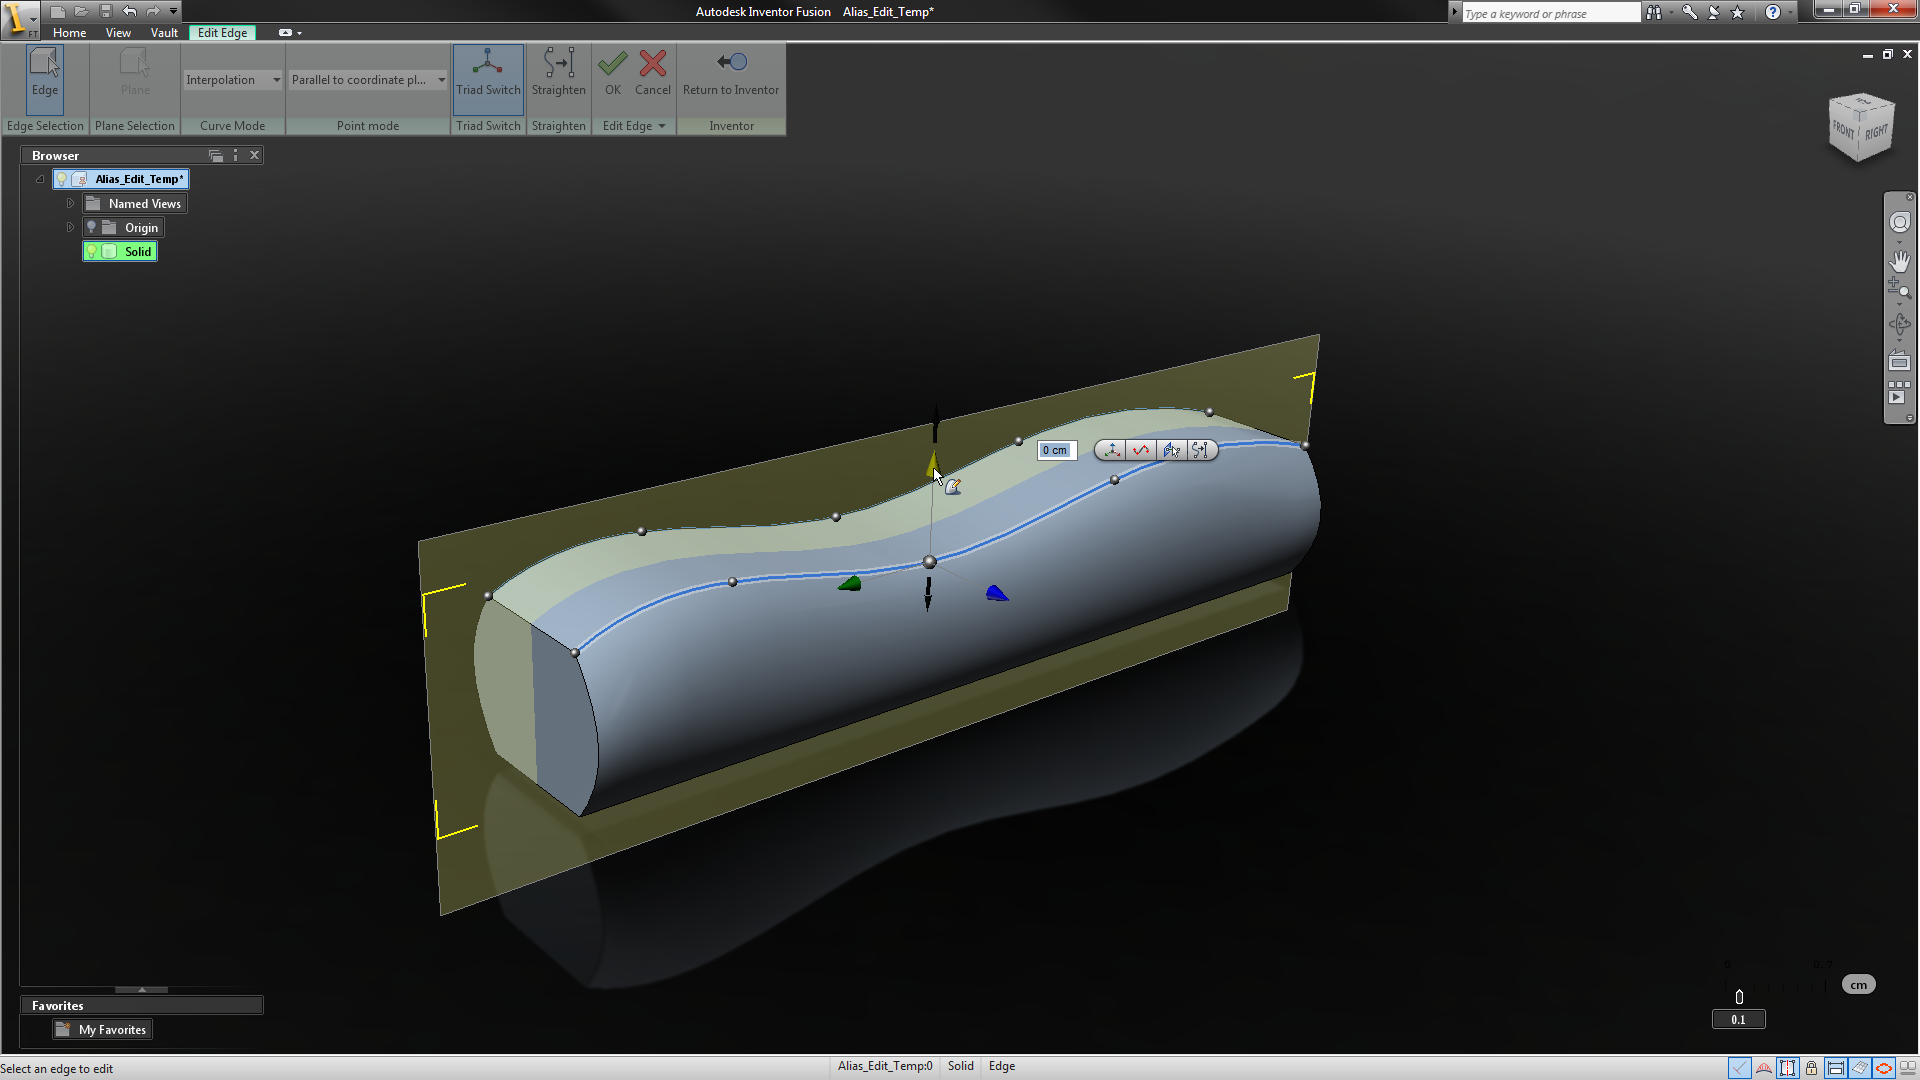
Fusion’s Form Editing tools work on Edges, rather than UV curves on surfaces. You select the edge, add in control points (click where you want them) and manipulate those points. You can do this freely, but frankly, you can get yourself in a mess. There’re options worth exploring how those points are edited compared to related surfaces. My biggest recommendation is to use the Triad option – this gives you much more control over movement of each point, even allowing you to dial in numerical values rather than working it by eye. You can edit the form as you see fit, use multiple edge edits to achieve the form you want. The whole thing is pretty damned slick and its worth exploring the tools.

Once your edits are finished, you hit the Return to Inventor icon and it transfers back a new body that’s available for further work.
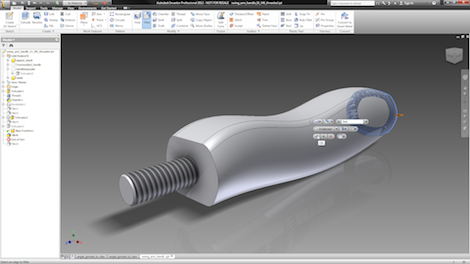
Once the basic form is back, you can then start to add additional features. In this instance, I’ve added a few fillets along the edges to round it out. It’s a pretty basic component so it does’t need too much work. That said, Inventor 2012 brings in some new variable radii G2 continuous filleting tools that could help nail this form if you’re looking for something better than “rounded off”. it might seem a little odd to do this in Inventor proper, when it’s a simple case of pushing in a fillet in Fusion. Fact is that you might want to edit the original form Edit derived shape and if you did that with Fusion, you’d struggle to edit and reapply the fillets. This way, the workflow should be much more robust when updating and effecting design change.

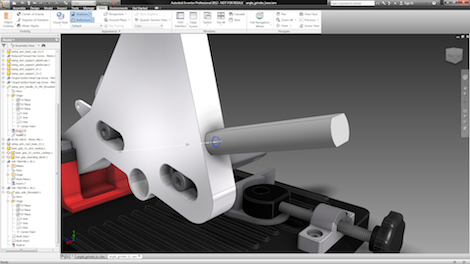
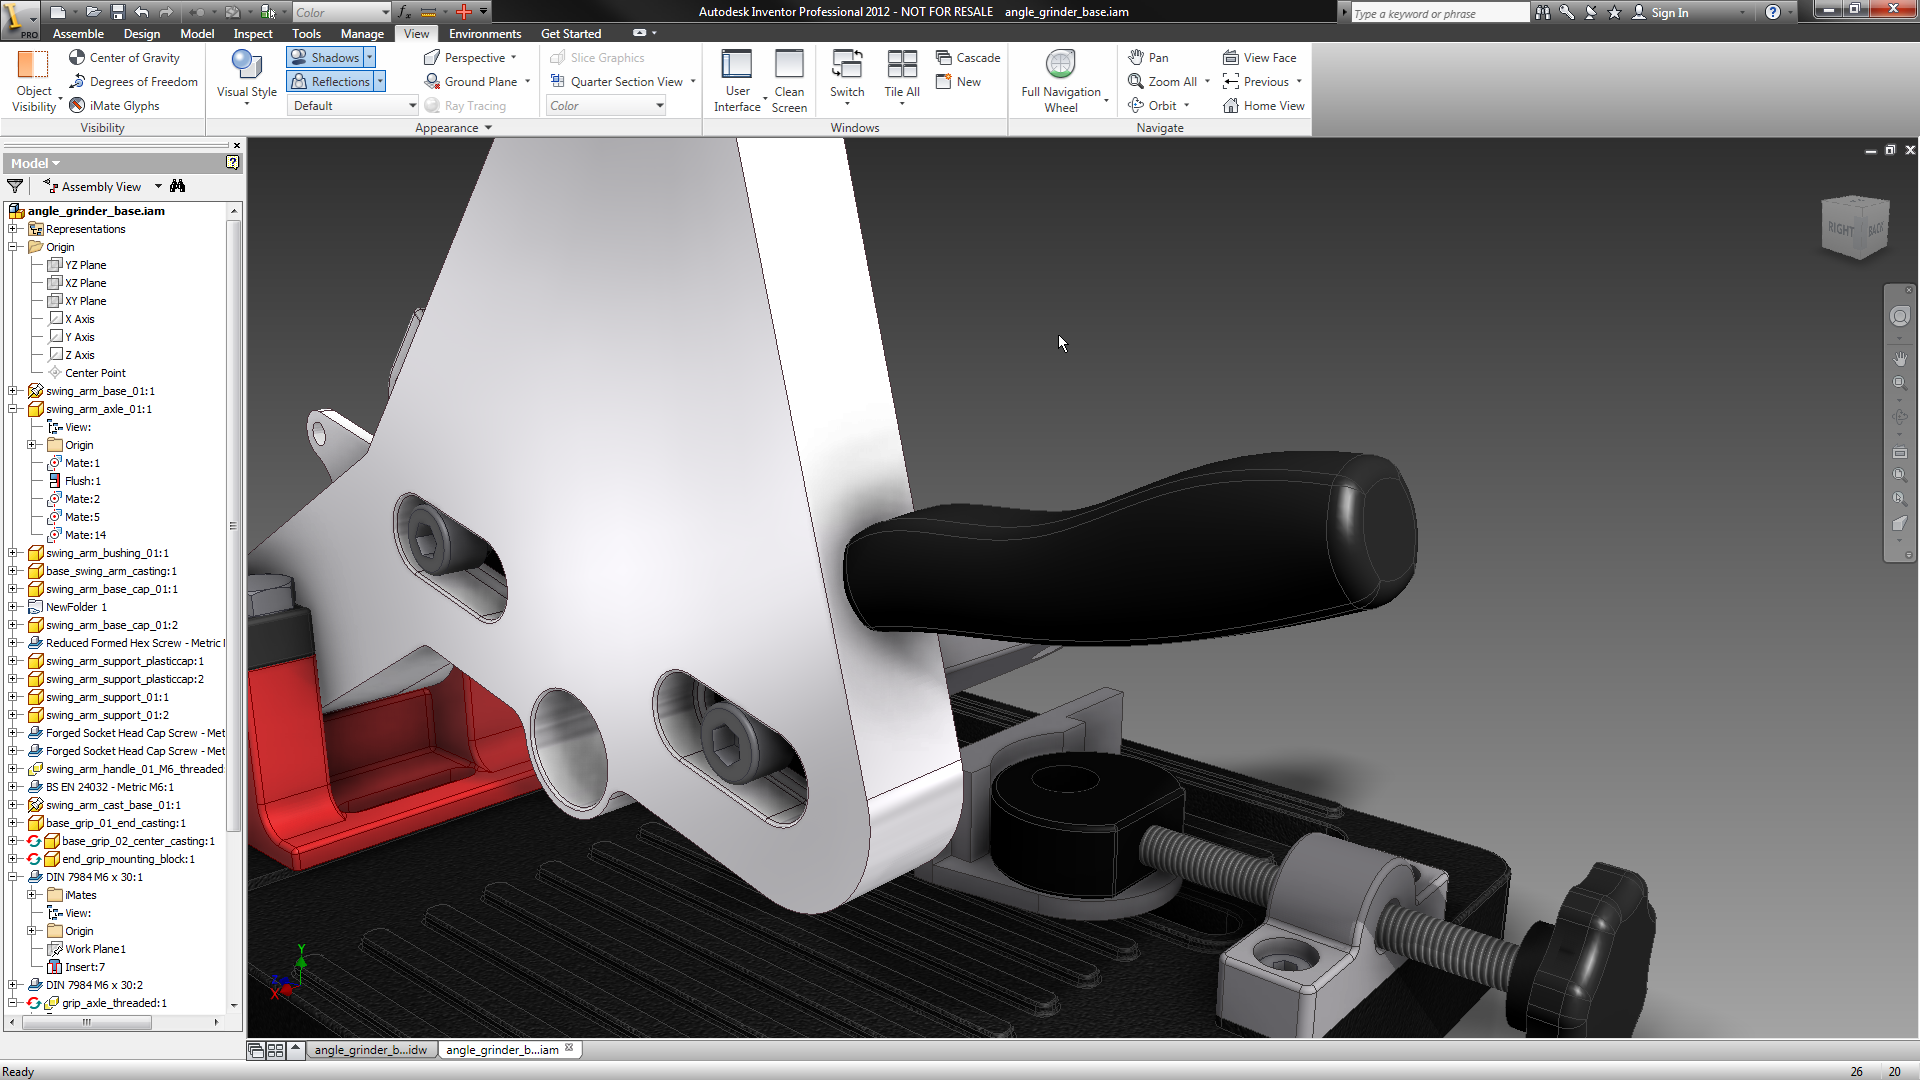
Final shot – component back in position. Edit time? About 3 minutes from start to finish.
Working through this makes me think that the conversation about what the best modelling method (see the comments) is, direct vs history vs parametric vs whatever, is just a bit redundant. What matters is how quickly you can get a job done and, yes, how quickly you can update a model when that inevitable change request comes in (or you realized you’ve dropped a bollock). While the Inventor/Inventor Fusion workflow isn’t ideal (this should be in a single system – that’s coming I’m sure), it shows that you can mix and match technologies. Considering how long it would take to effect that kind of geometric modelling change using a standard history-based system, you’d have to create multiple workplanes, multiple sketches and multiple features. With this, you edit it and snap, it’s done.
I’m also aware that for those users who are surfacing aware, this looks like a joke. If you’ve dug into Alias, the ISDX tools in Pro/E, in fact, the likes of Catia or NX, it’s pretty standard fare. Which is perhaps the point. This isn’t anything new. it’s just that a new, much wider range of users are now getting access to these types of tools. Complex surfacing is growing. Even the most innocuous components today need to be styled. At least everyone’s starting to get the tools to do it quickly and efficiently.
And they say 3d design tools got mature and there’s nothing interesting happening. My arse did it. It’s getting more fascinating than ever before. So what I want to know is how many people are using these tools. What do existing users of Inventor make of the 2012 release? What’s the highlights? I’m curious in case I’ve missed anything out. Hit the comments if you fancy..


