

One of the best things about this job is that we get to test drive all of the latest bits of technology and for me, there’s nothing more satisfying than sending off some data to an rapid prototyping vendor and waiting for that FedEx box to arrive back in the mail. if you’re going to write about these machines, then surely you need to try them out, see what they can do – right?*
Anyway, today brought me a test assembly build from Z Corp, over in MA. The Z 650 is the company’s high-end machine, bigger build chamber (@254 x 381 x 203 mm), fastest printing (2 to 4 layers a minute – layer size being between 0.089–0.102 mm ) and it’ll build in full colour at 600 x 540 dpi. The machine also sees a new black binder introduced, so for those working with darker colours, less ink is used as it doesn’t have to make up that black from the others. It also introduces the integrated clean up station that debuted with the 410 last year, so mess is reduced greatly.
So, here’s what its like receiving a rapid prototype in the mail:
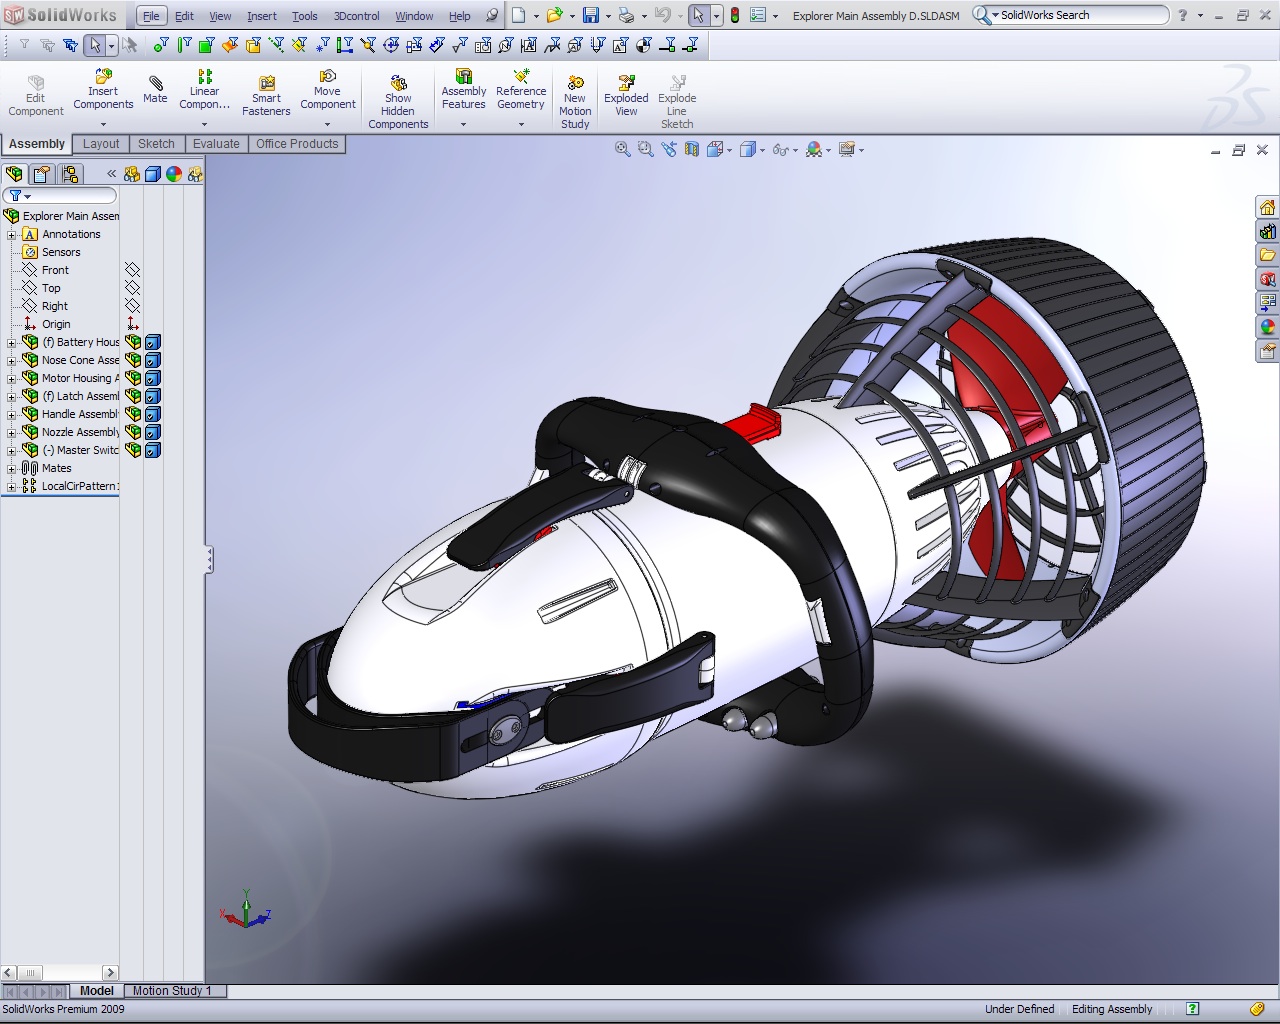
#1: Start in SolidWorks, create the model. you then output the data to either STL if you’re working with a colourless RP process (pretty much everything else other than Z Corp). With Z Corp, it supports colour, so use it, and to do that, you need a VRML (.wrl) file. Waiting a while and then you get excited, you get the email notification that your part is being dispatched..

#2: Box arrives with glee on your behalf, absolute horror on the behalf of your significant other (if you work at home – and do excuse the state of the kitchen).
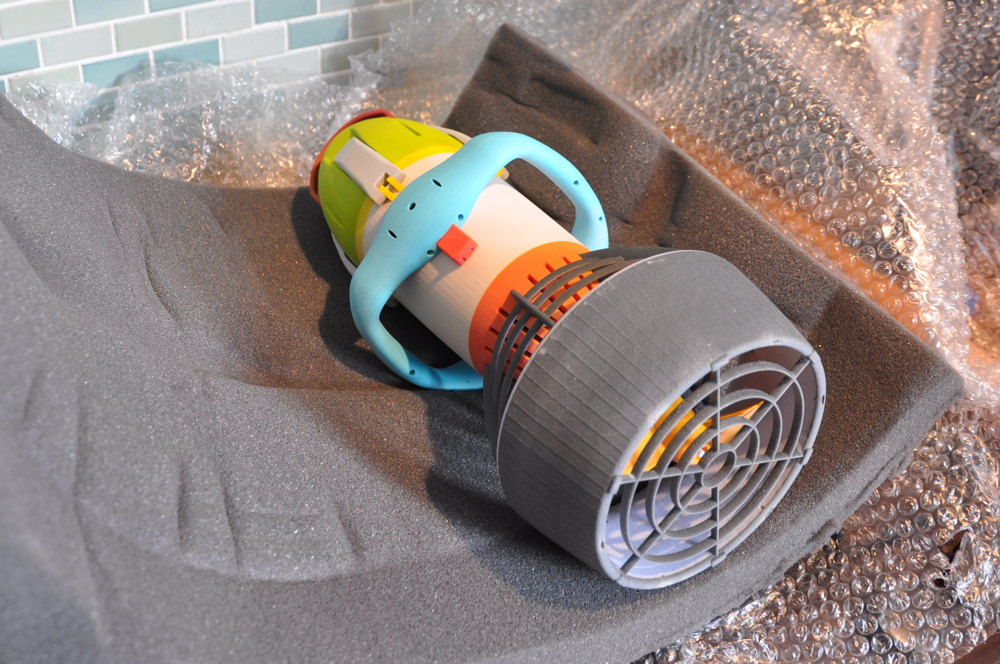
#3: This thing looks sweet. Build is very stable, finished nicely (Z Corp have been working with us long enough to know not to mess with the results – unlike some other vendors).
#4: This thing maxes out the Z650’s build chamber in length, so shows what it’s capable of in terms of size – this is around 13.5-14″ high.

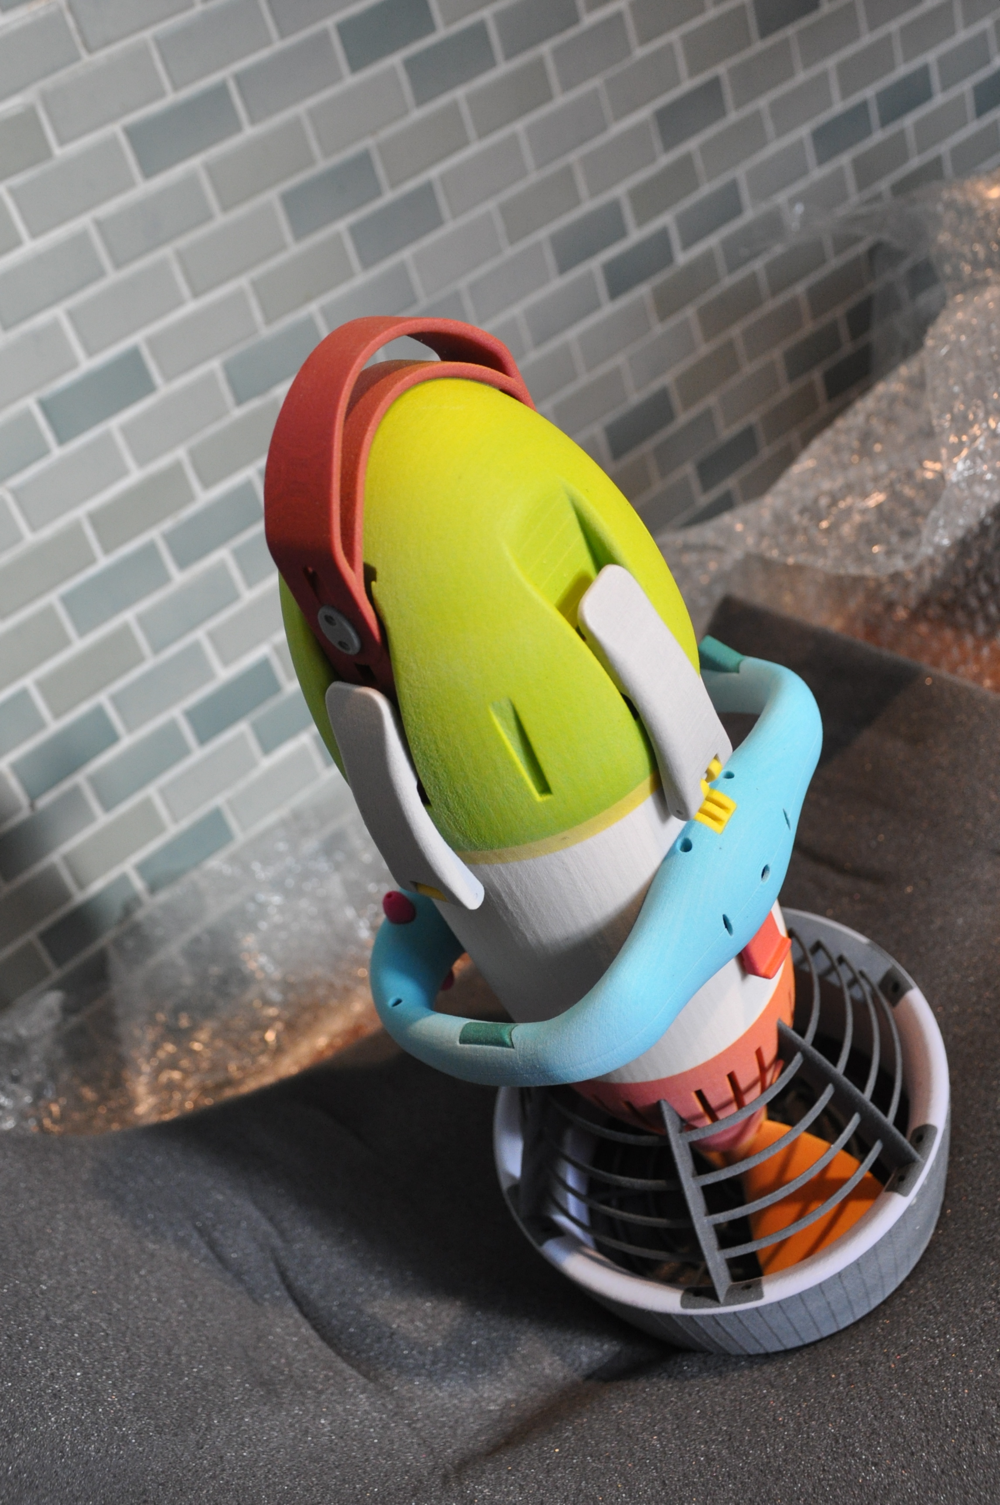
#5: Details are nicely replicated, you’d have very little finishing to do with this model before a presentation with a client. With the colour Zprints, you have to be careful with too much aggressive finishing as the coloured binder is only printed on a few mms thick ‘into’ the material.
But what about the colours? I was pretty surprised. Look at the first image – Black, White, Red. Not this. I spent some time going through the assembly file to remove the colour that existed on the model (as have been built), using the Appearances funcitonality in SolidWorks (itself not an easy task). Go the model in a nice state and exported the VRML file and sendspace’d it off to Z Corp – who duly built the model and sent it back. I’m in touch with the SolidWorks guys to find out what’s going on with this and I’ll post an update here when I get some feedback.
But if it proves anything, it proves two things:
- a) the Z Corp 640 Z printer is an incredible peice of kit and can generate stunning vivid coloured models at a scale that’s increasingly in demend in a very wide spread of industries (including architecture in a big way).
- b) it proves that user error is inevitable. I thought I’d have know after all these years to double check the geometry I’m sending out, that it’s what’s needed at the other end and suits my purposes. You live and learn I guess. I thought I was going to get back a slick looking model in three colours. I got back a brightly coloured model that looks pretty cool on my desk, but doesn’t quite match up with expectations in terms of appearance. That said, they do match Greg’s shiny/horrid new trainers.
January’s Develop3D will feature an indepth of the Z650 – so stay tuned or register if you haven’t already.
*OK, so not all magazine’s do it – they should…


