The rise of interest in Virtual Reality (VR) is currently at the beginning of a hype curve that’s going to last for the foreseeable future. The combination of consumer focussed hardware and software along with a rebirth of interest from the professional community means that we’re on the cusp of such immersive environments becoming usable for the majority rather than just the cash rich enterprises.
In the box on the opposite page we talk about how the Head Mounted Displays (HMDs), such as the HTC Vive and Oculus’ Rift, are not only affordable but easy to set up and confi gure. The time is ripe.
Simultaneously, there’s also a need for those of us with both budget and project pressures to ensure that we adopt the VR strategy that suits us best. Not every organisation has the need or, indeed, the room for a full scale environment set-up.
So is there a viable alternative that’s not permanent but could be portable?
This is where Lenovo’s brand spanking new ThinkPad P71 comes into its own.
Those that follow the portable workstation market will know that the 17” models are few and far between and have traditionally been restricted to the HP and Dells of the world as well as a few smaller, more specialist vendors. The P71 marks the next iteration since last year’s P70, which marked the first time Lenovo has produced a 17” model in recent memory.
The reason for this requirement is twofold and much of it relates to the undoubtedly heavy graphics compute requirements to drive VR. The ThinkPad P71 can be configured with one of two beasts — either a Nvidia Quadro P4000 or P5000. Our test unit was fitted with the more powerful P5000.
These graphics boards, although in a mobile unit, have some serious power requirements (100W) and generate substantial thermal output, so you’re going to need a bigger machine to effectively cool them during use — which, if you’re running professional applications (and especially VR applications), you’re most certainly going to do.
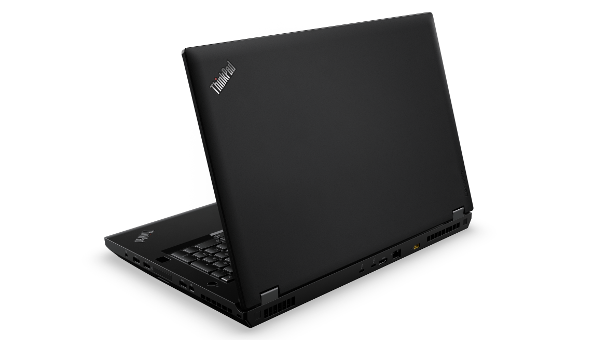
ThinkPad P71 – The machine
Once you’ve got the machine set up and running (see our note on colour calibration on the opposite page), you’re struck by the size of the machine, though having spent the last few years working with a 15” Macbook Pro, I was initially surprised how heavy the machine was — it weighs in at a shade under 3.5 kg.
That said, after a while you forget the size of the unit, considering the specification here.
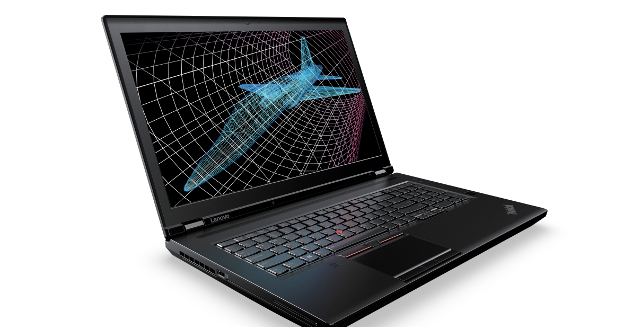
After all, we’re talking about a beast of a display for a portable machine. With a 17.3” display running at 4K, you’ll notice that you’ve got a lot of room to work and quickly forget that it’s in fact a portable machine.
As ever, the build quality of the Lenovo ThinkPad machines are still just as you remember. This is a mil-spec machine (MIL-STD-961 for the standards geeks out there). It’s built like a tank and should stand up to the rigours of the road warrior.
And of course, there’s the usual keyboard arrangement that ThinkPads are known for. You’ve got a full-size keyboard (including separate numerical input), track-pad and your nubbin point in the middle of the keyboard.
The test unit
We received a specced out test unit that we’ve been testing for the last few months. As our focus has been VR, we wanted to ensure that we could see how far we could push a portable unit and that is always going to mean some heavy requirements.
With a Xeon R 1535 CPU (giving us four cores or eight threads), RAM coming in at 64Gb (split over four 16Gb units) and dual half terabyte SSD drives, this machine was never going to be a slouch in even the most demanding of applications.
In terms of connectivity, there’s a lot of options here. The machine has four USB 3.0 inputs/outputs, two Intel thunderbolt 3 ports on the rear, ethernet, bluetooth and Wi-Fi for connecting to your network and peripherals.
In terms of display connections, you’ve got two options — HDMI 1.4 or a mini DisplayPort 1.2 — so using the machine alongside a desktop monitor or two isn’t an issue at all. And as you’ll see from our guide to VR set-up opposite, having two outputs for display can also pay dividends here as well.
In conclusion
The ThinkPad range is still as you remember them — essentially built to last and considering the amount of travel that our readership does, often into ‘less than clean’ environments, having a mil-spec machine whilst signing off first-off- tooling on a shop floor in China is always going to be a wholly good thing. That means it’s not only tested against, but passes military tests for humidity, vibration, temperature and mechanical shock.
Yes, it’s larger than many might be used to, but with that size comes the benefit of graphics processing to rival most officebound, full stack workstations.
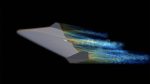
Once set-up with our VR rig (see our notes in the box out below), we found that it handled everything we pushed at it.
Whether it was running the new tools in KeyShot 7 (which combined progressive rendering with HMD display), Autodesk’s VRED (which pushes a machine to its limits once you switch on anti-aliasing in VR) or the other tools we’ve been evaluating under NDA.
When it came to using the machine without the VR kit plugged in, again, it worked flawlessly. The clarity offered of a large display running at 4K is very high especially when using 3D design systems. It was crisp, responsive and roomy.
So the machine performs well, it’s well built and runs your VR applications perfectly. What about the cost?
This isn’t a cheap machine, particularly with this spec. The base level price for the P71 is £1,830, but our unit came in at over twice that at £5,099. While the drive capacity and RAM specs are higher, what really drives up the price is the Quadro P5000.
While it’s possible to spec the machine with the lower specced P4000, if you want to push things, the more graphics compute the better. For those on a budget and not so concerned with VR, the machine can also be delivered with the P3000 and M620M GPUs as well.
Ultimately, it comes down to the experience and potential benefit you can derive from a machine like this, particularly if you’re looking to go all out for VR.
Here’s huge potential to add to your business by being able to arrive at a client’s site to discuss a project, quickly rig up a VR headset and sensor package and immerse your customers in the product they’re looking to purchase or commission you to build.
If you want to do that in an efficient way then the ThinkPad P71 proves that this is possible without having to lug around a desktop unit. Pack it up, arrive, deploy and get the order. That’s solid gold in terms of return on investment.
thinkworkstations.com
Lenovo.com
ThinkPad P71 – Specifications
» Intel Xeon E3 1535 CPU
» 4x 16GB (64GB) DDR4-2400 Memory
» 2x 512GB NVMe PCI-E SSDs
» Nvidia Quadro P5000 GPU (8GB)
» 17.3” 4K (3840 x 2160) Anti-Glare IPS
» Microsoft Windows 10 Pro 64-Bit
» 416mm (w) x 275.5mm (d) x 31.5mm (h)
» 3 years NBD onsite
ThinkPad P71 & VR: Set-up tips for Oculus Rift
Over the last couple of months we’ve been looking at a range of VR enabled tools for this issue (KeyShot 7) as well as forthcoming issues and have been using the ThinkPad P71 and the Oculus Rift as our workhorse test system.
During that time, we’ve come up with a short guide to set-up for this particular combination that should prove interesting for anyone that’s looking for either a portable VR solution, whether to take to client visits or presentations or, indeed, for something that can easily be packed away.
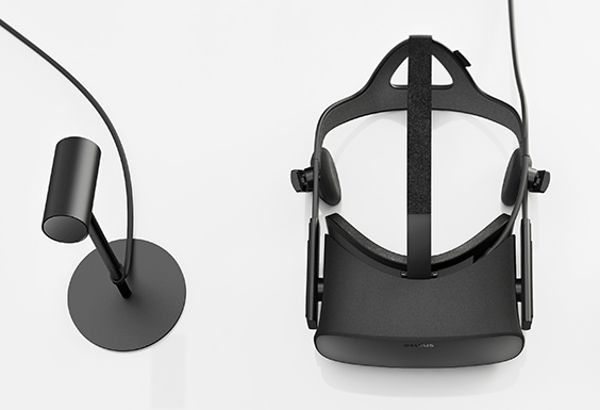
Connections are everything: When you set-up any VR rig you need to ensure that your various sensors and HMDs are plugged into the appropriate connections. With the HTC Vive much of this is done wirelessly through a base unit, whereas the Oculus Rift (particularly when you’re using the Touch Sensors) has some additional requirements.
We found that to get the transfer rates (key to accurate and consistent tracking) you need to fi nd out where the separate USB bus connections are. As you have a need for USB for the HDM, then one each for the two sensors, you’ll find yourself working around the machine, with the set-up software running, while you fi nd the best combination. It might be more prudent to invest in a good, high-speed USB 3 hub, but word is that the Oculus set-up software is a little picky in this regard.
Collaboration with displays: One of the benefi ts of the new breed of HMDs is that it’s entirely possible to have one person using them, then others in the session looking at the screen to see what they’re talking about. While the 17.3” display running at 4K is good for a team of two, if you want to project it for a large group, you’ll think you’re immediately out of luck.
The good news is that you can use a standard, off the shelf projector (we set-up with a BenQ W2000) and a converter for the mini Displayport socket on the side of the machine.
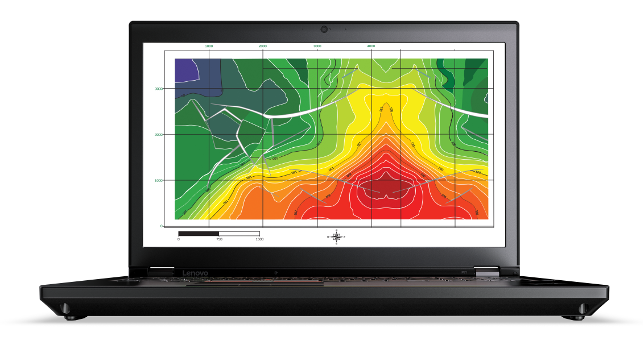
Dialling in colour: P71’s integrated display calibration
Unless you’ve done a lot of work in the high-end imagery field, you might not be immediately aware that your computer’s display probably isn’t, by default, showing you a true representation of your colours.
While statistics are few and far between, there are many phenomena that affect the accuracy of your display — whether that’s manufacturing variance, your software control or the age and temperature of your hardware.
At DEVELOP3D, we’ve always advocated using colour calibration tools when you’re working on high accuracy requirement imagery and animations. Many tools, particularly in the visualisation world, support the importing calibration profi les (known as ICC files), so they match perfectly with the requirements and measurements of your displays.
The thing is that it typically requires an additional device to routinely measure and calibrate your displays. There are a range of these available, but the best known are either from X-rite or Datacolor. But additional cost is additional cost, right?
So it was with some interest that we discovered that the ThinkPad P71 includes colour and display calibration. In fact, when you fi rst boot up the machine it guides you through the process to nail your fancy 17” display from the word go. This requires that you close the lid — the sensor for the calibration is built into device, just to the right of the keyboard. This will run through a calibration process using an application called Pantone Color (developed by X-Rite).
As the process works, the red LED in the ‘I’ on top will flash and eventually it’ll beep when done. Open it and you’re done.
Of course, if you want to get serious about this, then you’ll need the ICC profiles. These aren’t track them down and they can be Windows/loaded into immediately available from the application. We managed to found in the Spool/Drivers folder and then your favourite rendering and visualisation tool.