The Cricut Maker could be a useful addition to any design or engineering office, just don’t be deceived by the craft-focused nature of the company’s marketing message, as Al Dean discovers
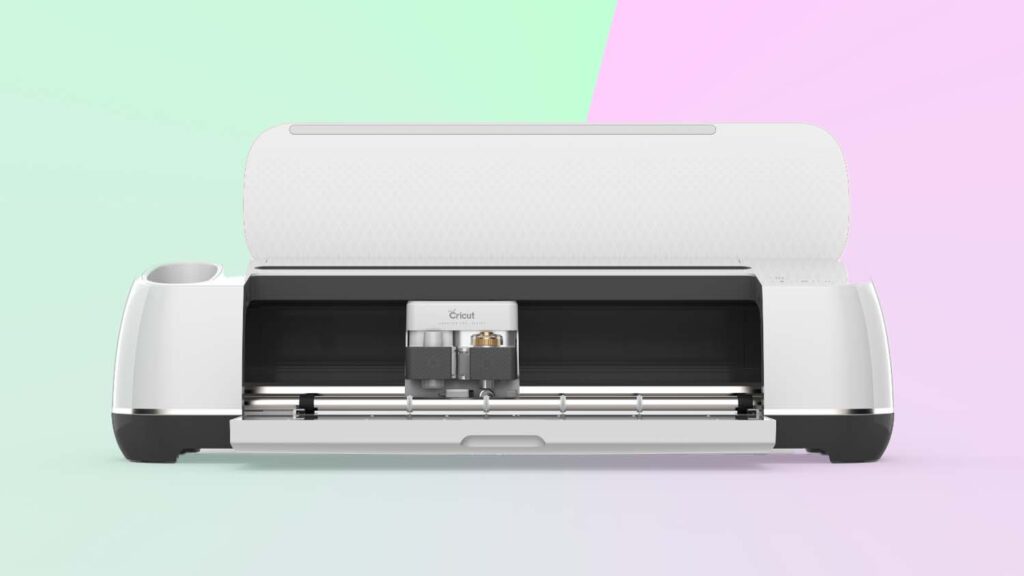
Cricut specialises in putting capabilities more typically found on the factory floor in the hands of individual makers in their workshops and sheds. The company’s cost-effective but advanced product range includes numerically controlled knife cutting machines.
These are akin to the vinyl cutters, CNC routers and laser cutters found in the industrial world, but without the need for the large flatbeds and heavy roller arrangements seen there.
While they follow the same principle of cutting along a given path, Cricut’s machines are much smaller and far more affordable for consumers.
That’s all very well, you might say – but why are we covering Cricut and its devices in a magazine aimed squarely at professional designers and engineers? Well, as it turns out, having a small, desktop-based machine that cuts materials to your requirements can actually be incredibly useful.
At DEVELOP3D, we’ve spoken to a number of folk lately that use these machines in their design offices, on a range of tasks: for example, for packaging prototypes; for small design exploration jobs (such as finding the perfect fit without the need for a 3D print); for creating templates, gauges and gaskets.
Thanks to those conversations, we were keen to learn more about Cricut and the Cricut Maker, described by the company as “the ultimate smart cutting machine”.
Cricut Maker – Project set-up
First off, setting up is a breeze. You unpack the unit, plug it in, connect it to your workstation via USB and download the software. Cricut’s products are pretty much a closed environment. Everything is proprietary. The software for your desktop or laptop is Cricut’s Design Space; you’ll need to register for this cloud-based software before you get started. There are also some smart applications for iPhone and iPad – more of which later.
Once set-up is complete, it’s time to get cutting. The machine comes with a number of predefined projects, and these are worth working through, even if they do seem a little twee.
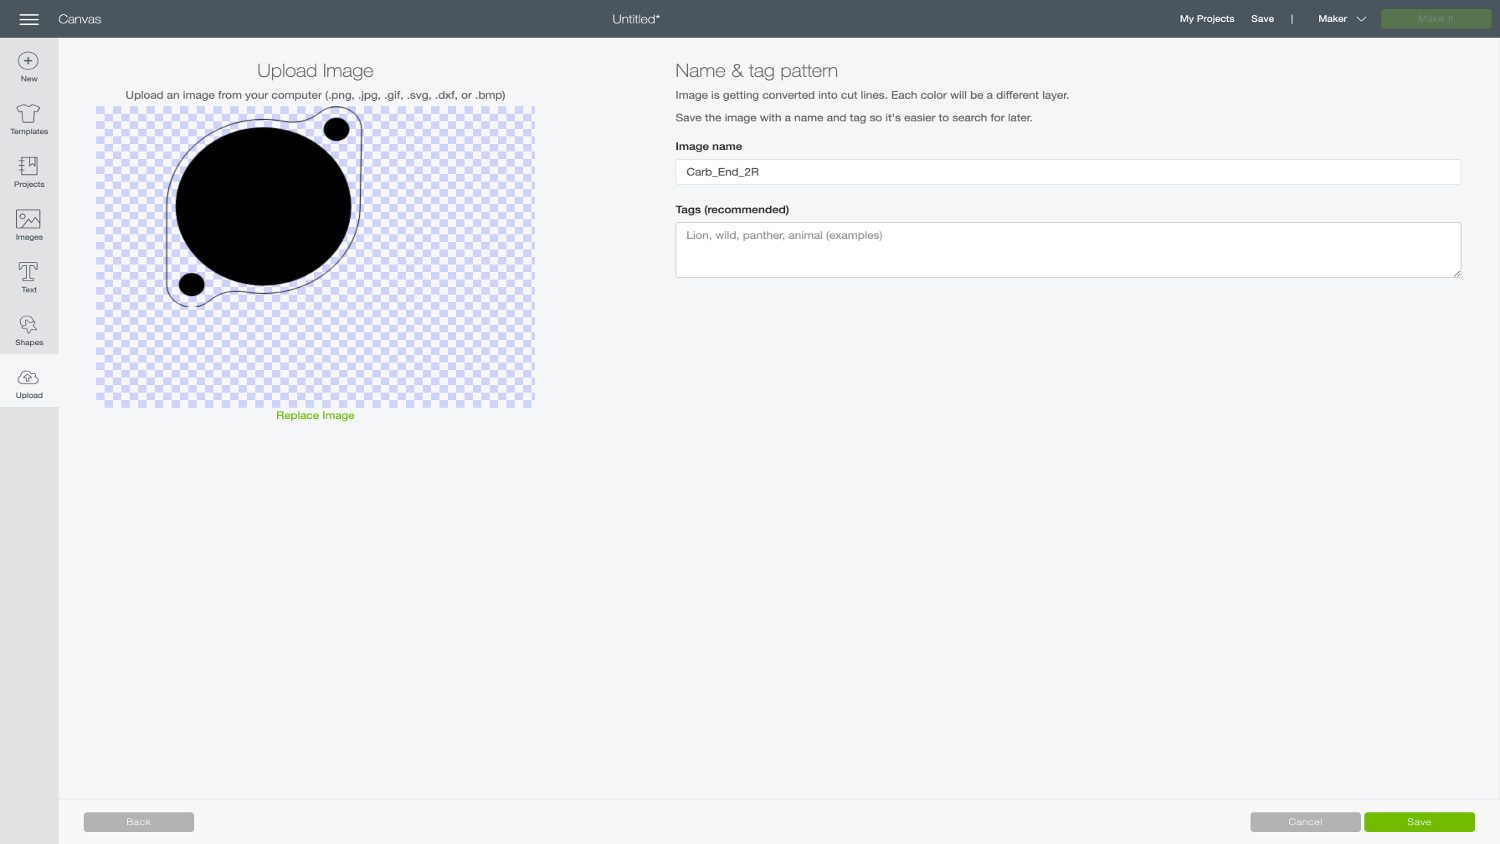
To give you a general guide on how a project works, you’ll develop the forms you need in your CAD system of choice and export them as either DXF or SVG.
Both options have their challenges and benefits. SVG seems to work nicely, but its support in mainstream design and engineering systems is a little patchy at best. And if you go down the DXF route, you’ll need to bear in mind that the Cricut Design Space app’s support is pretty bare bones.
In other words, it needs the most basic representation of a DXF that your CAD system can generate. In Rhino, for example, we found that DXFs exported using the ‘DXF 2012 option, lines, circles and arc’ option worked best.
Once you import your geometry into Design Space, there are a couple of steps you then need to work through. The first is to define the action you would like the machine to perform on each of these geometric entities.
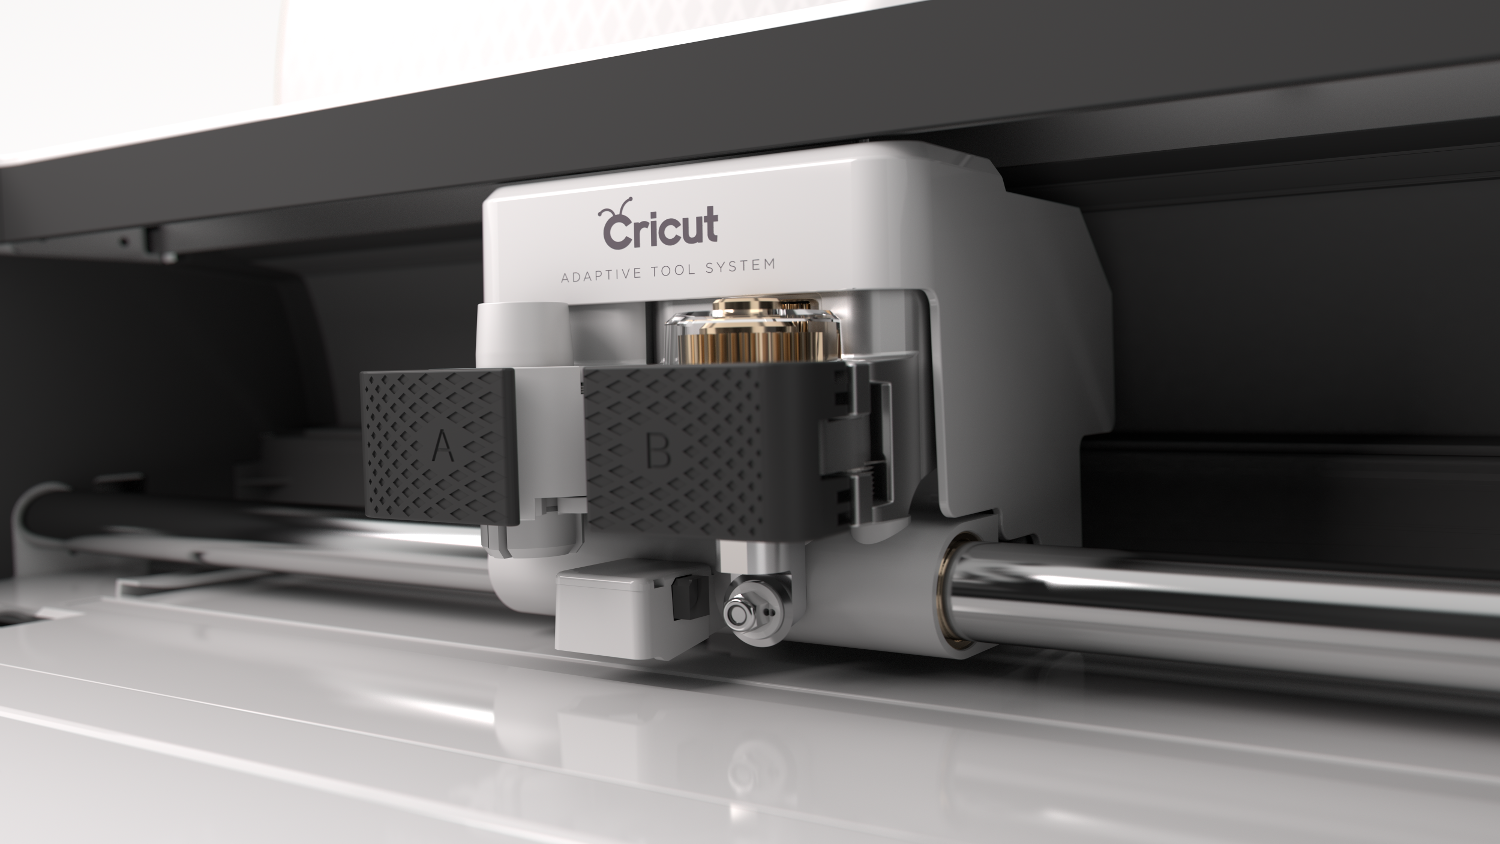
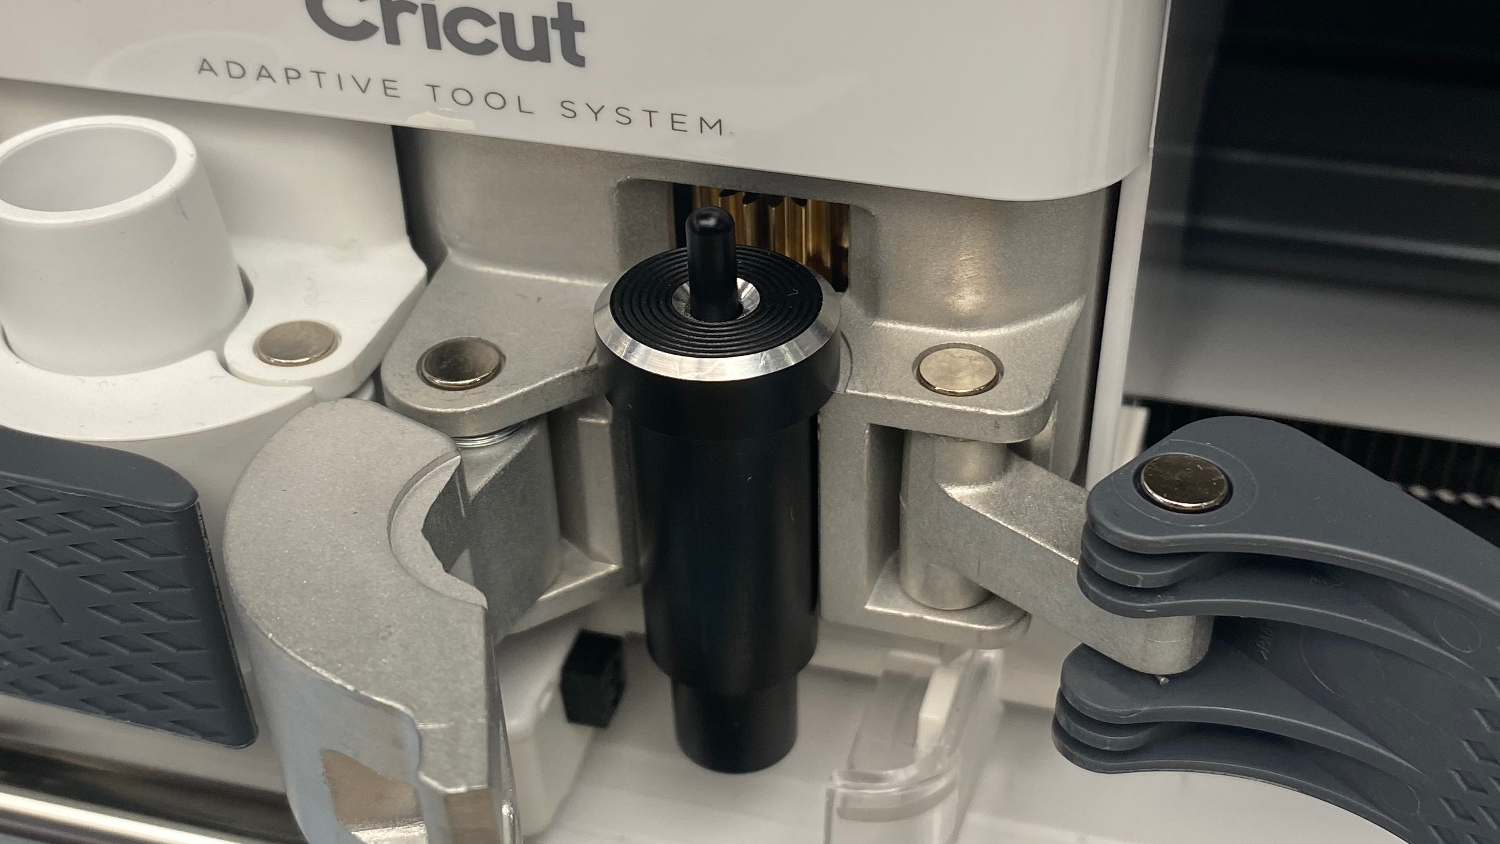
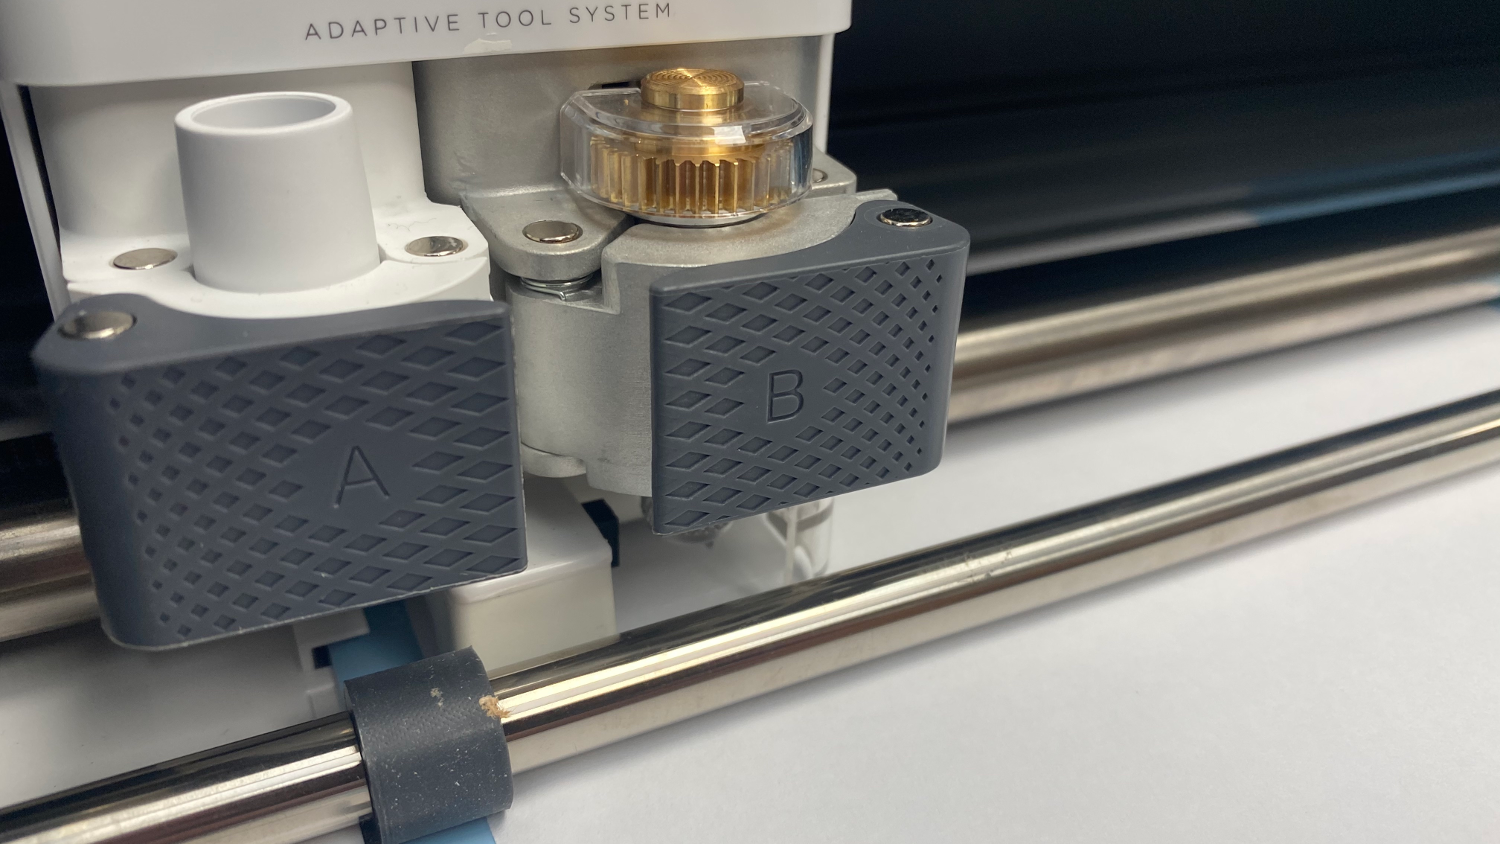
While the machine is built for cutting, it uses a number of different types of blade to achieve this. A follower knife is the default and it’s supplied with the system. But all manner of other add-on options are available, including roller blades (useful for fabrics) and attachment blades for scoring, embossing and perforating.
You need to select the lines, arcs and circles of your part and assign a function to them. By default, the machine will assume every line is a cut. These individual lines now need to be grouped together, using the Attach operation. Give your part a sensible name and proceed to the fun bit – cutting things out – by hitting the Make button in the top right corner.
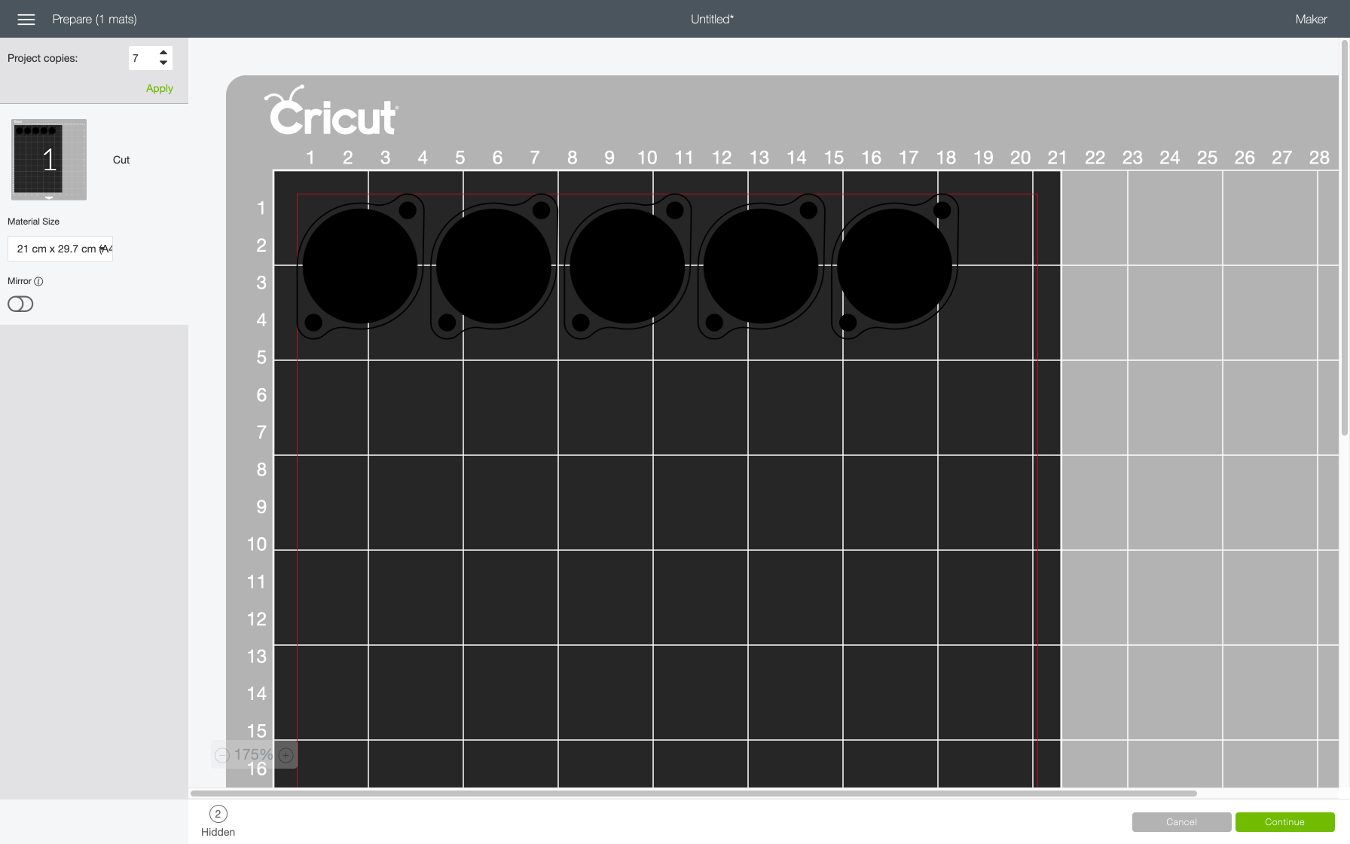
Cricut Maker – Get cutting
Hitting the Make button moves your project into the Make workspace, which is where you set it up for processing on the machine. Cricut Maker uses an adhesive cutting mat to hold your material in place during cutting; your selection of the most appropriate mat depends on a number of factors.
Mats are available in different sizes and with different grip strengths, for example. Some are intended for use with lighter weight materials – think paper or fineweight stock card. Others focus on fabrics or thinner gauge board materials, such as lightweight particle board.
Alongside mat selection, your cutting job is also defined by the number of cuts needed to get through your chosen material. The software guides you through the process, offering a wide range of presets and recommendations. While there is a learning curve here, if you spend time exploring your options, you can get good results, first time.
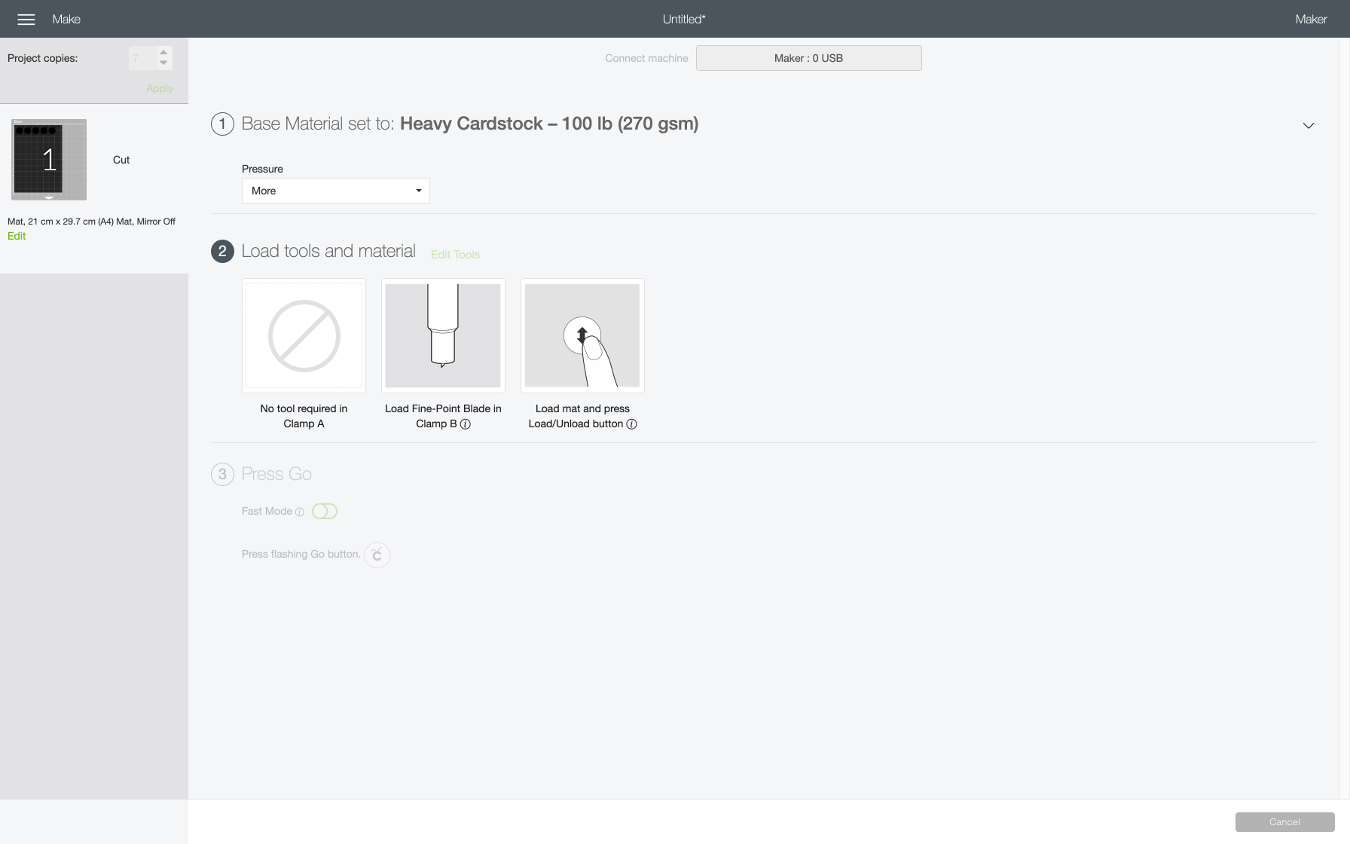
If your project is a plain set of cuts on one sheet, you can then start the process. The system asks you to ensure that you have the correct cutting blade in place (a simple process), then fix your materials on the cutting mat. (For some materials, such as thicker leathers and card stocks, additional tape is recommended.) You then feed the board into the machine when prompted.
The machine pulls the sheet into place and registers the blade. By hitting the Go! button, you start the cutting job.
If you have multiple sets of sheets, the system will prompt you to remove one mat and add the next (or indeed, reload the same one with more stock). If you’re dealing with a more complex cutting/embossing/ scoring job, you’ll need to swap out the cutting tools when prompted.
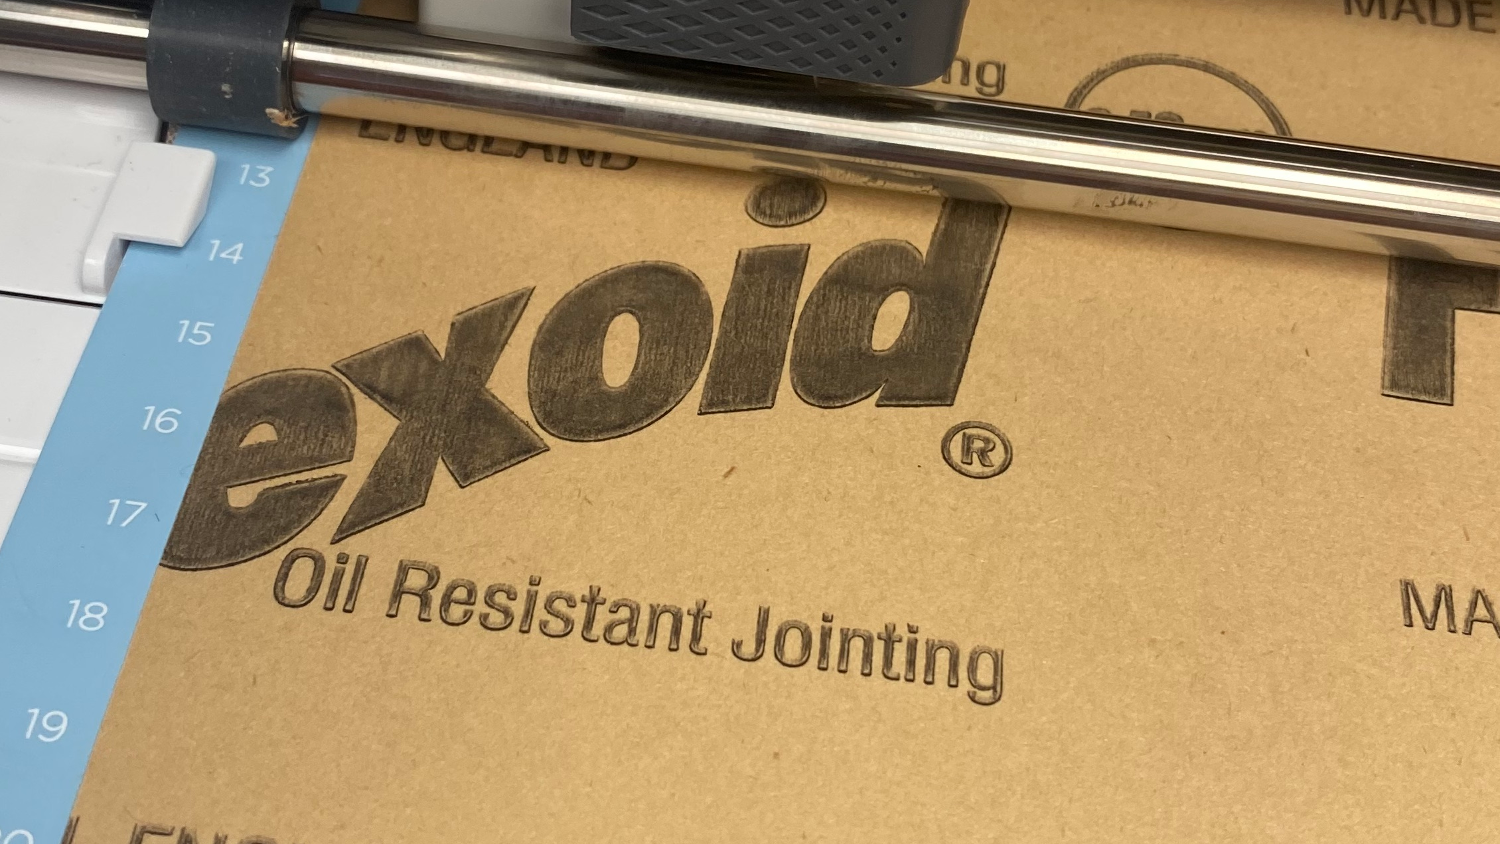
Once your job is complete, your tools swapped and mats processed, it’s time for the fun part. Depending on the material you’re using, you’ll need to be careful how you remove it from the cutting mat, particularly if you’re working with self-adhesive materials such as vinyl for labelling or self-adhesive films and gaskets.
(Tesa film, for example, works beautifully with this machine.) If you’re working with thicker or more rigid materials, then this is less of an issue.
If you want to repeat your build, you just need to add more material, position the mat again and hit go. Rinse and repeat – it really is that simple.
In conclusion
If you’ve come across these devices before, you may have dismissed them, because of the craft-focused nature of the company’s marketing. That might well be a mistake.
The reality is that the Cricut Maker, even with its slightly weird software, is a really useful thing to have around a design studio.
Yes, larger scale vinyl cutters are available, but this is missing the point. The Cricut Maker is ideal for those projects where you need to whip the machine out, cut what you need and then tuck it away again. If you’ve got space to have it set up for everyone to use, all the better, but its compact form-factor is a huge benefit.
If terms of running costs, once you’ve acquired the machine and spent a few quid on the additional knives and other attachments, you’re only really looking at the cost of cutting mats. These cost around £5 or £10 each and are widely available, as are cheaper off-brand versions. The knives, meanwhile, never dull – or at least, are still serviceable years after purchase – but replacements are pretty widely available.
Since we’ve had it, the machine has proved useful on a range of projects, demonstrating just how versatile a numerically controlled cutter can be.
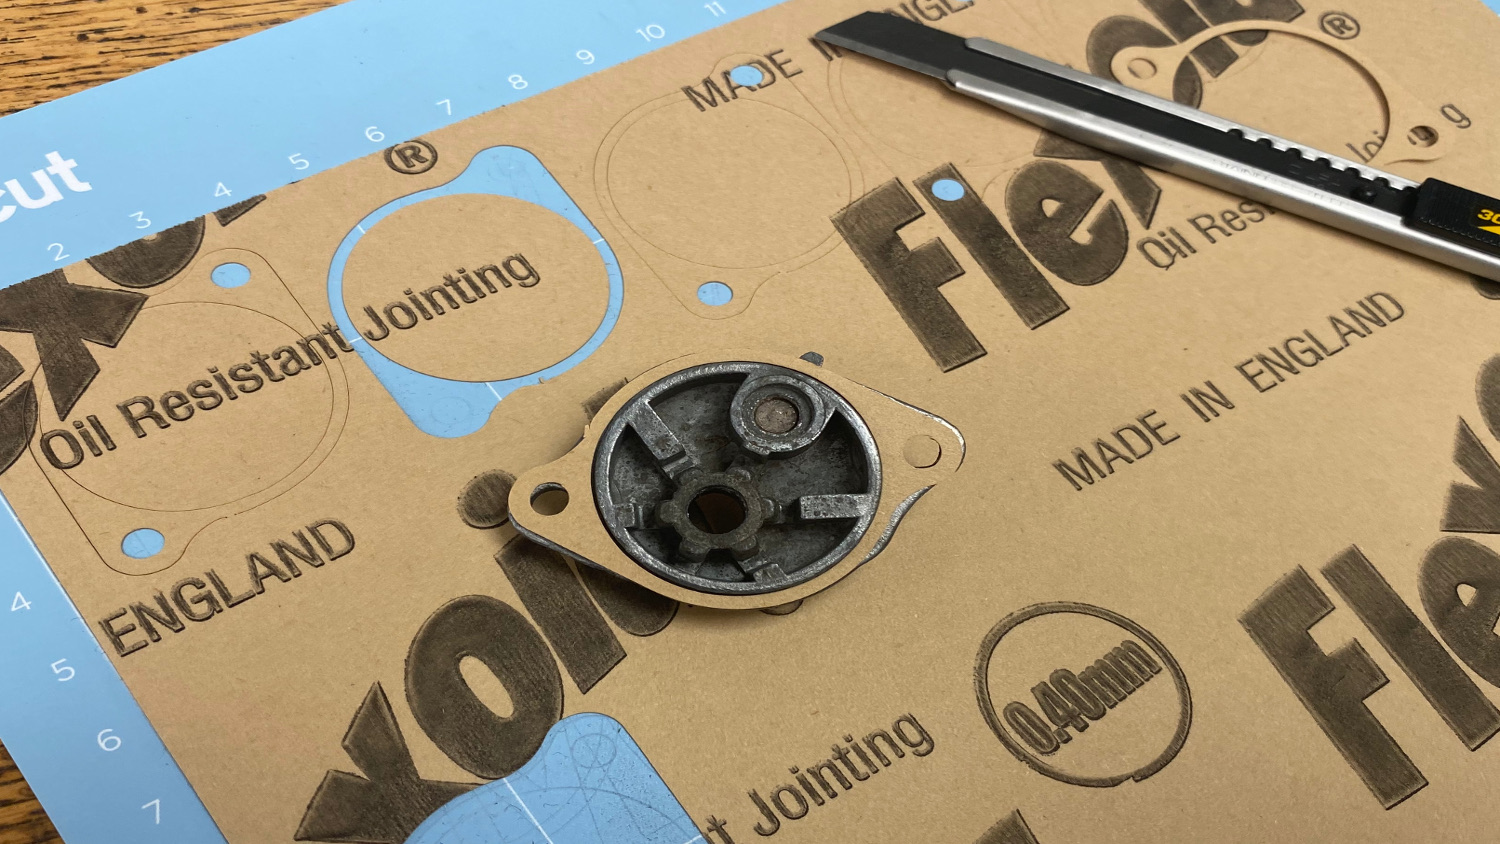
These have included creating new signage for an office move; labelling for storage; drilling guides in 4mm card stock; and quick-and-dirty cardboard templates aimed at fine-tuning fit in a Pelicase before we committed to foam cutting. We have even started experimenting with cutting leather for smaller projects here and there.
As long as you spend the time to work out the parameters and how to refine them, then you’re golden. With a little experimentation, you can be pretty confident of achieving results that are repeatable and consistent.
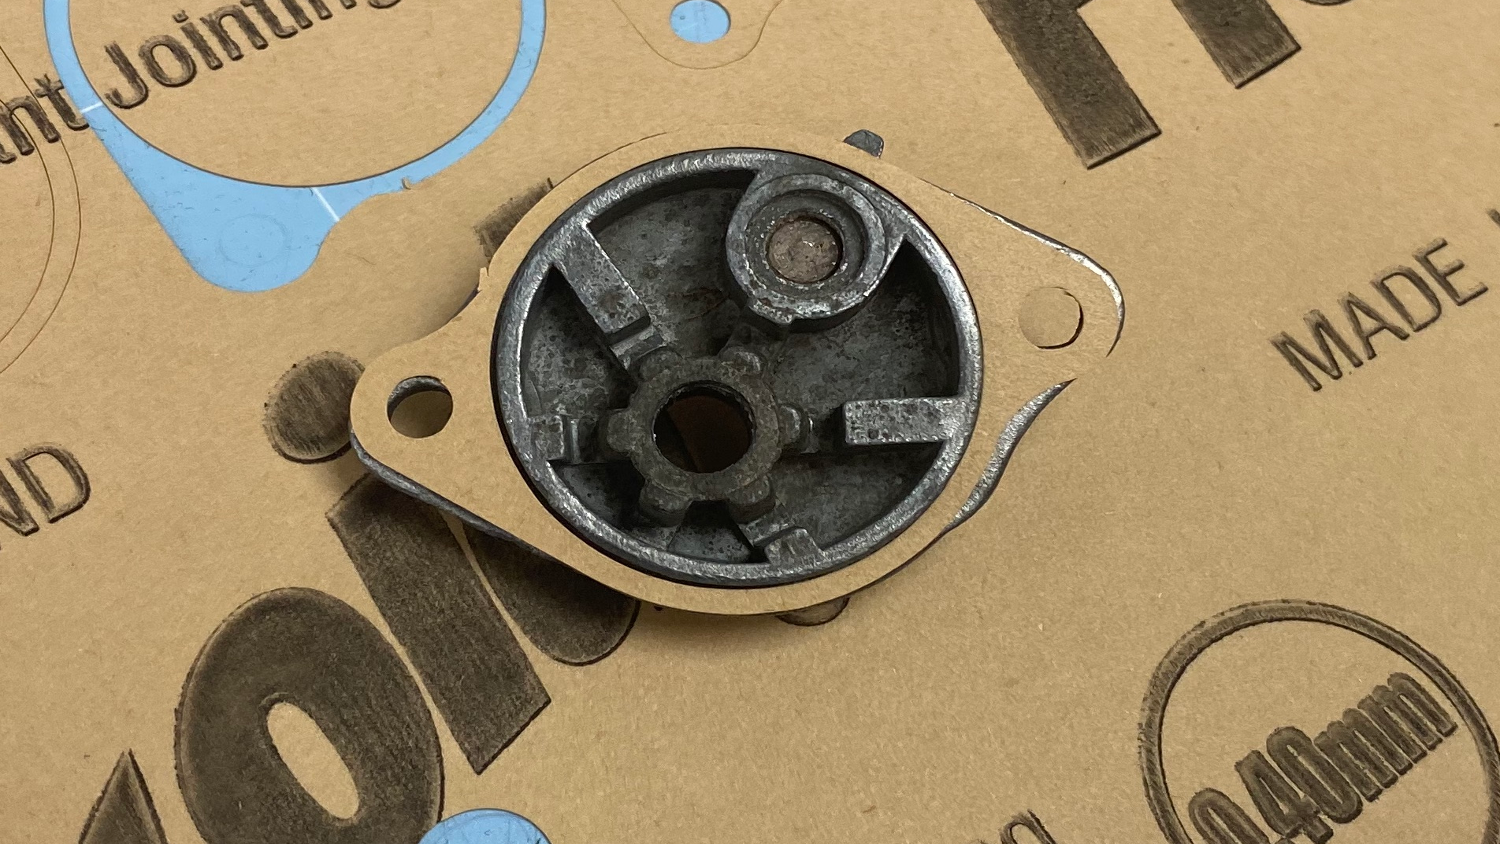
Workflow: From 3D CAD to cut gasket with Cricut Maker


Knives, lasers and water: Four alternatives

Silhouette Cameo 4
Product: Cameo 4
Supplier: Silhouette
Technology: CNC knife, punch
Sheet Size: 304 x 3,000 x 3mm
Price: $299
Web: silhouetteamerica.com
Notes: While Cricut is a well-known brand, there are other cutting machines for the workshop available at a similar price point.
While the likes of the Brother Scan and Cut are interesting, a real highlight is the Silhouette Cameo 4, particularly if you’re working on a lot of soft goods projects. While the dual tool option is there, the real standout is the optional roller for tackling really long, 3m materials on a roll.

Glowforge
Product: Glowforge
Supplier: Glowforge
Technology: Laser cutter
Build Size: 190 x 190 x 196mm
Price: $2,495
Web: glowforge.com
Notes: Laser cutters were previously split into the ‘small but potentially lethal’ and ‘large and costly’ camps for quite some time. Glowforge transformed this picture with its desktop-sized machine, smarter software and sensing options.
The range now includes upgraded filtration, faster speeds and there’s also an option to have an ‘infinite’ pass-through, so your build size increases dramatically in the Y direction
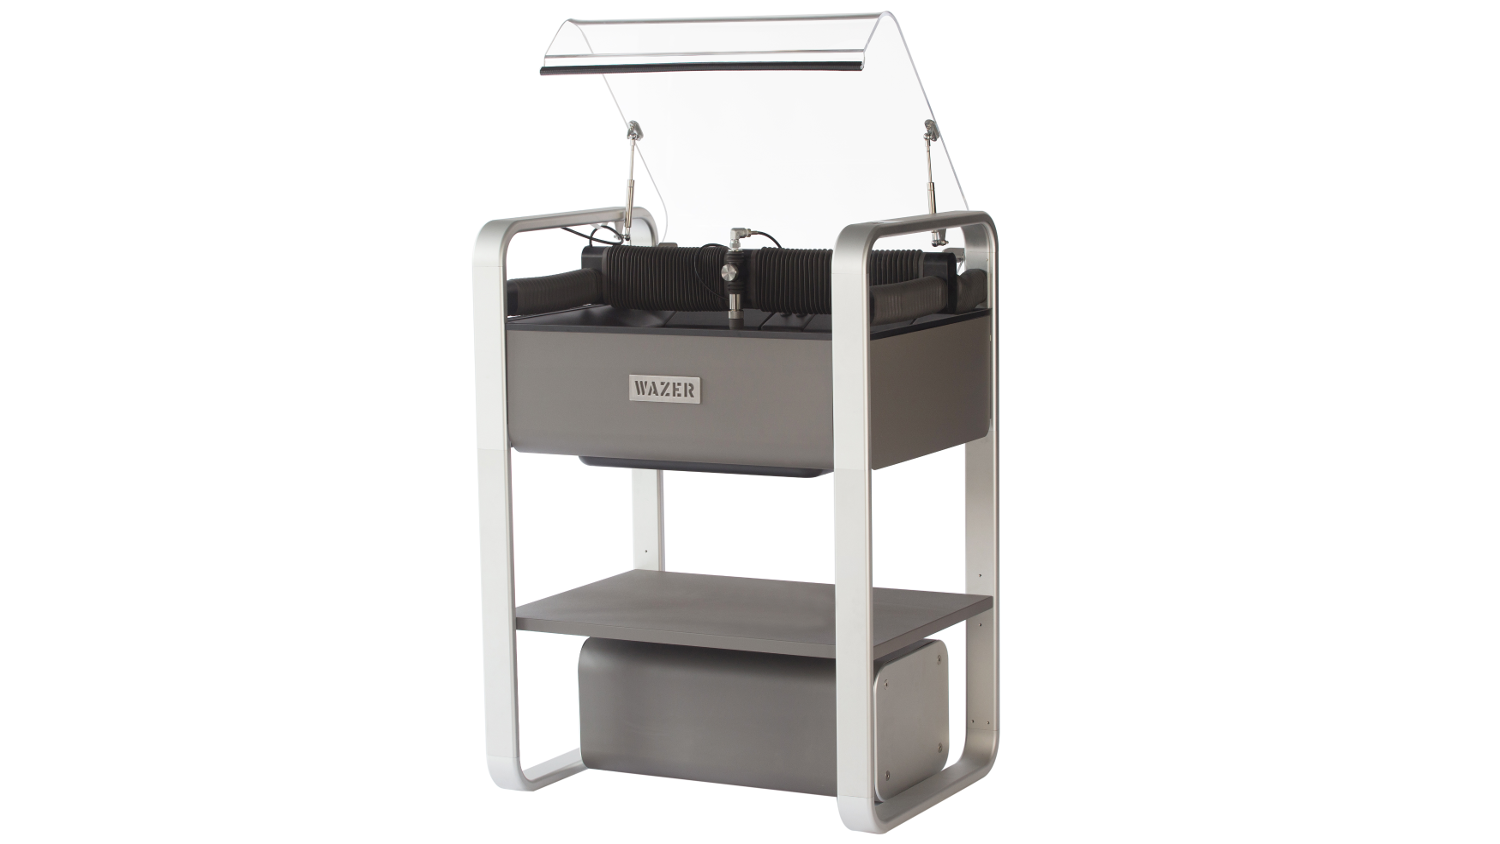
Wazer
Product: Wazer
Supplier: Wazer
Technology: Abrasive waterjet
Build Size: 305 x 460 x 25mm
Price: $7,999
Web: wazer.com
Notes: Wazer was born at Philadelphia’s Penn Engineering college and, following a $1.3 million crowdfunder, has been quietly providing one of the most interesting tools for serious prototyping labs.
The Wazer machine (comprised of the cutting and pump units) is an abrasive waterjet at a fraction of the cost traditionally associated with such machines. It has a respectable and useful cutting envelope and is no slouch in the speed department.

Omax Protomaxx
Product: ProtoMax
Supplier: Omax
Technology: Abrasive waterjet
Build Size: 300 x 300 x 25mm
Price: $23,950
Web: protomax.com
Notes: Omax is a name associated with advanced waterjet cutters typically found in the machine shop, rather than in prototyping labs, so the ProtoMax is an interesting departure for the firm.
It’s a smaller scale machine, fully enclosed and ready for use in the workshop. The 5hp pump generates 30,000 PSI in cutting power, which will happily see its way through material up to 1-inch thick, from foam to tool steel.