The Benninghoven company was founded by Otto Benninghoven in 1909, in Hilden, Germany to produce gear wheels and machine tools. The company diversified into the field of industrial combustion technology in the 1950’s, followed by asphalt production in the 1960’s.
Screenshot showing raw scan data in PolyWorks
In 1970 a new fabrication facility was set up in Mulheim/Mosel. Another huge expansion took place in 1990 with the addition of a manufacturing plant in Wittlich. Today, the Benninghoven group is fabricating in two locations in Germany and one in the UK. It has a total of 600 employees.
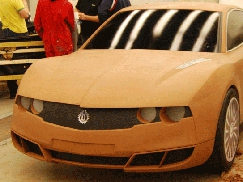
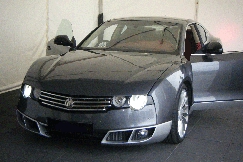
The company has recently celebrated its 100th anniversary and chose to celebrate in style by entering into the automotive industry.
A Celebratory project
Alistair Davis from Benninghoven started looking at various options whilst deciding on which company to use for the design and development of the new car. After much research, he decided on Coventry University’s automotive faculty, due to its reputation and desire to create a totally new concept.
He also needed a team that could start immediately and could deal with a fast project turnaround time. The period allocated to produce the first two cars from concept to completion was only 18 months.
Chris Johnson and Mark Varney from the automotive faculty at Coventry University were in charge of this huge project. Johnson was the chief designer whilst Varney oversaw the development work.
Whilst Coventry University could take care of the design, other companies had to be pulled in to help with the development and manufacture of the vehicle.
Enter 3D scanning
Benninghoven decided to use an existing vehicle’s chassis, floor pan and power train. This meant that the exterior and interior trim, the Body in White (BIW) and chassis of the chosen vehicle had to be 3D scanned to achieve the required alignment.
This is where 3D Scanners UK entered the scene. The 3D Scanners team proceeded to scan the BIW and chasis of the donor vehicle at Advanced Vehicle Solutions Coventry site. Every part was scanned and datum points were probed.
This data, once aligned in PolyWorks software, would indicate exactly where the new surfaces would sit on the BIW. The scanning of the BIW then took eight hours using a laser arm-based scanner.
Lastly, Innovmetric PolyWorks software was used to organise and process the raw point cloud data. The software allows large data sets to be imported and aligned, picking the best point cloud data to create the best model.
PolyWorks’ IMMerge module was used to turn the points into a polygon mesh and then IMEdit was used to trim the edges of the panels back to create perfect edges. The polygon model could then be aligned to the car in PolyWorks’ IMInspector Module.
Taking polys to manufacture
When the meshed polygon models of the donor vehicle and the concept car were aligned in PolyWorks’ Inspector Module, it was clear that there was a clash at the front of the bonnet. This meant that the bonnet needed to be re-designed.
The bonnet grille and exhaust surround also had to be modelled up in SolidWorks. This was done by importing the polygonal model of the hand finished concept and using it as a template to create the new
model around it. The resulting solid model was geometrically correct for future manufacture.
The rear of the concept car needed redesigning due to the spare wheel housing that sits right at the back on the donor vehicle’s BIW. To clear this area the design of the car needed to be brought outwards.
Once 3D Scanners had completed its work, the CAD files were sent to Four Masters Ltd for tooling.
www.3dscanners.co.uk
www.polyworks.com
www.benninghoven.com


