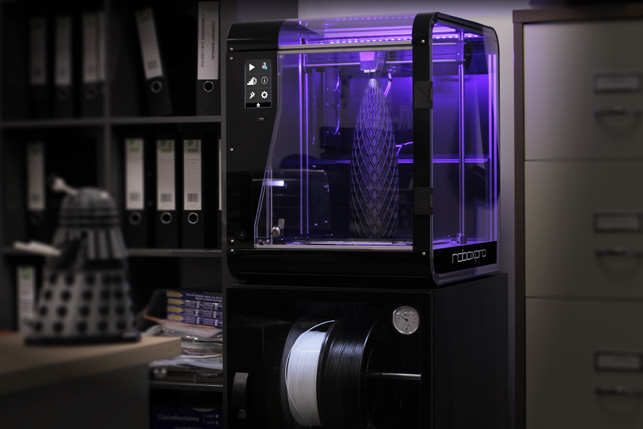

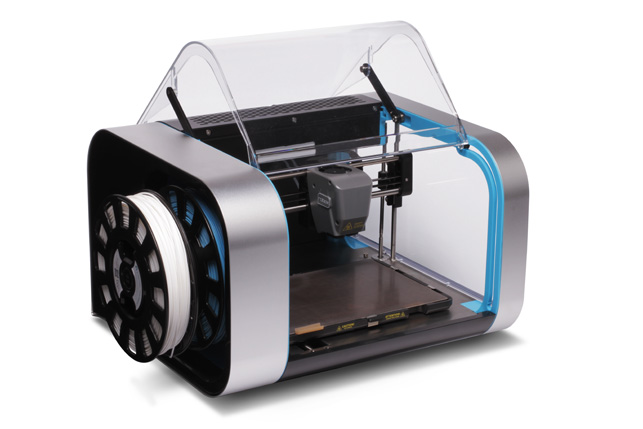
CEL’s latest printer is the RoboxPro for building larger parts in a single build
Too much choice, too little differentiation. That’s the problem with many 3D printers today, according to Chris Elsworthy, CEO and founder of CEL, the Bristol-based manufacturer of the Robox 3D printer.
“There are so many ‘me too’ 3D printers in the world,” he says. “Nearly all competing 3D printers are a regurgitation of the same principles.”
In other words, they use similar extrusion processes and similar software. From the start, it was Elsworthy’s intention to build a machine that stood out from the crowd. “When we launched Robox in 2014,” he says, “we felt our machine really offered something completely new.”
Designed from the ground up by CEL’s engineers, Robox is a compact system (external dimensions 370 x 340 x 240mm and build area 210 x 150 x 100mm) that works straight out of the box.
As a fused filament fabrication (FFF) or fused deposition modelling (FDM) machine, thermoplastic filament purchased either from Robox itself or a third-party supplier is fed from a reel through a heated extruder head. The molten material is then extruded from the nozzle onto a build platform, layer by layer, to create a 3D object.
It does this in a very innovative way. “Our dual nozzle system can increase the speed of the printer as it closes off the flow of material and lifts the unused nozzle,” Elsworthy explains. “That, as well as other things, such as the way our extruder monitors the flow of material through it, didn’t exist until Robox launched.”
A lot of the innovation that CEL put into its machine is now starting to appear in other brands’ machines.
“Whether that is the natural progression of their systems or whether these brands have seen that on our machine, I couldn’t possibly tell, but at the time [we launched Robox], I know that there was nothing like it on the market,” he says.
CEL – Start of the journey
Elsworthy didn’t initially set out to create a 3D printer. A mechanical engineer by trade, he founded CEL in 2007 to bring a range of low-cost power tools to market. This included launching the successful Power8 workshop, a four- piece cordless toolset, which saw him appear on the BBC’s Dragons’ Den.
During development of these products, the CEL team relied heavily upon rapid prototyping techniques, mostly through service bureaus. But Elsworthy was always keen to drive down cost as far as possible.
“As I didn’t want to spend very much on prototyping, the engineers would work very hard towards finishing a concept in quite a lot of depth, almost making it ready to go to injection moulding,” he recalls.
“However, if they made a mistake with a small section early on, that whole prototype would end up being a very expensive waste of time.”
Taking the process in-house seemed to be a better option and while searching for a suitable 3D printer in which to invest, Elsworthy was introduced to the team behind the RepRap (replicating rapid prototyper) project. This began at the University of Bath back in 2004, with the aim of producing a low-cost, self-replicating desktop additive manufacturing system capable of printing many of its own components. An open source project, RepRap now has hundreds of contributors worldwide.
“We assembled the kit machine in our office and I soon noticed that all the engineers were tinkering and modifying it by adding new technologies and features to make it produce the results, rather than using it to get on with the next design job that I wanted them to do,” Elsworthy says with a smile.
This got him and his team thinking that there must be other users out there who wanted a reliable, easy-to-use, results-orientated 3D printer, rather than a plaything. So they decided to refine their own design for a 3D printer, with a view to making it a commercial product.
Of course, their decision was helped by the fact that, in 2012, 3D printing was very much in the limelight. The technology was featured all over the mainstream press, with stories promising that 3D printers would soon become part of the furniture in the average consumer’s home, chugging away to produce all manner of useful bits and bobs.
But the CEL team wanted to produce more than just a 3D printer. Its goal, in fact, was a micro-manufacturing platform – and that meant future-proofing the machine so that further down the line, new features and functions could be added.
This is achieved through the HeadLock system, which allows for different toolheads to be swapped in and out, so the Robox can become a stylus cutter, a light milling head or a paste extruder.
“As the machine’s Cartesian action or xyz system is a frame format common to high-end CNC machines and other 3-axis machinery, we can utilise that expensive part for other kinds of processes and tooling. That was one of the grand ideas behind Robox,” Elsworthy explains.
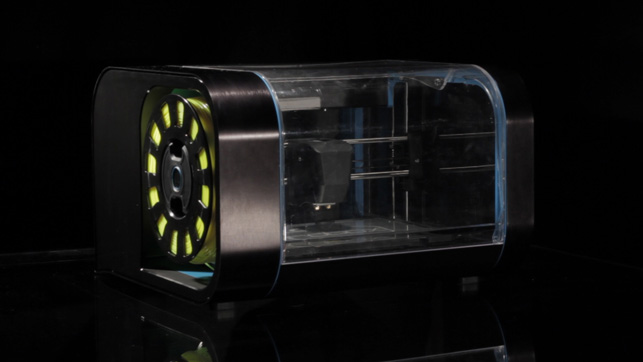
RoboxDual introduces the ability to print in two materials at once
CEL – Design for mass manufacture
The intention was aways to design this robot in a box (hence the name Robox) for mass manufacture using injection moulding. By using existing suppliers in the Far East, CEL was aiming for a reliable, repeatable and better-quality product that could be offered at low cost to consumers.
Aesthetic would be another point of differentiation for Robox, it was decided. Other printers available at that time often looked like they’d been made in someone’s garage, Elsworthy reckons. “Although I love this aesthetic of nuts and bolts and bits of wire, if you really want to attack a nonengineering user group aggressively, you need to a hide a lot of the tech,” he says.
“We created a stainless steel sheet at the bottom that provides dimensional accuracy and the injection-moulded frame and the cladding is then screwed to it. So even though injection-moulded parts can warp and bend, the mechanical parts of the machine all reference that single steel sheet.”
During this process, CEL’s engineers used Creo Parametric to create a complex assembly design as a topdown skeleton model with fully associative parts that reference that skeleton. If any change was subsequently made to the skeleton, the parts would update automatically.
“For example, if your first part is the build volume, you draw a cube the size that you want the printer to be able to print. Then you should be able to go into your skeleton model and adjust the dimensions of that build volume with every part beyond that, automatically updating to be able to produce that build volume,” Elsworthy explains.
“You have to be quite careful about structuring your design, but it does mean that your end model is hugely adaptable.”
CEL – Launching the Kickstarter campaign
With the mechanical aspects of the machine nailed down, CEL decided to launch a Kickstarter campaign in order to help fund Robox’s development, as well as raise awareness of what this small UK company was doing.
Launched on 21 November 2013 with a fundraising target of £100,000, the company raised almost three times that amount by the time the campaign closed 30 days later.
It was now full steam ahead to deliver the 3D printers – but as Elsworthy admits, although the hardware was sound, he hadn’t taken into account quite how crucial software would be to the whole user experience. In particular, the user interface (UI) needed urgent attention.
“The UI is what the customer uses to access your hardware and I think that I personally massively underestimated how important or how much work goes into UI design,” he admits. “We could have made the best 3D printer in the world but without a decent suite of software behind it, the user would have immediately dismissed it, I think.”
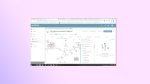
Getting the software up to speed proved to be a steep learning curve for CEL. Whereas previously it had been subcontracting out its software programming, it soon decided to bring this in-house by employing new team members to custom-build the Automaker interface software that now drives Robox.
“Automaker is still the part that has taken the most time to engineer, as we’re constantly developing and updating it,” Elsworthy says.
Once the machines were delivered to Kickstarter backers, and following the official product launch towards the end of 2014, Robox got a favourable reception, and was praised especially for its user-friendly, plug-and-print operations.
The machines have since found their way into design studios and home workshops, as well as in dental surgeries for the use of dental surgical guides and in schools, where it’s favoured not just for being robust, reliable and competitively priced, but also for its primary safety feature – an interlocking mechanism in the door.
CEL – New Robox machines
Since then, CEL has continued to innovate and introduce new points of differentiation.
In 2017, it launched an upgraded dual-extrusion version of its product, RoboxDual. This enables users to print with two colours or two materials simultaneously, while still running the same hardware and software.
With its most recent model, the RoboxPro, which came out at the beginning of 2018, the company has moved off the desktop and launched a much bigger box aimed at the prosumer market. With its 300 x 210mm print surface and 400mm build height, RoboxPro allows for much larger parts to be created in a single build.
The big change with this machine is that it is manufactured not in the Far East, but in CEL’s Portishead factory near Bristol. That’s due in part to the slump in the value of the pound following the UK’s Brexit vote.
“We didn’t want a huge spend upfront on tooling and manufacturing and as this machine would be produced in much lower volumes, the margin wasn’t as sensitive,” says Elsworthy.
“We invested in a few CNC machines to cut all the parts ourselves and we’ve built it in a very modular manner. So far we’ve made about 15 machines and, if we wanted, every machine could be slightly different from the last with ongoing development in the process.”
Again, Creo was used to design the machine. One of the biggest advantages for Elsworthy is the control CEL now has, not only over the design of the machine, but also how it’s assembled.
“That instant feedback loop, from the guy in the factory telling me that a component or certain aspect of assembly is a real pain, to me then changing the design in Creo, and then by the afternoon handing him a new design, is a great asset,” he says.
“It also means that I can innovate on the machine in a day. I don’t have to wait a week or a month for a piece of tooling to be changed in the Far East and for DHL to then get it to the UK for us to then assemble on the machine to see results. Now, I can 3D print a part and have a working prototype in a matter of hours.”
Aside from building its own machines, CEL is now also working as part of a collaborative research initiative with two companies – Iterate Design + Innovation and Printed Electronics – along with academics from the University of Warwick, in order to produce the next generation of additive manufacturing machines.
The group has been awarded two grants from government funding agency InnovateUK and its focus is on combining electrically conductive inks with polymer-based structures, with a view to replacing the need for wiring looms in electro-mechanical product assemblies.
CEL may have entered the 3D printer market at the top of the hype cycle and seen many of its competitors fall by the wayside since then, but Elsworthy is satisfied that his company’s machines continue to offer market-leading features and functions. When it comes to innovation, there will be no slacking, he promises.
“We are continuing to design new machinery and invent new processes, which will enable 3D printing to move from its well-established prototyping role to full mass manufacturing. There are certainly exciting things round the corner – back to work!”
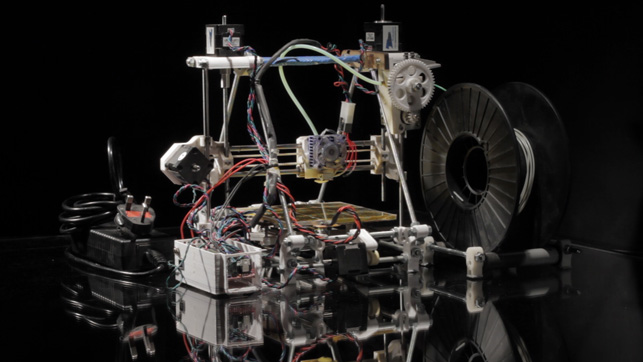
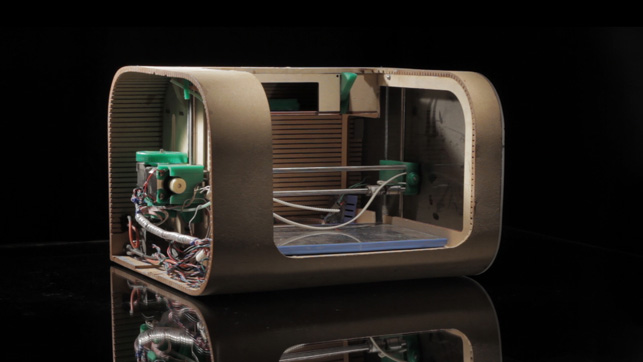
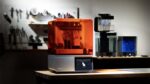
Shots taken during the development of the original Robox desktop fused filament fabrication (FFF) 3D printer
Six of the best desktop 3D printers
1. Ultimaker 3 Extended
Cost: $4,295
Process: FDM
Build area: 223 × 223 × 205MM
A dual-material set-up makes this model perfectly suited to pro users, with soluble supports letting them build a wider range of parts. Its nifty Cura software, meanwhile, means setting up a print farm of several of these machines is a breeze.
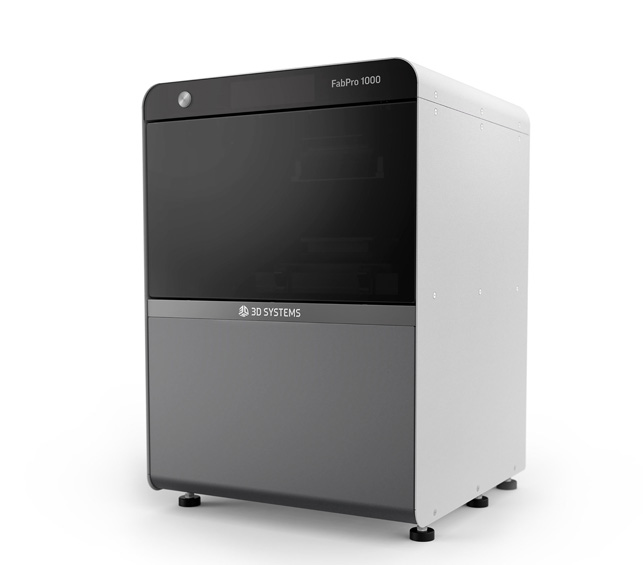
2. 3D Systems, FabPro 1000
Cost: TBC (SUB-$5,000)
Process: SLA (DLP)
Build area: 125 X 70 X 120MM
The big-name player makes a return to the desktop market with the FabPro 1000, a resin 3D printer billed as being between two and four times faster than competitors, and able to use a wide range of materials.
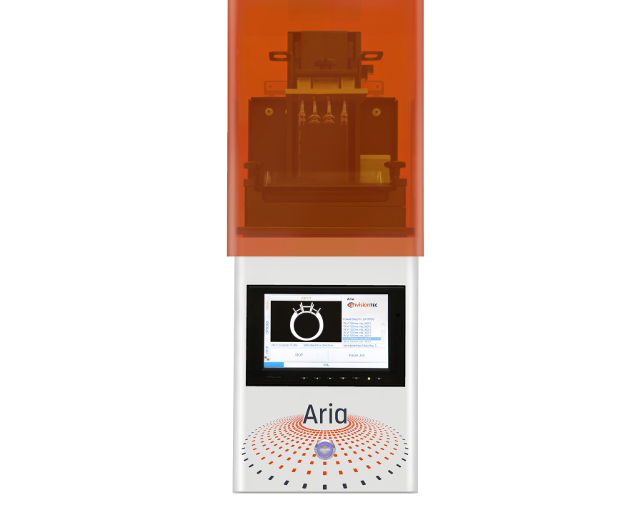
3. EnvisionTEC Aria
Cost: $6,999
Process: SLA (UV)
Build area:65 X 40 X 100MM
EnvisionTec’s machines are renowned for their high-detail prints, and this entry-level model doesn’t disappoint, coming ready to print with a choice of four of EnvisionTEC’s most popular materials.
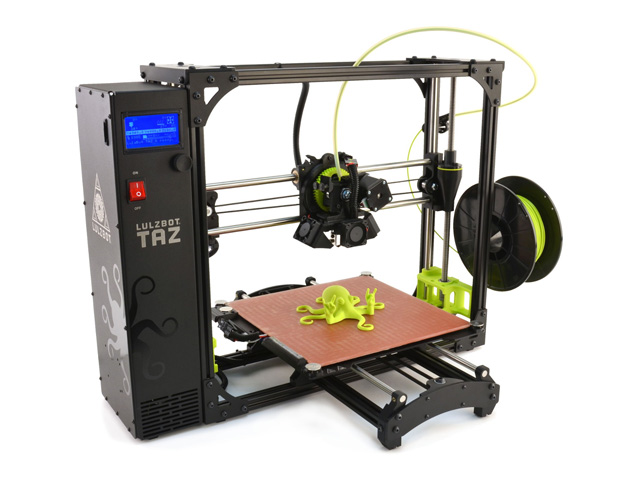
4. LulzBot TAZ6
Cost: $2,500
Process: FDM
Build area: 280 X 280 X 250MM
Another printer beloved by workshops and makers around the world, this model comes with a slick v2 Hot End print head, allowing it to produce parts in functional materials including ABS, nylon and polycarbonate.
5. Markforged Onyx One
Cost: $3,499
Process: FDM
Build area: 320 × 132 × 154MM
With the same software as costlier professional counterparts, you might be tempted to look upon this Markforged entry-level machine as a mere training tool – if it weren’t for the fact that it also offers the same build quality and is able to print with the company’s tough-as-nails chopped carbon fill material, Onyx.
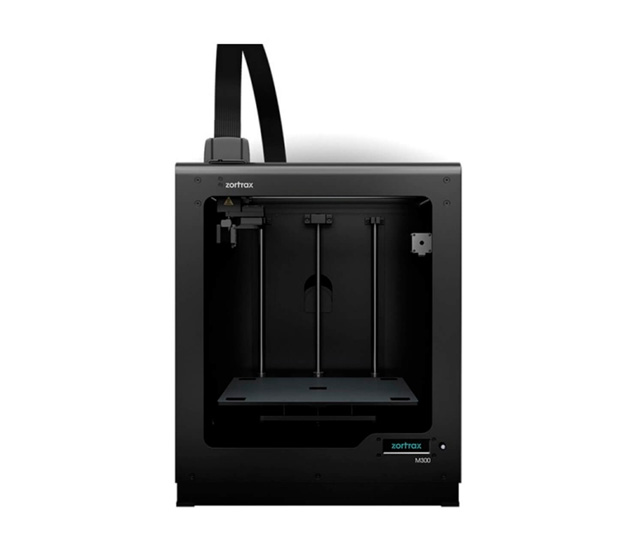
6. Zortrax M300
Cost: £2,550 +VAT
Process: FDM
Build area: 300 X 300 X 300MM
The Polish firm’s M200 has already proven itself in maker communities, and the M300 goes further still, with a bigger build plate and reliable prints straight out of the box.