The rise of the desktop stereolithography (SLA) machine has been unstoppable in the last year or two. Pretty much since Formlabs launched its Form 1 (though the company wasn’t the first in this area), there’s been a lot of talk around the subject.

Ultrasonic parts washers are very useful for cleaning resin off parts. The good news is that they’re available in all sizes and price ranges
SLA machines are very different beasts from more widely available FDM machines. Whereas an FDM machine deposits filament layer by layer, an SLA machine uses photo-curable resins and a light source that cures those layers, to build up the 3D form.
As a result, a typical FDM machine requires you to break out your part and any supports from the build plate, either manually or, in some higher-end systems, using water-soluble support material. The SLA process, by contrast, is more complex.
Process basics
As we’ve stated, SLA is a resin-based process and, while each machine differs slightly in the way that it builds, the basics are roughly the same. Once a build is complete, it needs to be removed from the build chamber.
Even at this point, there are a few things to bear in mind. First and foremost, wear gloves. No ifs, no buts – wear them.
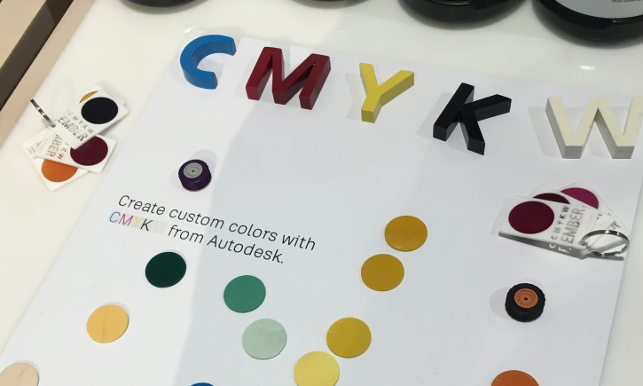
Autodesk has just released a set of CYMK (and white) resins to help you mix and match colours more freely for its Ember printer
Photo-curable resins are not particularly pleasant and contact with your skin, however brief, should be avoided. It’s also worth considering wearing eye protection as well.
You’ll also need some means to lift your part off the build plate. Most machines come with tools to assist (in many cases, a simple wallpaper scraper), but some have more advanced fixtures that hold the plate in place while you lever off the part (and trust me, it’s very easy to slip and end up, literally, with blood on your hands.)
Make sure you’ve got a good working surface. We found that laying down microfibre cloths or non-slip matting is essential.
Part rinse
Once you’ve got a part, typically with some form of supports on it, you’ll also find you’ve got some uncured resin to deal with, so you’ll need to rinse the part before you break it out of the supports.
Most machines are supplied with a rinse tub or two. The idea is that you fill these with a 75/25 mix of isopropyl alcohol and water to remove the uncured resin. While that’s fine, if you’re working to a deadline and need to get the parts ready quicker, we’ve found an ultrasonic parts washer really speeds things up. These are relatively simple machines and can be sourced very inexpensively.
The DEVELOP3D workshop has a small unit, purchased from Ebay for around £40 and it’s perfect for the job. You just fill up the tank with the IPA/water mix, throw in the part and switch the machine on.
Ten minutes later, the uncured resin is dissolved and you’re ready for the next step.
Post curing
This is an area that demands particular attention to detail. Almost every part that comes out of an SLA printer is going to require a period of post-curing.
Essentially, that involves bathing it in UV light. While the low-tech approach is to leave parts on a window sill, the next level up probably involves the acquisition of a UV oven.
There are plenty of options out there. Some are being sold as special-purpose devices for 3D printing, but the reality is that these ovens are simply a couple of UV bulbs in a box.
In our workshop, we’ve simply used a steriliser cabinet, more commonly used in beauty salons to sterilise tools such as scissors and tweezers.
The advantage of this approach is that these cabinets come with racking and a timer. You just stick the parts in, twist the timer and away you go.
Support removal
Once you’ve got your part rinsed and cured, the next step is to remove the supports.
Some machines build these very nicely; others, not so much (and that’s being kind). Depending on the density of the supports, this can either be a pretty trivial process or, at the other end of the spectrum, involve going at the part with a set of snips and needle-nose pliers.
The good news is that most machines come with a set of snips as standard (I personally won’t need to buy any again for the next two lifetimes), but investing in a couple of long-nose pliers with varying degree bends is good practice. You’ll need them to reach those hard-to-access parts of some builds.
At this point, you might find that you’ve got some residual resin tucked away in some crevices, so you might want to rinse again, but the chances are you’ll have a good model that’s ready to fit, test and even paint.
Resins experimentation
This last point is something that’s been on our minds for a little while. A quick Google search will show you that there are a growing number of vendors selling all manner of different resins and formulations for SLA printers.
The reality is that in most cases, while you’re free to experiment with these, some vendors encourage the use of third-party resins, while others discourage it.
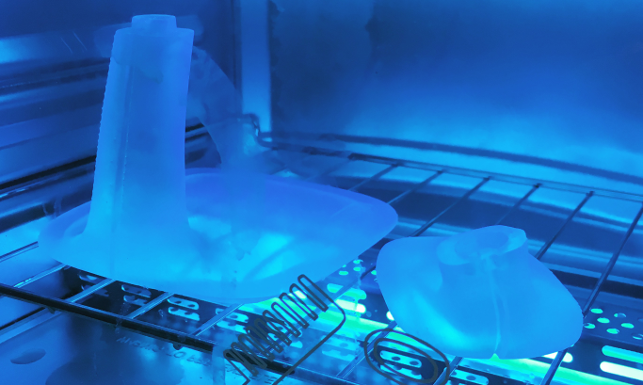
Our rather handy UV steriliser is perfect for post-build curing of parts
Part of this is protectionism: they want to maintain a healthy revenue stream from their ownbrand materials. But in fairness, there’s also an element of wanting to ensure that owners get a good output from the printer in which they’ve invested.
Each resin’s formulation requires different settings on each printer, since different mechanical properties and different colours require different light settings, peel timings and so on. It can get quite complex.
Some machines allow you to adapt the print configuration, while others don’t. And believe me, you can screw up a build tray in seconds if you pick your resins badly. That’s an expensive mistake to make.
It’s best to explore what each machine vendor offers and read the datasheets thoroughly. And if you don’t find something that immediately matches your need, spend a little more time researching before you forge ahead with pouring an unfamiliar resin into your rather costly machine.
Most professional vendors are now offering a range of materials that should suit your needs. Formlabs has a nice range of different colours and mechanical properties, while Autodesk just introduced a CYMK mix and match set to allow you to mix your own.
What’s on DEVELOP3D’s workbench radar now?
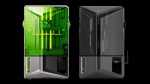
Formlabs Form 2
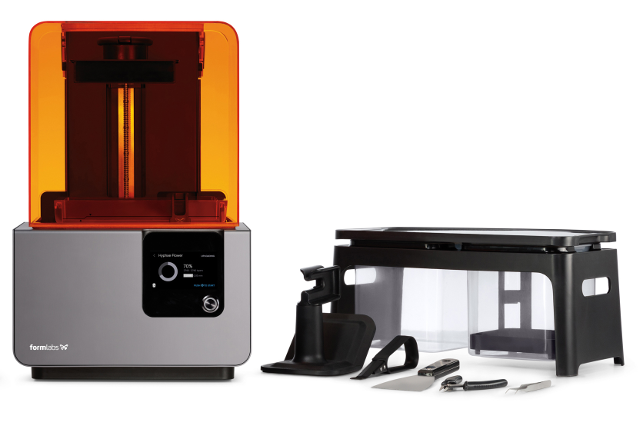
To find out more about the Form 2 click here, but the gist of our review is this: Formlabs has taken the lessons learned over the last models and built a next-generation machine that takes desktop SLA to the next level.
formlabs.com
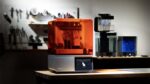
Autodesk Ember
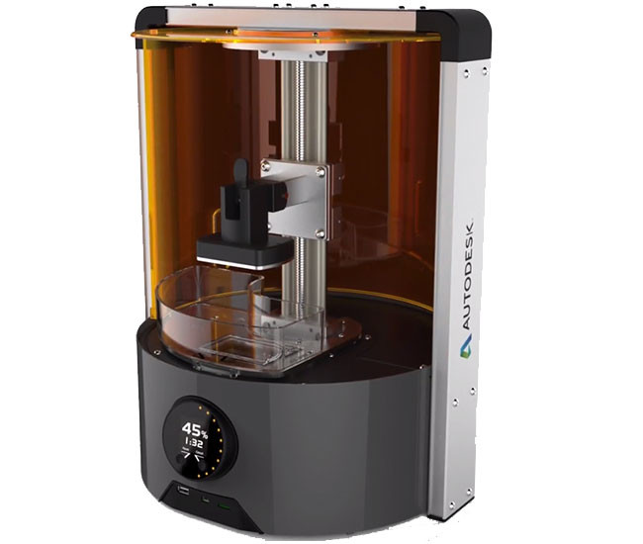
Autodesk acquired London-based start-up Invention Works two years ago and it became its launchpad into the 3D printing industry with the Ember. This machine is small, efficient and terrific at building detailed parts.
ember.autodesk.com
XYZ Printing Nobel
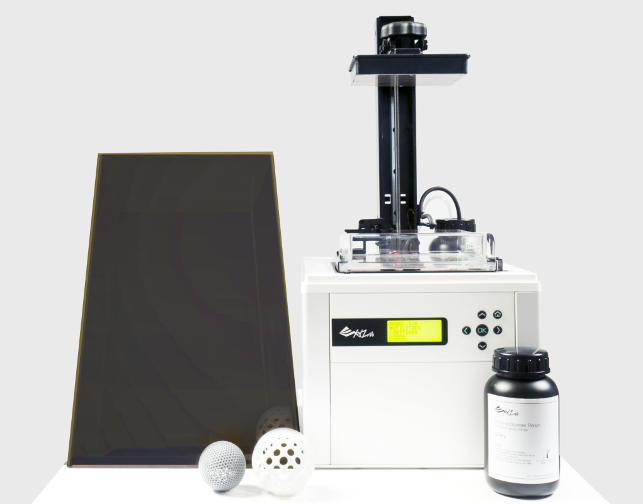
Backed by Chinese mega-manufacturer, Kinpo Group, XYZ Printing delivers very low-cost FDM printers and 3D scanners. The Nobel is its first foray into SLA and at just over £1,000, it’s cheap. We intend to find out if it can perform.
xyzprinting.com
Automated rinse and curing for SLA parts
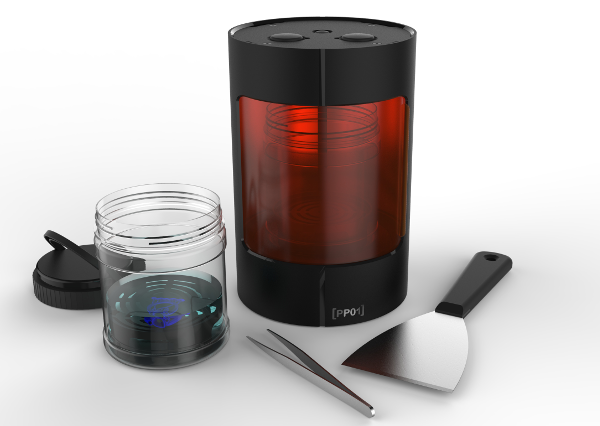
As we’ve discussed, rinsing and postcuring SLA models is fundamental to achieving not only the best surface finish, but also the best mechanical performance — and this can be achieved without breaking the budget on a professional-grade UV curing oven or parts washer.
But what if you’re prepared to shell out around £200 on a device that can perform both rinsing and curing? A pretty slick prospect, right?
UK-based product design consultancy, Product Resolutions, is preparing a new product that aims to deliver exactly this.
Its finishing station desktop post-processor for SLA models uses a whirlpool effect inside an internal container, to ensure that parts are thoroughly, but gently, cleaned.
Parts can then be post-cured while still in the IPA fluid. The Product Resolution team’s tests have shown that curing works best when parts are completely submerged in liquid, to avoid exposing them to oxygen during this process.
With this machine, parts can be rinsed for up to 10 minutes and then cured for up to an hour.
That said, timings for each process can be pre-set by the user and the unit will switch automatically between processes.
Parts can also be dry-cured in the chamber if preferred. The unit will ship with two treatment containers and accessories and should start shipping in mid-2016.
Product Resolutions has plenty of knowledge in the 3D printing arena, with some of its team having been instrumental in the development of Autodesk’s Ember 3D printer. For pre-release details, email: {encode=”info@productresolutions.com” title=”info@productresolutions.com”}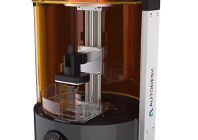
We look at how they work and what we’ve learnt from using them
Default